> For the complete documentation index, see [llms.txt](https://docs.parallels.com/landing/llms.txt). Markdown versions of documentation pages are available by appending `.md` to page URLs; this page is available as [Markdown](https://docs.parallels.com/landing/pd-ag/preparing-virtual-machines-for-deployment-and-securing-them/golden-images.md).
# Golden Images
This section of the Management Portal is where you go to designate the virtual machines that will be deployed across your organization. You can deploy multiple golden images.
{% hint style="info" %}
**Note**: To learn how to prepare a virtual machine for deployment, please refer to [this section of the guide](/landing/pd-ag/provisioning-and-activation-of-parallels-desktop/alternative-deployment-methods/alternative-mass-deployment-via-deployment-package/preparing-the-autodeploy-package/optional-adding-a-virtual-machine/creating-and-uploading-virtual-machine-images.md). The result should be a `.pvmp` file containing a virtual machine and a `.txt` file containing the SHA-256 checksum for it.
{% endhint %}
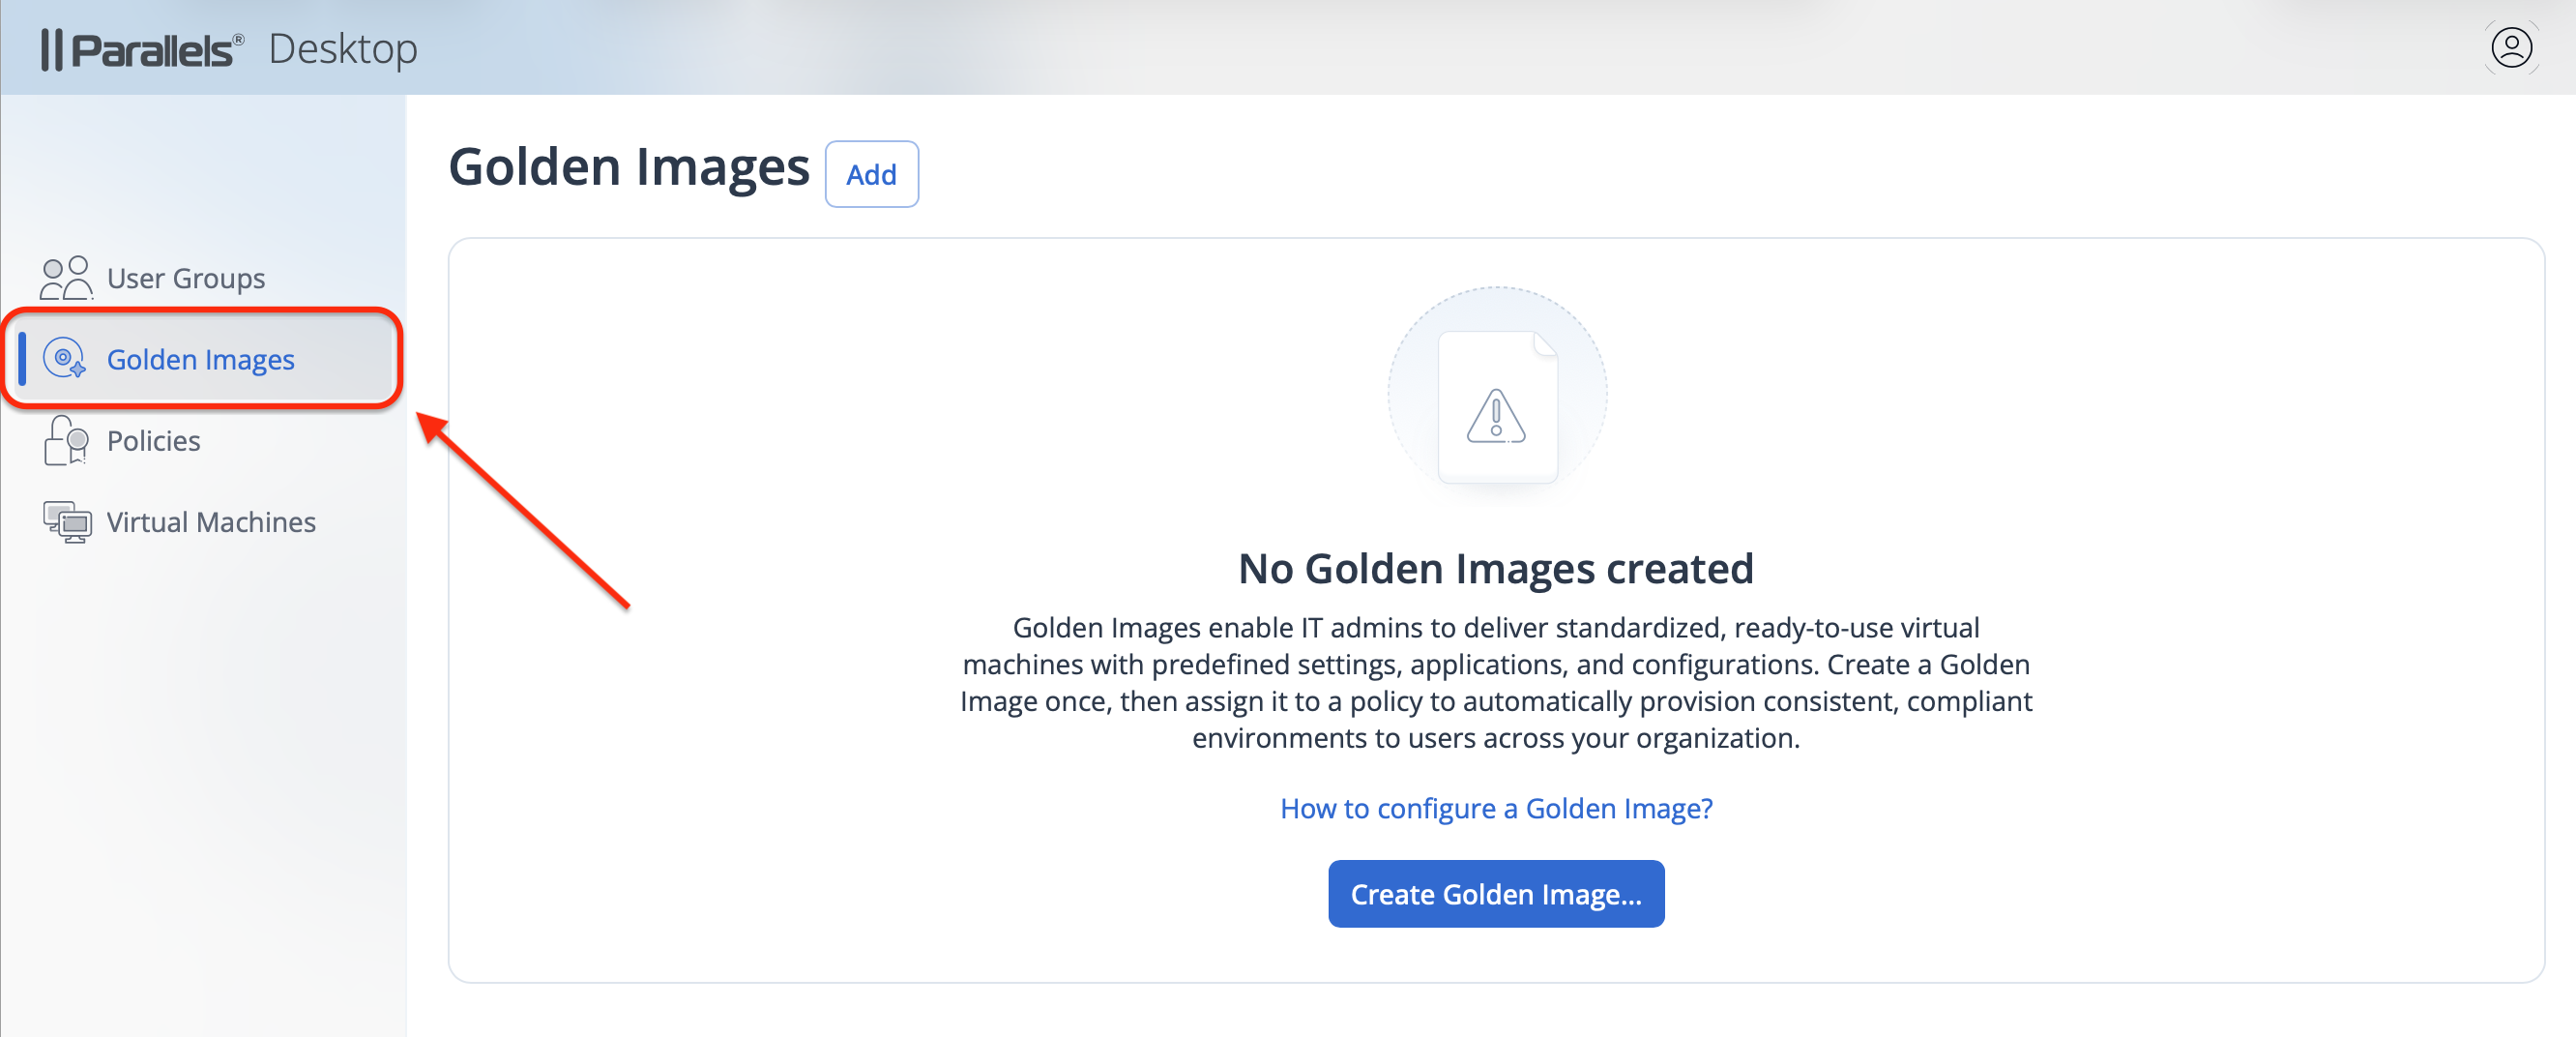
If you are configuring your Parallels Desktop Enterprise Edition setup for the first time, the Golden Images section in your Parallels Management Portal will look like this:
Use the **Create Golden Image** button and follow the instructions [below](#adding-a-virtual-machine-golden-image-for-deployment).
{% hint style="info" %}
**Note**: Prior to the February 2025 update, Parallels Desktop Enterprise Edition only allowed two virtual machine images per organization, one for Apple silicon Macs and one for Intel Macs.
The update results in those two images listed as one Golden Image, suitable for two architectures, with the option to add more.
{% endhint %}
Each golden image can be assigned to one or several [groups of users](/landing/pd-ag/getting-started/dividing-users-into-groups/dividing-users-into-groups-with-sublicenses.md). Starting from the September 2025 update, Golden Images are assigned to user groups as part of [policies](/landing/pd-ag/preparing-virtual-machines-for-deployment-and-securing-them/policies.md#golden-image).
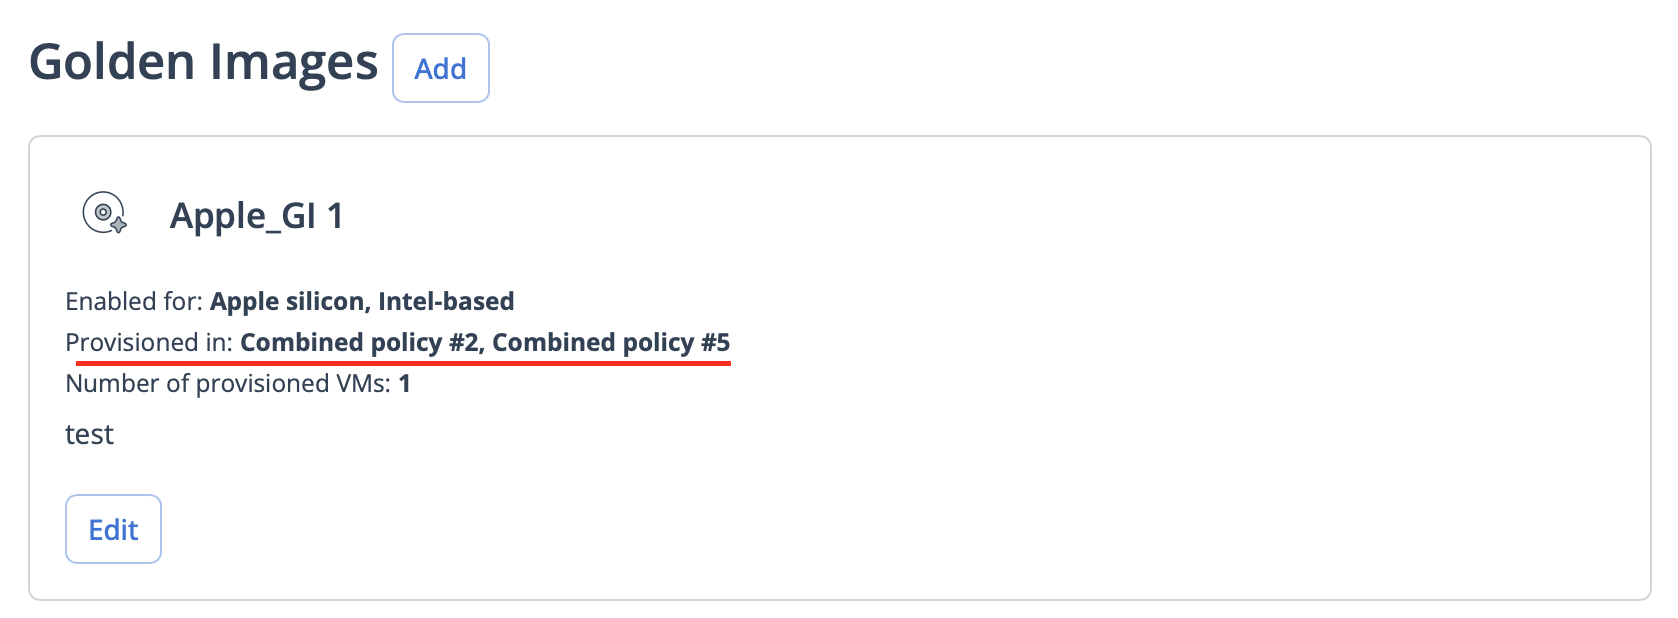
Each Golden Image card contains the list of policies in which this image is provisioned and the number of virtual machines provisioned with it:
{% hint style="info" %}
**Note**: Currently, each group of users can have only one golden image assigned to it (for up to two processor architectures).\
\
If the image is based on [Declarative Deployment](#declarative-deployment-windows-vms), where you don't need to add two different images for two processor architectures, the line **Enabled for** is not shown.
{% endhint %}
Starting from February 2026, the number of provisioned VMs on a Golden Image card is an active link. Clicking it opens the [virtual machine monitoring page](/landing/pd-ag/managing-and-monitoring-virtual-machines/virtual-machines.md), with the filters set to display all virtual machines provisioned with this specific Golden Image.
### Adding a virtual machine golden image for deployment
First, fill out the following fields when adding a golden image record:
1. **Name**. Give the virtual machine a descriptive, easy-to-read name, e.g., `{company_name} Windows 11 Pro for Arm`. This name will be shown to your users.
2. **\[OPTIONAL] Description**. Feel free to add a more detailed description that helps to understand the specific purpose or setup of each image, e.g., `This image is for the accountants to run Excel for Windows`. This description will be shown to your users.
With the December 2025 update, Parallels Management Portal allows two distinct deployment methods: the traditional one that involves preparing a fully-fledged virtual machine golden image and uploading it to a cloud location, and the so-called declarative method that is based on the latest standard Enterprise image from Microsoft or a custom ISO file.
#### Declarative deployment (Windows VMs only)
As mentioned above, declarative deployment eliminates the need to store, update, and distribute a multi-gigabyte virtual machine image by relying on the latest Enterprise images from Microsoft. It also drastically simplifies Intune enrollment.
{% hint style="info" %}
**Note**: Declarative deployment requires Parallels Desktop for Mac version 26.2 or newer.
{% endhint %}
In this method, your users still receive appropriately customized Windows virtual machines because the Out-of-the-Box Experience (OOBE) is completed based on the host Mac's existing user information or the contents of your [provisioning package](/landing/pd-ag/preparing-virtual-machines-for-deployment-and-securing-them/enrolling-virtual-machines-in-azure-active-directory.md). The package can also be used to enroll the machines in Intune.
To configure declarative deployment:
{% hint style="info" %}
**Note**: If your Golden Image was created prior to the June 2026 update, read [this section](https://kb.parallels.com/en/131085#section4) of the respective KB article to understand which new installation options match your old configuration.
{% endhint %}
1. Switch the **Deployment method** parameter to **Declarative**.
2. Under **Installation source**, choose one of the following:
* **Windows Enterprise** for the latest Enterprise image directly from Microsoft.
* **Custom ISO** for your own custom image, for which you'll have to provide two distinctive DIRECT URLs with checksums for Intel and Apple silicon Macs or use the file picker to select an image from your company's [Azure Storage](/landing/pd-ag/preparing-virtual-machines-for-deployment-and-securing-them/golden-images/distributing-golden-images-from-your-companys-azure-storage.md) (with more integrations to come). To find the checksum for an ISO file, open macOS Terminal and use the `shasum -a 256 {ISO_file_path}` command to obtain it.
Note: Once you have selected one of the available sources and saved the Golden Image configuration, you WILL NOT be able to change the source later.
3. Under **Installation options**, you may choose the order, in which various Windows configuration steps happen. You can choose one of the following options:
* **Don't configure unattended installation**. This is the option for those who have already included an answer file and all required software in their Golden Image.
Attention: If your custom ISO already contains any kind of unattended.xml answer file, activating one of the other three options will lead to a conflict, and the user will have to go through the OOBE experience manually.
* **Set up language and keyboard only**. This option provides the user with the suitable keyboard/language combination to log in using their work or school account and apply the [provisioning package](/landing/pd-ag/preparing-virtual-machines-for-deployment-and-securing-them/enrolling-virtual-machines-in-azure-active-directory.md) afterwards.
Attention: If your Microsoft Intune policies prevent Windows devices classified as Personal from enrolling, this option may lead to error 80180014.
* **Automatic setup with local account**. This option applies the package after creating a technical local account with administrative rights.
* **Automatic setup with provisioning package applied before sign-in**. This option configures Windows and enrolls it in Intune before the user is allowed to sign in with their work or school account. This procedure usually takes 5 to 10 minutes longer due to the enrollment process.
Note: The third and fourth options may fail if the provisioning package can't be applied — for example, due to network issues reaching Microsoft services or an expired token. We recommend that you test the provisioning package manually before use.
4. Under **Provisioning package**, you can add a provisioning package to automatically enroll Windows virtual machines into your company's Intune setup. To create such a package, follow the instructions outlined in [this chapter](/landing/pd-ag/preparing-virtual-machines-for-deployment-and-securing-them/enrolling-virtual-machines-in-azure-active-directory.md).\
\
You can add the resulting `.ppkg` file by uploading it (if up to 100KB in size) or designating a DIRECT URL if, e.g., its size exceeds 100KB, or you wish to set up an automated job to keep the profile dynamically updated with fresh tokens, current network access information, or other changing parameters.\
\
As a result, the package will run and apply the provisioned settings during the virtual machine's first launch (OOBE), configuring the OS and enrolling it in management (e.g., Intune) without user intervention, except for logging into the corporate account.
Attention: The maximum validity period for the bulk token that is obtained when creating the provisioning package is 180 days. Plan accordingly to keep the provisioning package up to date.
5. In the bottom-right corner, click **Add** to finish creating the Golden Image.
#### Standard image-based deployment (any supported OS)
This method relies on the [traditional way of preparing a virtual machine](/landing/pd-ag/preparing-virtual-machines-for-deployment-and-securing-them/golden-images/creating-and-uploading-virtual-machine-images.md) image file and distributing it from a network destination.
To configure VM image deployment:
1. Switch the **Deployment method** parameter to **VM image**.
2. **Enable for** {architecture}. You may provide golden images for one specific processor type or both.
Note: You may choose not to add one of the images if your organization only uses Macs with one processor architecture.
3. **Download URL for {architecture}**. Starting from June 2026, there are two options here:
* Use the Browse Storage picker to select a Golden Image distributed from your connected Azure Storage (with more integrations to come). To set up the integration, follow directions outlined [here](/landing/pd-ag/preparing-virtual-machines-for-deployment-and-securing-them/golden-images/distributing-golden-images-from-your-companys-azure-storage.md).
* Alternatively, upload your virtual machine `.pvmp` file to a server location that supports direct links and is accessible to all the machines where you plan on deploying it, and share the file. Optionally, you may use a URL shortener. Apple silicon Macs and Intel Macs will require two separate image files. Make sure the files are accessible without authentication. Before proceeding, [verify the link works](/landing/pd-ag/provisioning-and-activation-of-parallels-desktop/alternative-deployment-methods/alternative-mass-deployment-via-deployment-package/preparing-the-autodeploy-package/optional-adding-a-virtual-machine/creating-and-uploading-virtual-machine-images.md#verifying-the-link-for-the-image).
Note: A local network file share may be a suitable solution, provided the remote machines can connect via VPN.
4. **Checksum (SHA-256)**. When packaging a virtual machine (right-click on it in the Control Center and choose Prepare for Transfer), the resulting `.pvmp` file is accompanied by a `.txt` file containing a SHA-256 checksum for it. Copy and paste the contents of that file in this field.
Note: If you have the .pvmp virtual machine file but not the .txt file with its checksum, you can quickly find it by following these steps:
Right-click on the .pvmp file while holding down the Option key and choose Copy {file_name} as Pathname.
Open macOS Terminal.
Type in shasum -a 256 {file_path}, pasting the copied pathname from Step a, and hit Enter.
The output will look similar to the following: 63a90c3c38cc8c354221da339069fc1292b10bf7c00ed8149787b0e6079d706b /Users/parallels/Parallels/Windows11Pro.pvmp.
5. Click **Add** to finish creating the Golden Image.
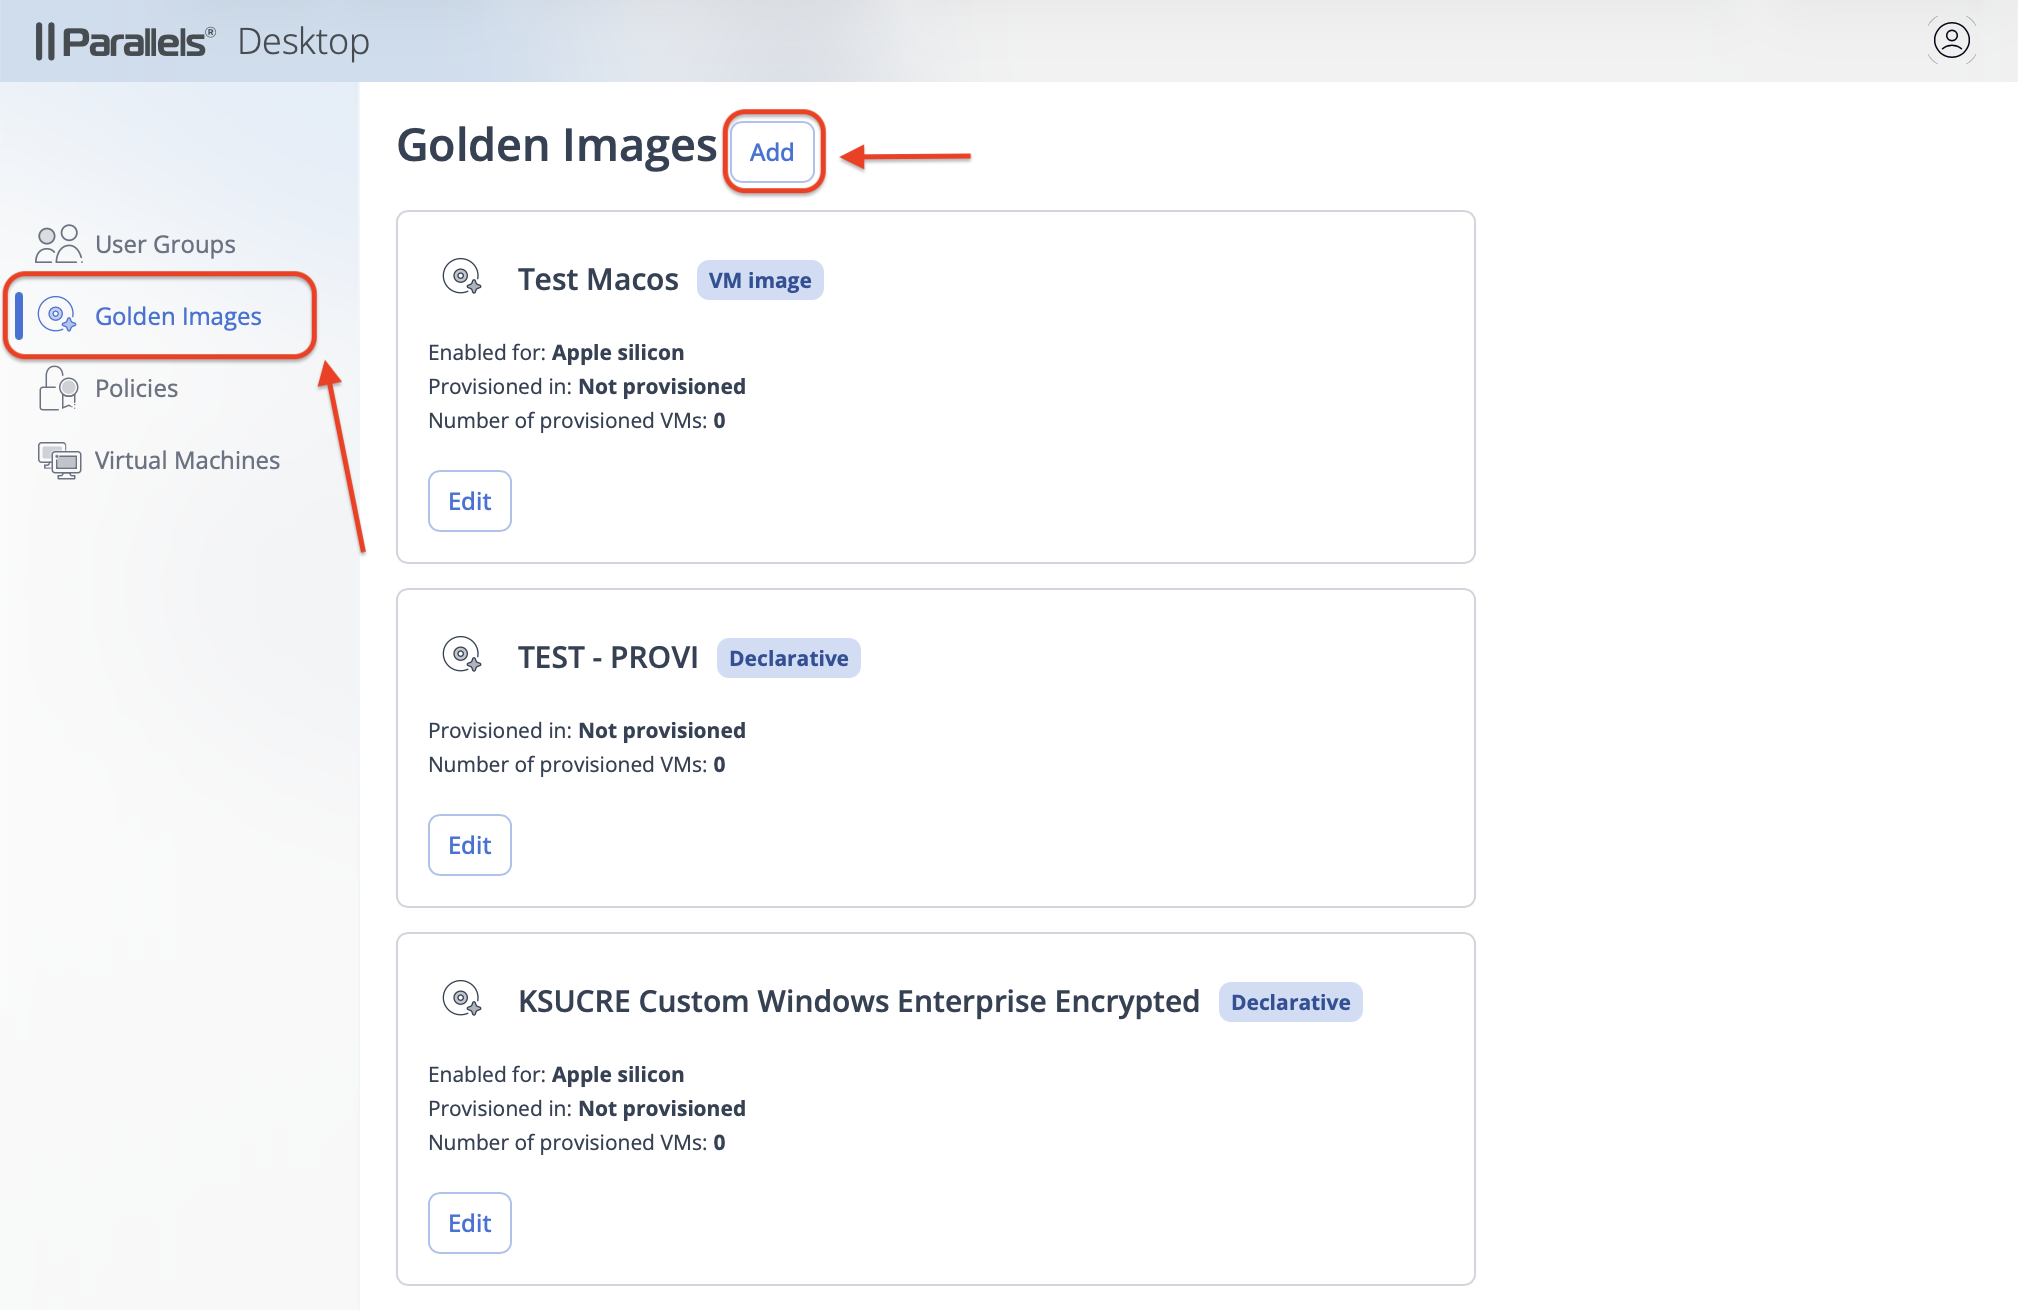
Starting from February 2026, each Golden Image card on the main images page is clearly marked as either created using the declarative deployment method, or built using the traditional image preparation method.
### Editing or removing a virtual machine golden image
To change the settings for a golden image, click **Edit** on the golden image's card and change the settings as described above.
{% hint style="info" %}
**Note**: Changing the golden image type (i.e., from Declarative to VM image) or the installation source (i.e., from **Windows Enterprise** to **Custom ISO**) in an existing golden image is not possible.
{% endhint %}
Mind that changing the link will not update the virtual machines already provisioned from that Golden Image, and both old and subsequently provisioned new VMs will count as provisioned from that image.
To remove a golden image, select the one you want to delete, click **Edit** on the golden image's card, click **Delete Golden Image** in the bottom left corner of the window, and confirm the deletion.
{% hint style="danger" %}
**Warning**: Deleting a golden image is irreversible. If you have deleted a golden image by mistake, you will have to create it again. If the groups that were assigned that image, were also [restricted to provisioned virtual machines only](/landing/pd-ag/preparing-virtual-machines-for-deployment-and-securing-them/policies.md), the users in those groups wouldn't be able to install new virtual machines until assigned another golden image.
{% endhint %}
If you attempt to delete a Golden Image that has virtual machines provisioned from it, you will get a warning message prompting you to remove those virtual machines first. Without removing them, you won't be able to delete the Golden Image as otherwise, you would lose administrative control over them.\
\
If you don't want users to install new virtual machines based on the image, it is easier to remove the image from the policy or policies where it's provisioned.
---
# Agent Instructions
This documentation is published with GitBook. GitBook is the documentation platform designed so that both humans and AI agents can read, navigate, and reason over technical content effectively. Learn more at gitbook.com.
## Querying This Documentation
If you need additional information that is not directly available in this page, you can query the documentation by asking a question.
Perform an HTTP GET request on the following URL with the `ask` and `goal` query parameters:
```
GET https://docs.parallels.com/landing/pd-ag/preparing-virtual-machines-for-deployment-and-securing-them/golden-images.md?ask=&goal=
```
`ask` is the immediate question: it should be specific, self-contained, and written in natural language.
`goal` is what the user is ultimately trying to achieve, the reason they need the answer. Sharing it helps GitBook give you a better, more relevant answer. A goal is most helpful when it describes the outcome the user wants rather than restating the question. For example, with `ask=how do I create an API token`, a goal like `automate deployments from our CI pipeline` lets GitBook tailor the answer to that use case.
The response will contain a direct answer to the question and relevant excerpts and sources from the documentation.
Use this mechanism when the answer is not explicitly present in the current page, you need clarification or additional context, or you want to retrieve related documentation sections.