> For the complete documentation index, see [llms.txt](https://docs.parallels.com/landing/llms.txt). Markdown versions of documentation pages are available by appending `.md` to page URLs; this page is available as [Markdown](https://docs.parallels.com/landing/pdfm-ug/parallels-desktop-for-mac-27-users-guide/parallels-desktop-preferences-and-virtual-machine-settings/adding-and-removing-devices/initializing-a-newly-added-hard-drive.md).
# Initializing a Newly Added Hard Drive
After you add a new blank virtual hard drive to the virtual machine configuration, it remains invisible to the operating system unless you initialize it.
### Initializing a New Virtual Hard Drive in Windows
To initialize a new hard drive in Windows 11, you will need to do the following:
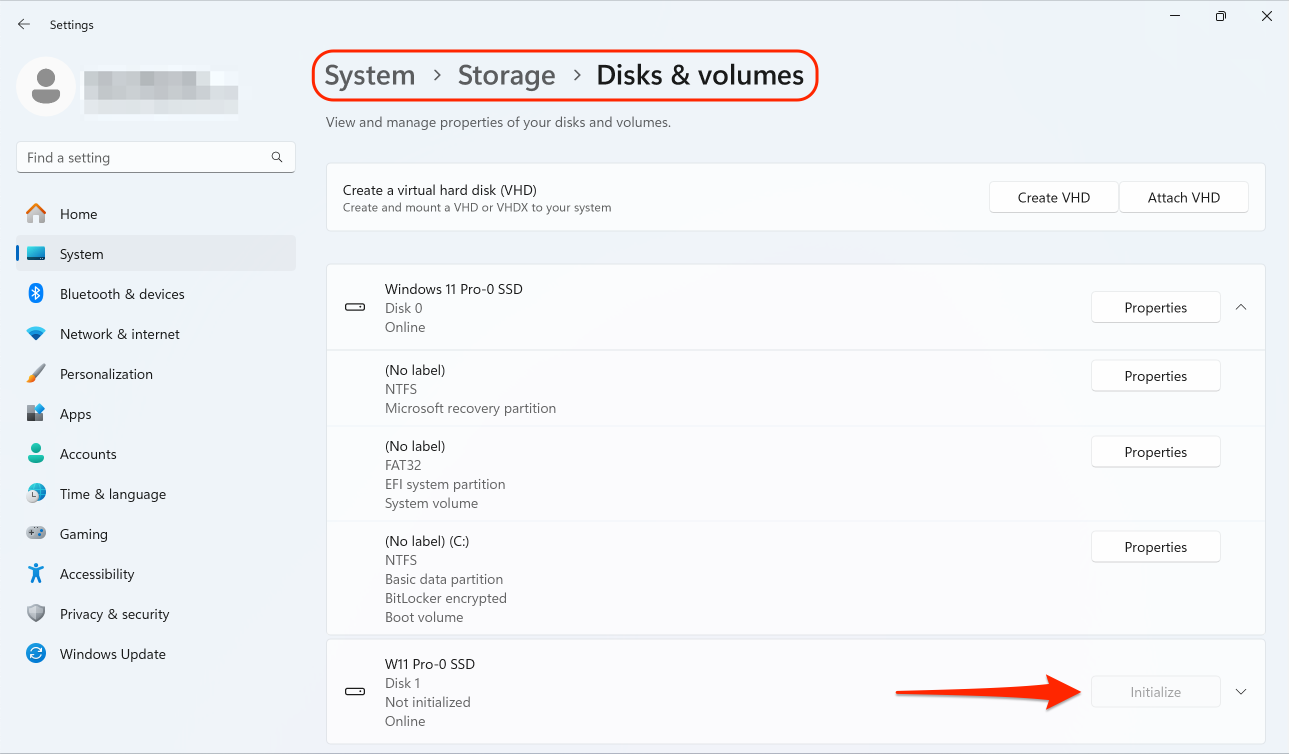
1. Open the start menu by clicking on the Windows logo and choose **Settings**.
2. On the left, choose **System** and scroll to the **Storage** menu item.
3. Under **Storage management**, expand the **Advanced storage settings** sub-menu and select **Disks & volumes**.
4. Find the new virtual hard drive from the list and click **Initialize**.
In older versions of Windows, you can initialize a new drive by locating the Disk Management utility in the Control Panel, launching the Initialize and Convert Disk wizard, and creating a new volume on that disk afterwards.
### Initializing a New Virtual Hard Drive in Linux
Initializing a new virtual hard disk in a Linux guest OS involves allocating the virtual hard disk space to a new volume and mounting this volume in the guest OS.
{% hint style="info" %}
**Note**: This section describes the process for Ubuntu Linux. If you are using a different distributive, please refer to its documentation.
{% endhint %}
Once you have connected a new external disk or added a virtual drive to the Linux virtual machine, do the following:
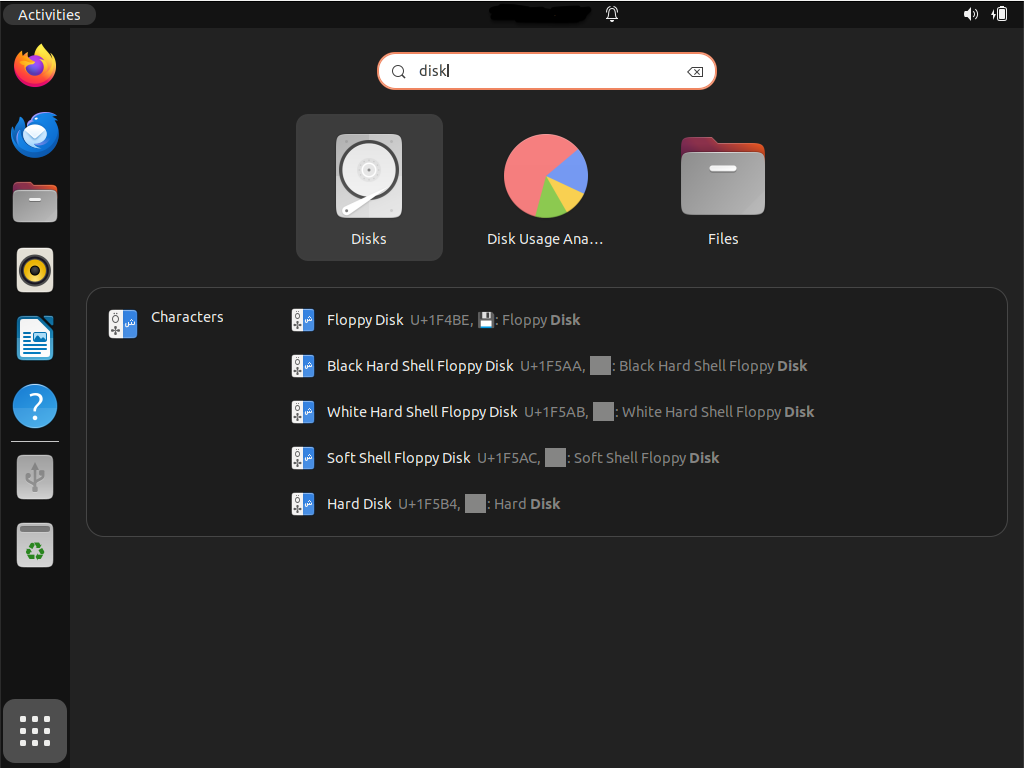
1. Launch the **Disks** utility by clicking on the **Show Applications** icon in the bottom left corner and typing "disks" into the search bar;\
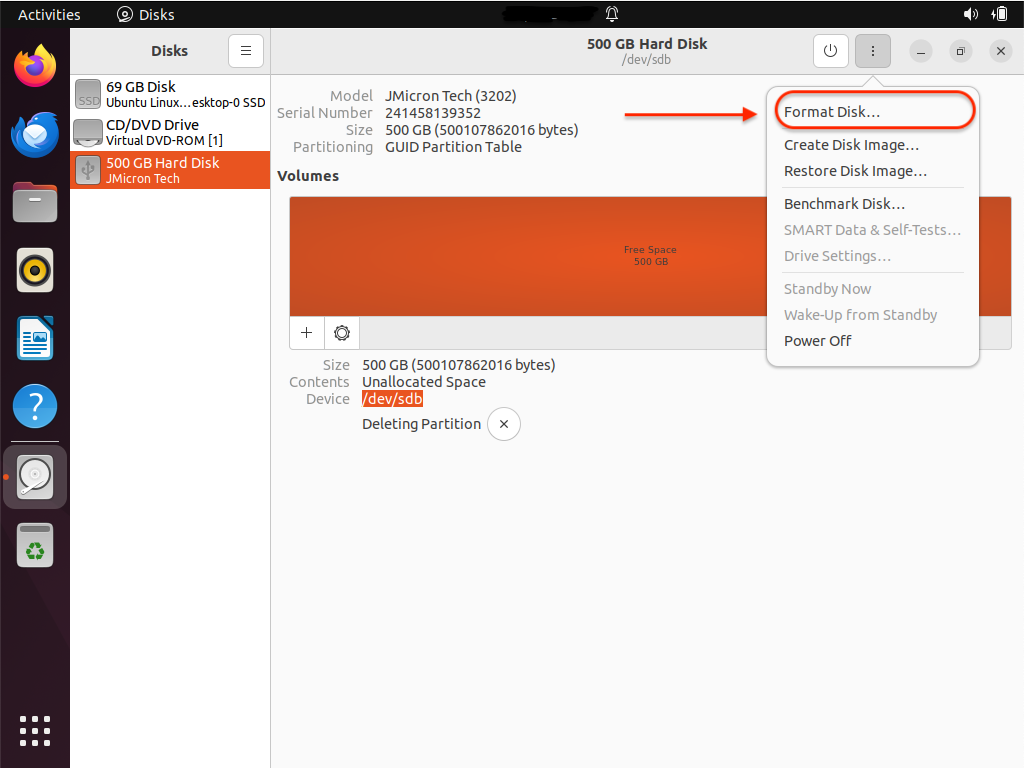
2. In the **Disks** utility window, select the newly added disk from the left sidebar;
3. In the top right corner of the **Disks** utility window, select the menu marked with three vertically aligned dots and choose the **Format Disk** option;\
4. Leave the default options on and click **Format**;
5. Confirm your choice by clicking the red **Format** button and typing in your password if prompted.
Now that you have initialized the disk, partition it by doing the following:
1. Under the volume map, click the (+) button;
2. In the revealed dialog, choose the size of the partition and click **Next**;
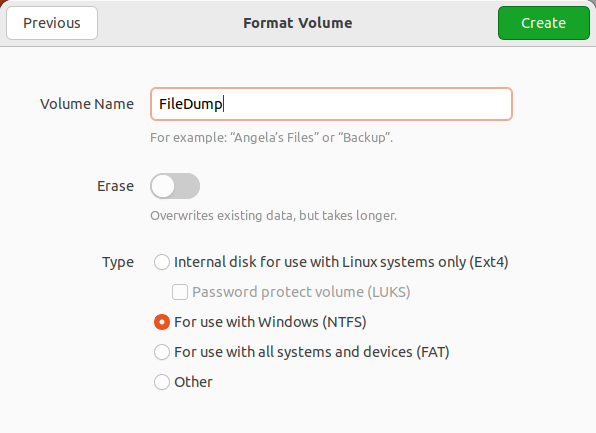
3. In the next dialog, type in the volume's name, choose one of the suggested file systems and click **Create**.\
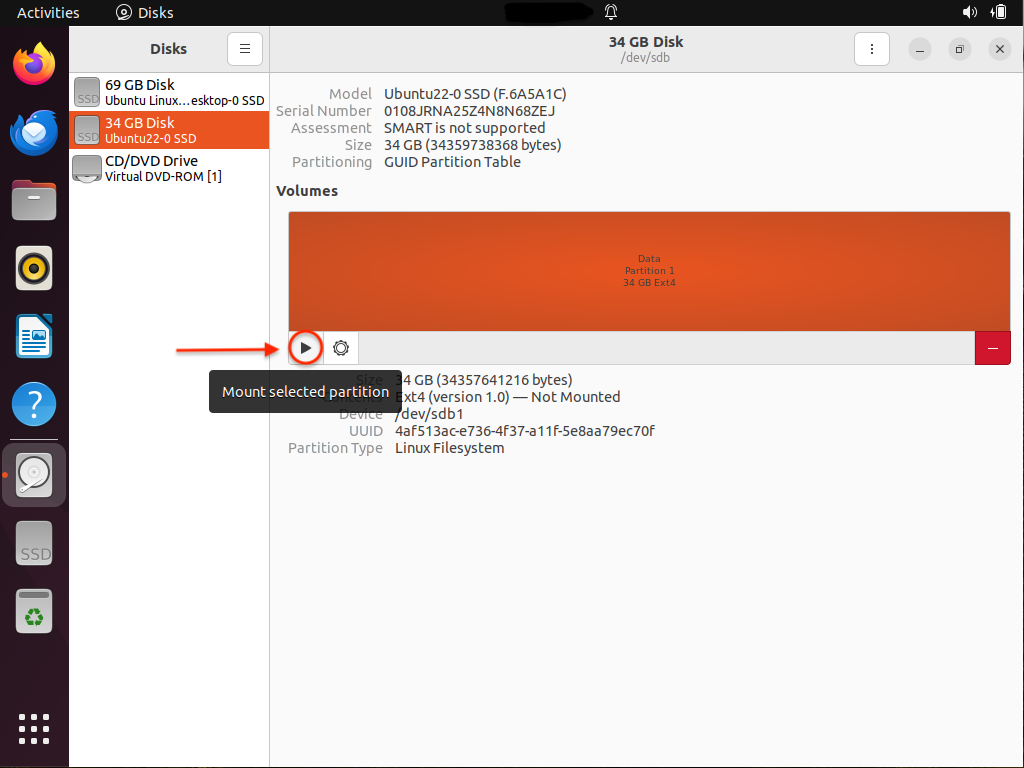
Once the operation completes, click on the triangular Play button to mount the new partition and be able to access it from your Linux machine.
---
# Agent Instructions
This documentation is published with GitBook. GitBook is the documentation platform designed so that both humans and AI agents can read, navigate, and reason over technical content effectively. Learn more at gitbook.com.
## Querying This Documentation
If you need additional information that is not directly available in this page, you can query the documentation dynamically by asking a question.
Perform an HTTP GET request on the current page URL with the `ask` query parameter, and the optional `goal` query parameter:
```
GET https://docs.parallels.com/landing/pdfm-ug/parallels-desktop-for-mac-27-users-guide/parallels-desktop-preferences-and-virtual-machine-settings/adding-and-removing-devices/initializing-a-newly-added-hard-drive.md?ask=&goal=
```
`ask` is the immediate question: it should be specific, self-contained, and written in natural language.
`goal` is optional and describes the broader end goal you are ultimately trying to accomplish on behalf of the user. GitBook uses it to tailor the answer towards what is most useful for that goal.
The response will contain a direct answer to the question and relevant excerpts and sources from the documentation.
Use this mechanism when the answer is not explicitly present in the current page, you need clarification or additional context, or you want to retrieve related documentation sections.