> For the complete documentation index, see [llms.txt](https://docs.parallels.com/landing/llms.txt). Markdown versions of documentation pages are available by appending `.md` to page URLs; this page is available as [Markdown](https://docs.parallels.com/landing/pdfm-ug/v20-zh-tw/parallels-desktop-for-mac-20-shi-yong-zhi-nan/jin-jie-zhu-ti/shi-yong-xu-ni-ji-qi/zai-apple-silicon-mac-shang-hui-ru-he-zhi-xing-x8664-intel-xu-ni-ji-qi/zai-apple-silicon-mac-shang-qi-dong-bing-zhi-xing-x8664-xu-ni-ji-qi.md).
# 在 Apple Silicon Mac 上啟動並執行 x86\_64 虛擬機器
若要在 Apple Silicon Mac 上匯入並啟動 x86\_64 虛擬機器,請遵循下列步驟:
{% hint style="danger" %}
**警告** : 在您的 Apple Silicon Mac 上使用新匯入的 x86\_64 機器之前,請檢查 [此清單](/landing/pdfm-ug/v20-zh-tw/parallels-desktop-for-mac-20-shi-yong-zhi-nan/jin-jie-zhu-ti/shi-yong-xu-ni-ji-qi/zai-apple-silicon-mac-shang-hui-ru-he-zhi-xing-x8664-intel-xu-ni-ji-qi.md#zai-apple-silicon-mac-shang-zhi-xing-x8664-xu-ni-ji-shi-de-yu-qi-qing-kuang) 的預期事項。
{% endhint %}
1. 在您的 Intel Mac 上,選擇執行與我們的模擬器相容的作業系統的虛擬機器,如此[清單](/landing/pdfm-ug/v20-zh-tw/parallels-desktop-for-mac-20-shi-yong-zhi-nan/jin-jie-zhu-ti/shi-yong-xu-ni-ji-qi/zai-apple-silicon-mac-shang-hui-ru-he-zhi-xing-x8664-intel-xu-ni-ji-qi.md#nin-ke-yi-qi-dai-zai-apple-silicon-mac-shang-tui-chu-na-xie-x8664-zuo-ye-xi-tong)所指定。
2. 正確關閉選取的虛擬機。傳輸未適當關閉的虛擬機器可能會導致資料遺失。
3. 大部分在 Intel Mac 上建立的 Linux 虛擬機器都會有一個模擬傳統 BIOS 的虛擬開機載入程式,這與我們的模擬功能不相容。如果您想傳輸 Linux x86\_64 機器,您必須先在 Intel Mac 上建立新的 Linux x86\_64 機器,步驟如下:
1. 下載所需 Linux 發行版的 x86\_64 ISO 檔案。
2. 在 Intel Mac 上啟動 Parallels Desktop,然後選取**檔案**>**新增...**。
3. 按一下**從映像檔安裝 Windows、Linux 或 macOS**,選擇下載的 ISO 檔案,然後按一下**繼續** 。或者,從**免費系統**部分選擇其中一個建議選項。
4. 按一下**安裝前的自訂設定**,然後選擇**繼續** 。
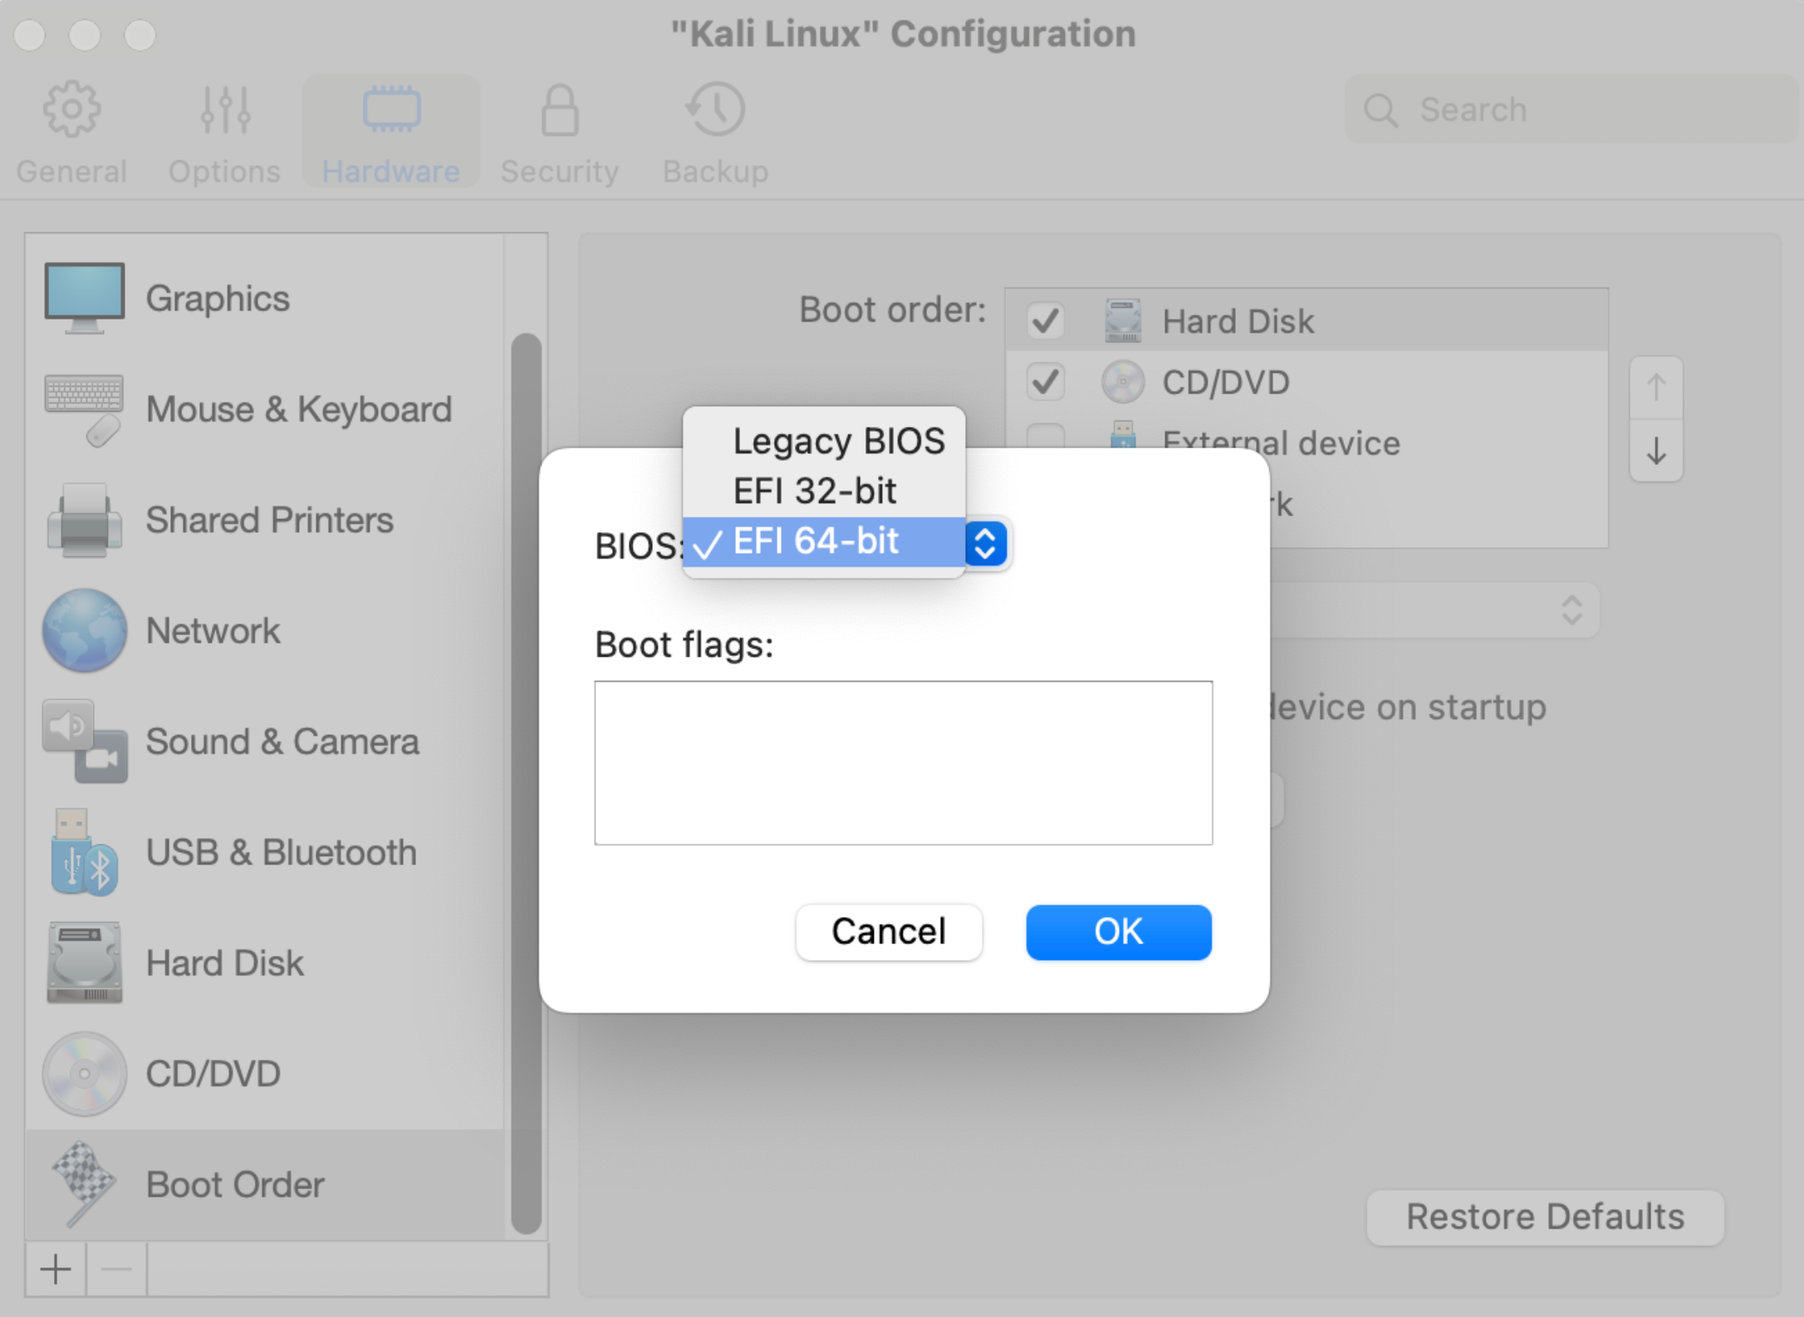
5. 設定視窗開啟後,切換到**硬體**標籤,然後從左側面板選擇**啟動順序**項目。按一下**進階**,然後選擇`64 位元 EFI`選項。
按一下**確認** 。
6. 關閉視窗,繼續安裝。
4. 在 Intel Mac 上,打開 Parallels Desktop 控制中心,選擇所需的虛擬機,按滑鼠右鍵,然後按**在 Finder 中顯示** 。這會顯示 x86\_64 虛擬機器的`.pvm`檔。
5. 將 `.pvm` 檔案傳輸至您的目標 Apple Silicon Mac,例如使用外接式 USB 磁碟機。
6. 複製所需的 `.pvm` 檔案到 Apple Silicon Mac 的 [Parallels Desktop 虛擬機器資料夾](/landing/pdfm-ug/v20-zh-tw/parallels-desktop-for-mac-20-shi-yong-zhi-nan/jin-jie-zhu-ti/shi-yong-xu-ni-ji-qi/guan-wu-xu-ni-ji-qi/she-ding-chu-cun-xin-xu-ni-ji-qi-de-wei-zhi.md),按一下滑鼠右鍵,然後選擇**打開方式**>**Parallels Desktop** 。
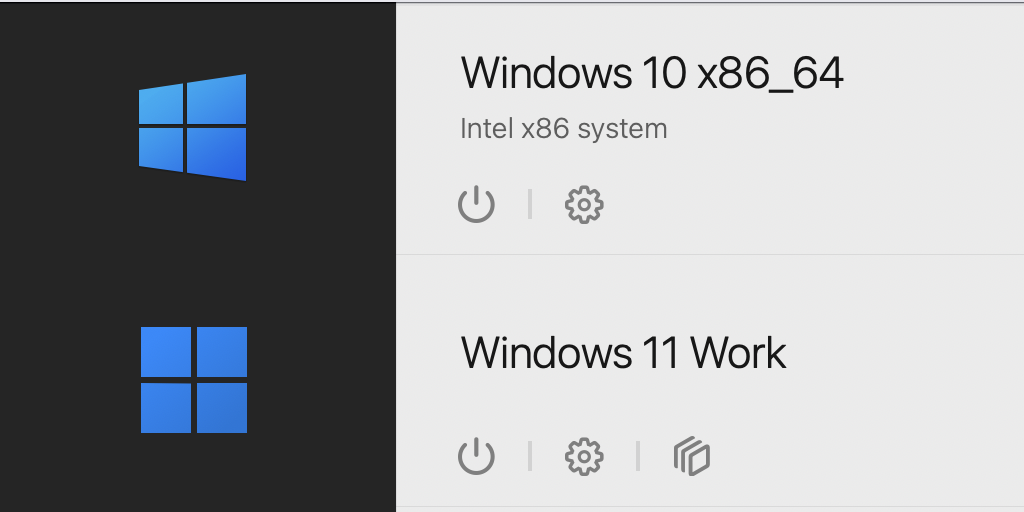
7. 匯入的虛擬機器最初會在控制中心指定為\*\* 不相容\*\* 。在其上按一下滑鼠右鍵,然後選擇**開始使用模擬器**選項。
之後,虛擬機器會被指定為**Intel x86 系統** 。
8. 在您的 Apple Silicon Mac 上使用新匯入的 x86\_64 機器之前,請檢查 [此清單](/landing/pdfm-ug/v20-zh-tw/parallels-desktop-for-mac-20-shi-yong-zhi-nan/jin-jie-zhu-ti/shi-yong-xu-ni-ji-qi/zai-apple-silicon-mac-shang-hui-ru-he-zhi-xing-x8664-intel-xu-ni-ji-qi.md#zai-apple-silicon-mac-shang-zhi-xing-x8664-xu-ni-ji-shi-de-yu-qi-qing-kuang) 的預期事項。
如需最新的相容性更新和疑難排解資訊,請參閱此 [KB 文章](https://kb.parallels.com/130217)。
即使您手邊沒有 Intel Mac,您仍然可以在 Apple Silicon Mac 上建立並執行 x86\_64 虛擬機器,儘管有一些限制。請閱讀 [本分章](https://github.com/Parallels-Corp/DI-OPS-pd-docs/blob/master/pdfm/20/pdfm-20-ug-zh_TW/parallels-desktop-for-mac-20-shi-yong-zhi-nan/jin-jie-zhu-ti/shi-yong-xu-ni-ji-qi/zai-apple-silicon-mac-shang-hui-ru-he-zhi-xing-x8664-intel-xu-ni-ji-qi/creating-a-new-x86_64-intel-virtual-machine-on-an-apple-silicon-mac.md)[ ](/landing/pdfm-ug/v20-zh-tw/parallels-desktop-for-mac-20-shi-yong-zhi-nan/jin-jie-zhu-ti/shi-yong-xu-ni-ji-qi/zai-apple-silicon-mac-shang-hui-ru-he-zhi-xing-x8664-intel-xu-ni-ji-qi/zai-apple-silicon-mac-shang-jian-li-xin-de-x8664-intel-xu-ni-ji-qi.md)以獲得更多詳細資訊。
---
# Agent Instructions
This documentation is published with GitBook. GitBook is the documentation platform designed so that both humans and AI agents can read, navigate, and reason over technical content effectively. Learn more at gitbook.com.
## Querying This Documentation
If you need additional information that is not directly available in this page, you can query the documentation by asking a question.
Perform an HTTP GET request on the following URL with the `ask` and `goal` query parameters:
```
GET https://docs.parallels.com/landing/pdfm-ug/v20-zh-tw/parallels-desktop-for-mac-20-shi-yong-zhi-nan/jin-jie-zhu-ti/shi-yong-xu-ni-ji-qi/zai-apple-silicon-mac-shang-hui-ru-he-zhi-xing-x8664-intel-xu-ni-ji-qi/zai-apple-silicon-mac-shang-qi-dong-bing-zhi-xing-x8664-xu-ni-ji-qi.md?ask=&goal=
```
`ask` is the immediate question: it should be specific, self-contained, and written in natural language.
`goal` is what the user is ultimately trying to achieve, the reason they need the answer. Sharing it helps GitBook give you a better, more relevant answer. A goal is most helpful when it describes the outcome the user wants rather than restating the question. For example, with `ask=how do I create an API token`, a goal like `automate deployments from our CI pipeline` lets GitBook tailor the answer to that use case.
The response will contain a direct answer to the question and relevant excerpts and sources from the documentation.
Use this mechanism when the answer is not explicitly present in the current page, you need clarification or additional context, or you want to retrieve related documentation sections.