> For the complete documentation index, see [llms.txt](https://docs.parallels.com/landing/llms.txt). Markdown versions of documentation pages are available by appending `.md` to page URLs; this page is available as [Markdown](https://docs.parallels.com/landing/pdfm-ug/v27-ja-jp/parallels-desktop-for-mac-27-yzzugaido/parallels-desktop-tomashin/debaisunoto/shikusaretadisukuno.md).
# 新しく追加されたディスクの初期化
新しいブランクの仮想ハードディスクを仮想マシン構成に追加しても、初期化するまでは仮想マシンにインストールされている OS には表示されません。
### Windows **11 での新しい仮想ハードディスクの初期化**
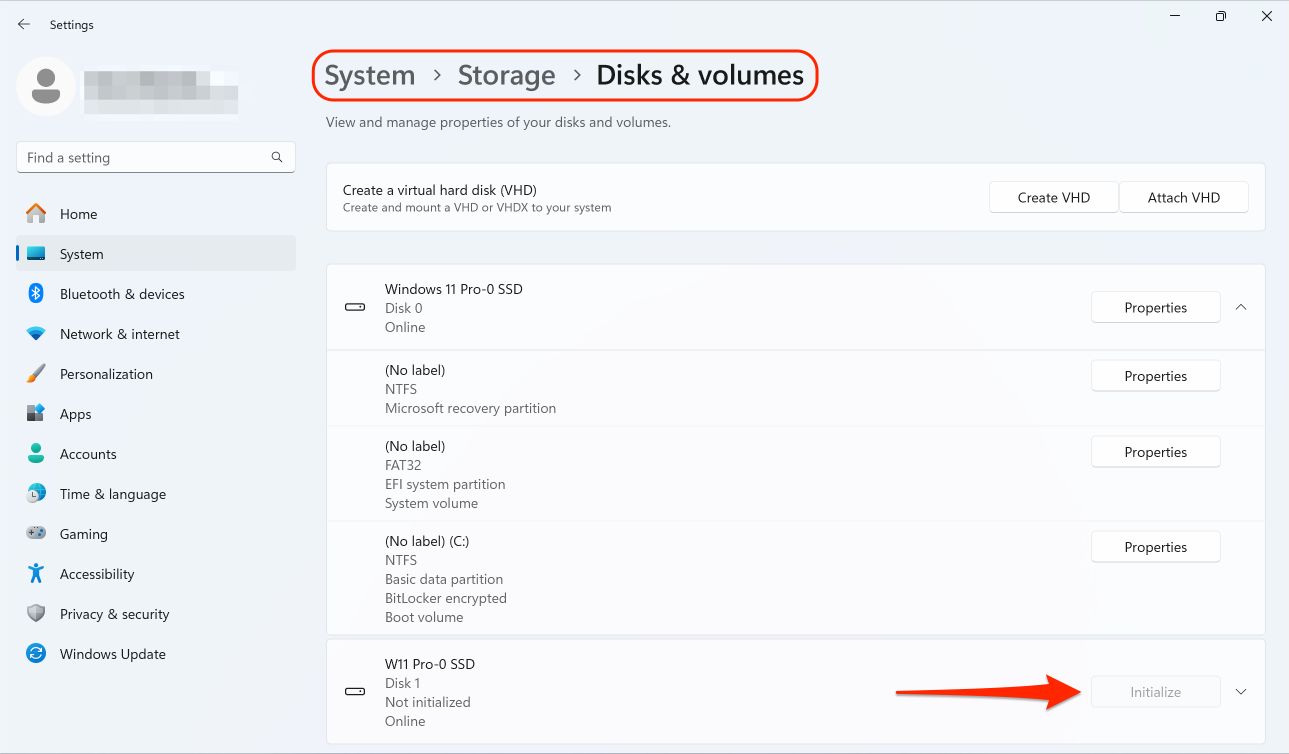
Windows11 で新しいハードディスクドライブを初期化するには、以下の手順を実行します。
1. Windows ロゴをクリックしてスタートメニューを開き、**\[設定]** を選択します。
2. 左側で、**\[システム]** を選択し、**\[ストレージ]** メニュー項目までスクロールします。
3. **\[ストレージ管理]** で、**\[ストレージの詳細設定]** サブメニューを展開し、**\[ディスクとボリューム]** を選択します。
4. リストから新しい仮想ハードディスクドライブを見つけ、**\[初期化]** をクリックします。
Windowsの古いバージョンでは、コントロールパネルにあるディスクの管理ユーティリティを探し、ディスクの初期化と変換ウィザードを起動し、そのディスク上に新しいボリュームを作成することで、新しいドライブを初期化することができます。
### Linux での新しい仮想ハードドライブの初期化
Linux ゲスト OS で新しい仮想ハードディスクを初期化するには、仮想ハードディスク領域を新しいボリュームに割り当て、このボリュームをゲスト OS にマウントします。
{% hint style="info" %}
**注**: このセクションでは、Ubuntu Linux のプロセスについて説明します。別のディストリビューションを使用している場合は、該当のディストリビューションのドキュメントを参照してください。
{% endhint %}
新しい外付けディスクを接続するか、Linux 仮想マシンに仮想ドライブを追加したら、次の手順を実行します。
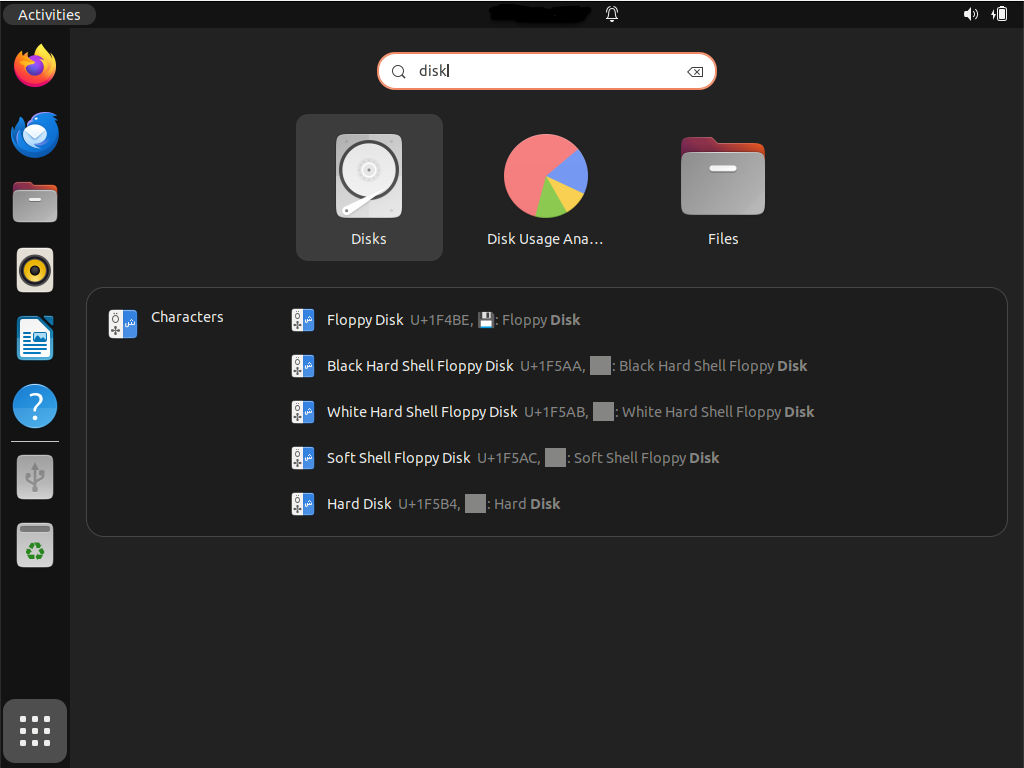
1. 左下にある**アプリケーションを表示**アイコンをクリックし、検索バーに「disks」と入力して**ディスク**ユーティリティを起動します。\
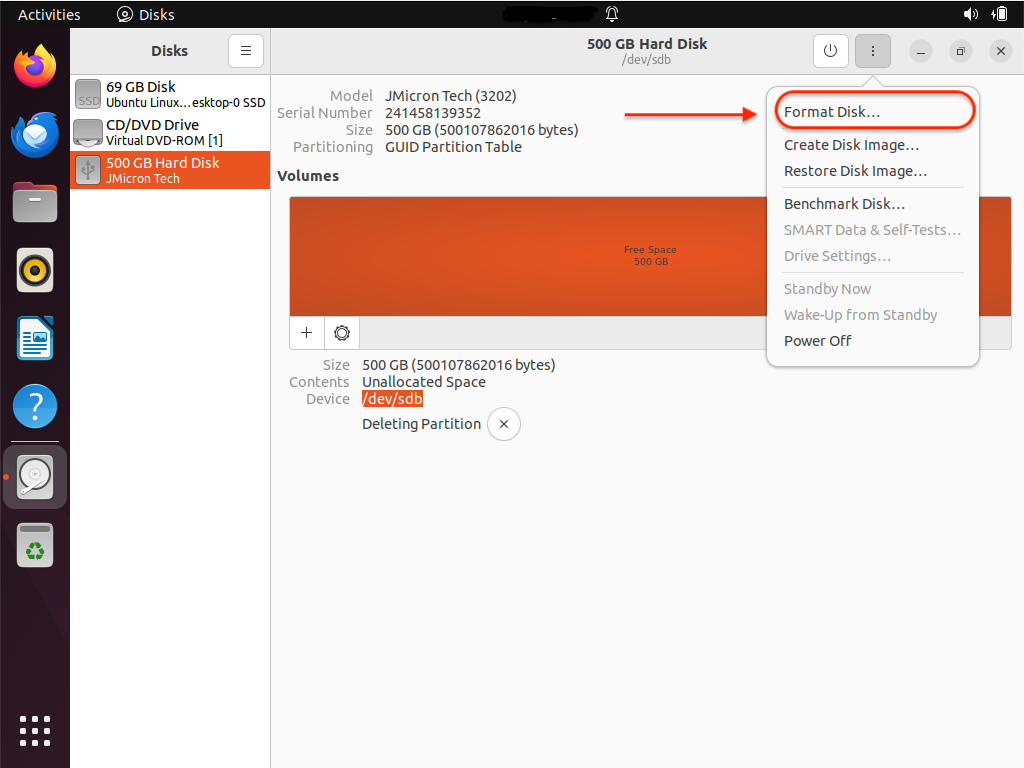
2. **ディスク**ユーティリティウィンドウで、左のサイドバーから新しく追加したディスクを選択します。
3. **ディスク**ユーティリティウィンドウの右上隅で、縦に 3 つ並んだドットのマークが付いたメニューを選択し、**\[ディスクのフォーマット]** オプションを選択します。\
4. デフォルトのオプションをオンのままにして、**\[フォーマット]** をクリックします。
5. 赤い **\[フォーマット]** ボタンをクリックし、パスワードの入力を求められたら入力してください。
ディスクを初期化したので、次の手順を実行してパーティションを分割します。
1. ボリュームマップの下にある(+)ボタンをクリックします。
2. 表示されたダイアログで、パーティションのサイズを選択し、**\[次へ]** をクリックします。
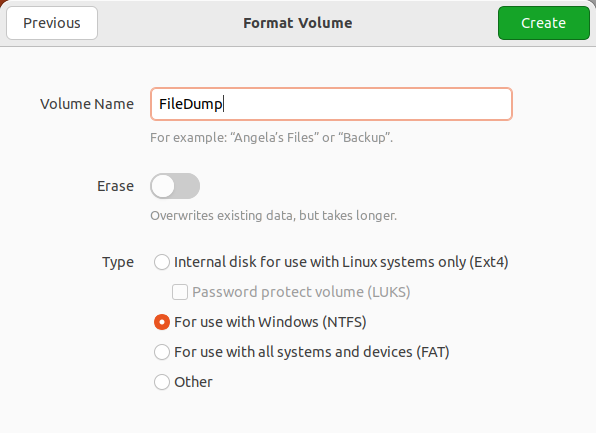
3. 次のダイアログで、ボリュームの名前を入力し、推奨されるファイルシステムの 1 つを選択し、**\[作成]** をクリックします。\
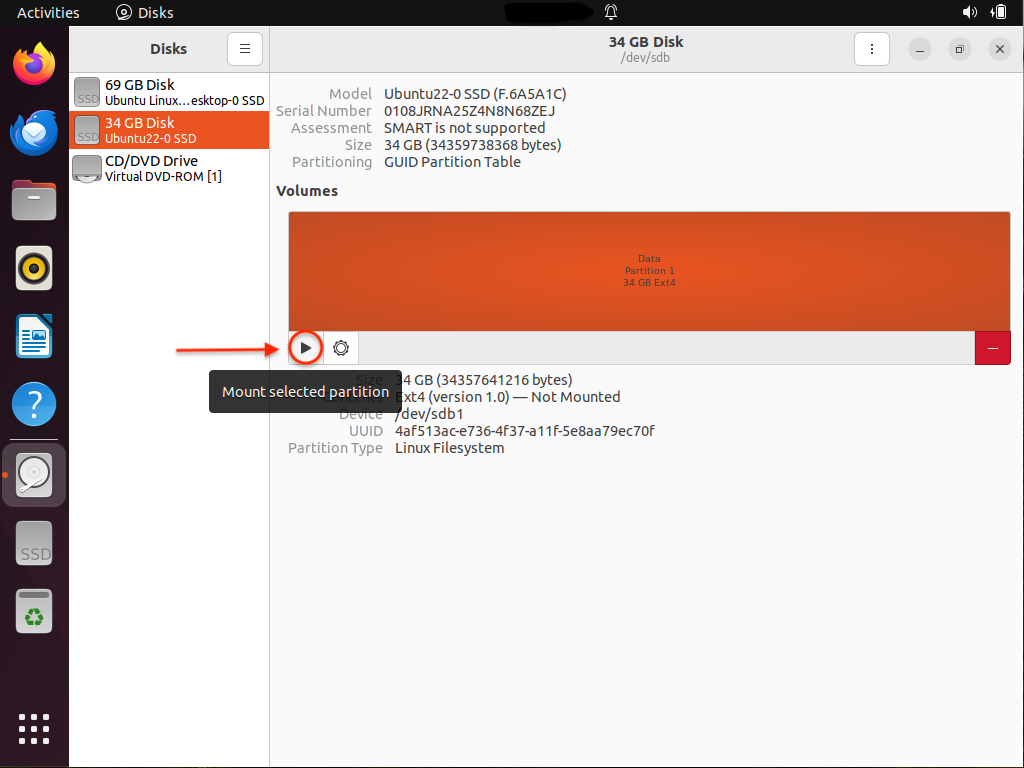
操作が完了したら、三角形の再生ボタンをクリックして新しいパーティションをマウントし、Linux マシンからアクセスできるようにします。
---
# Agent Instructions
This documentation is published with GitBook. GitBook is the documentation platform designed so that both humans and AI agents can read, navigate, and reason over technical content effectively. Learn more at gitbook.com.
## Querying This Documentation
If you need additional information that is not directly available in this page, you can query the documentation dynamically by asking a question.
Perform an HTTP GET request on the current page URL with the `ask` query parameter, and the optional `goal` query parameter:
```
GET https://docs.parallels.com/landing/pdfm-ug/v27-ja-jp/parallels-desktop-for-mac-27-yzzugaido/parallels-desktop-tomashin/debaisunoto/shikusaretadisukuno.md?ask=&goal=
```
`ask` is the immediate question: it should be specific, self-contained, and written in natural language.
`goal` is optional and describes the broader end goal you are ultimately trying to accomplish on behalf of the user. GitBook uses it to tailor the answer towards what is most useful for that goal.
The response will contain a direct answer to the question and relevant excerpts and sources from the documentation.
Use this mechanism when the answer is not explicitly present in the current page, you need clarification or additional context, or you want to retrieve related documentation sections.