Loading...
Loading...
Loading...
Loading...
Loading...
Loading...
Loading...
Loading...
Loading...
Loading...
Loading...
Loading...
Loading...
Loading...
Loading...
Loading...
Loading...
Loading...
Loading...
Loading...
Loading...
Loading...
Loading...
Loading...
Loading...
Loading...
Loading...
Loading...
Loading...
Loading...
Loading...
Loading...
Loading...
Loading...
Loading...
Loading...
Loading...
Loading...
Loading...
Loading...
Loading...
Parallels Client supports the following languages:
English
German
Dutch
French
Italian
Spanish
Portuguese
Russian
Japanese
Korean
Chinese Simplified
Chinese Traditional.
The Parallels Client localization matches that of the system. To change the interface language, simply choose any of the listed above in the system settings and Parallels Client will apply the new setting automatically. If you choose a language that is not supported, Parallels Client will use English.
To install Parallels Client, you need an Android device with Android version 9 to 15.
Parallels Client starting with version 17.1 can be used on an external monitor. To work with remote apps and desktops on a big screen, you need a Samsung mobile device that supports (this feature was first introduced on Galaxy S8 smartphones).
The preferred way to install Parallels Client is to follow the instructions from the invitation email. Your Parallels Remote Application Server administrator should send you this email.
Another way to install Parallels Client is to install it from Google Play. Do the following:
On your Android device, open Play Store.
Search for Parallels Client.
Tap Install and follow the onscreen instructions.
Help us improve our products!
When you launch Parallels Client for Android for the first time, you can choose to join Parallels Customer Experience Program. For more information about Parallels Customer Experience Program, see .
Once Parallels Client is installed, connect to Remote Application Server. Do one of the following:
The easiest way to create a connection is to use an invitation email from your system administrator. Open the email on your Android device and tap the "Configure" link. Parallels Client will open and configure connection to Remote Application Server automatically.
If you know the remote server IP address, host name, or your system administrator allowed authentication via email, and you have user's credentials, you can create a connection manually.
If you have an older version of Parallels Client on your Android device, you can import existing connections.
To connect to a remote server, just tap a connection in the Connections list. Read this chapter to learn what you can do when connected to a remote server via a Remote Application Server connection and via an RDP connection.
If you know the remote server IP address or host name and user's credentials, you can create a connection manually. There are two types of connections:
Remote Application Server. If you establish this type of connection, you will see the applications and desktops published on the Parallels Remote Application Server. You can launch and work with these apps.
Standard RDP. If you choose this type of connection, you will be able to work with the remote server desktop the same way you would if connected via the Microsoft RDP client.
Read on the following topics for more details.
If you have Parallels Client v15.0 with configured connections on your Android device, you can import these connections into a newer version. Do the following:
Open Parallels Client.
Tap the icon in the top right corner and choose Migrate settings.
The Customer experience program section allows you to modify the following settings:
Participate in Customer Experience Program. Check this option if you agree to participate in the customer experience program. Parallels collects statistical information to improve the product. No personal data is collected.
When you often use some keyboard shortcuts when working with a published application, ask your system administrator to create additional keyboard buttons that work as shortcuts. This way you will be able to tap only one button instead of having to tap two or more keys.
Once the administrator creates the buttons, tap the icon in the top right corner of the screen, choose Log off and then connect to Parallels RAS once again. The buttons will appear in the top left corner of the keyboard.
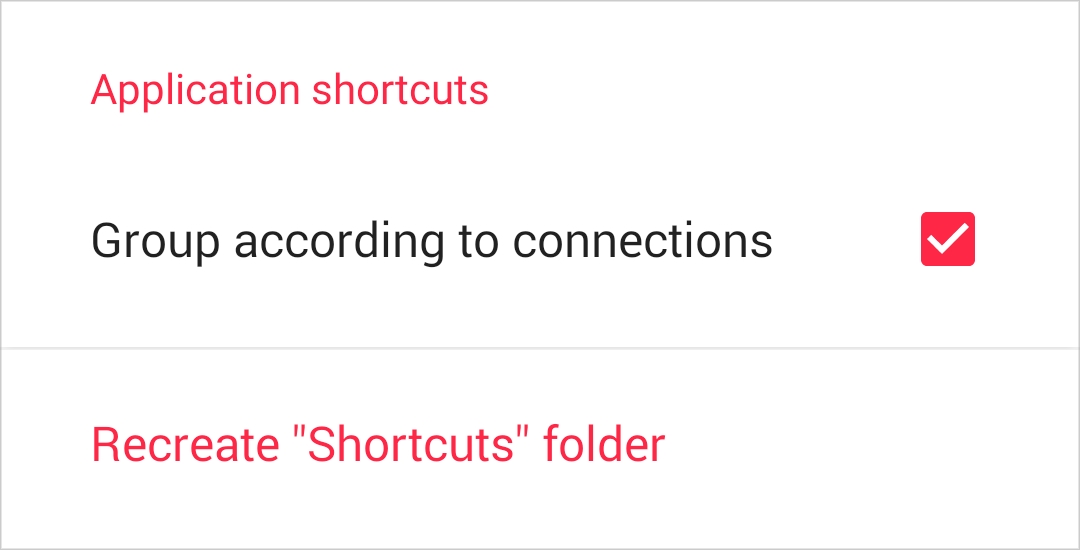
The Application shortcuts section allows you to modify the following settings:
Group according to connections. By default, when you connect to Parallels RAS for the first time, you will be offered to create a folder containing the shortcuts to all remote applications published for your user account.
If you agree, the "Shortcuts" folder appears on the desktop of your Android device. Open it and tap the application you want to work with - Parallels Client will automatically establish a RAS connection and launch the selected app.
If you have more than one RAS connection and Group according to connections is enabled, app shortcuts are displayed in sub-folders according to connections.
Recreate "Shortcuts" folder. If you removed the "Shortcuts" folder and need it again, tap this option to recreate the folder.
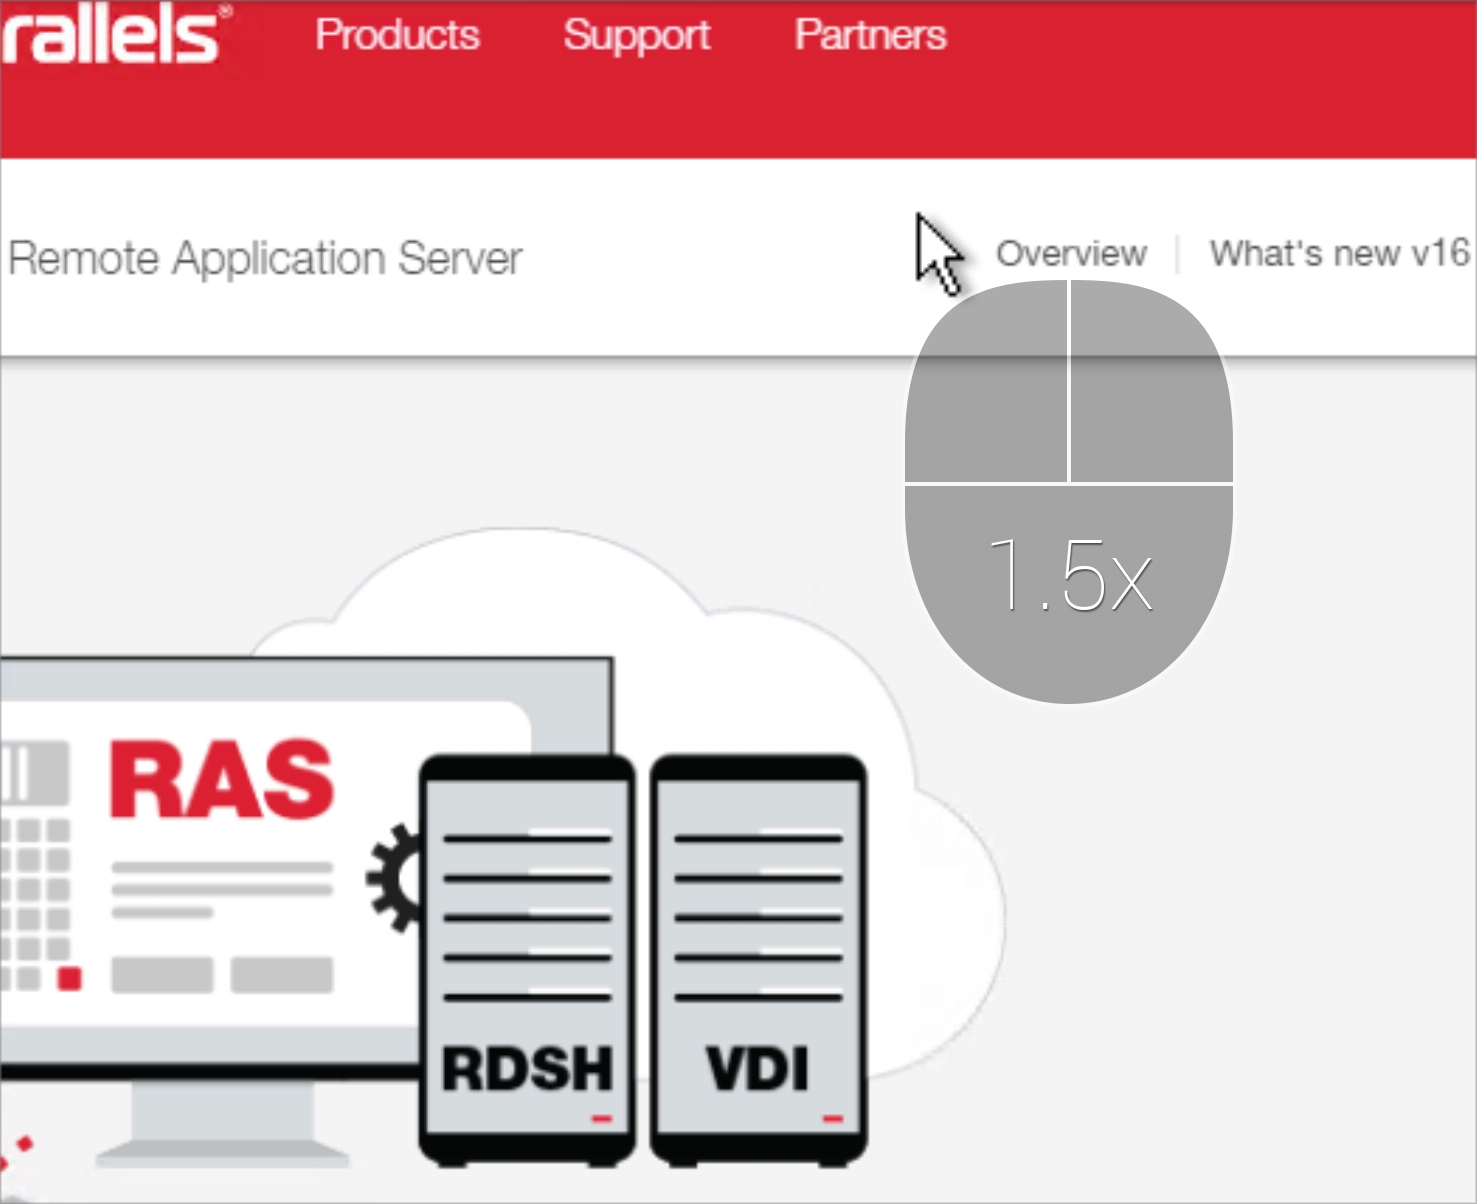
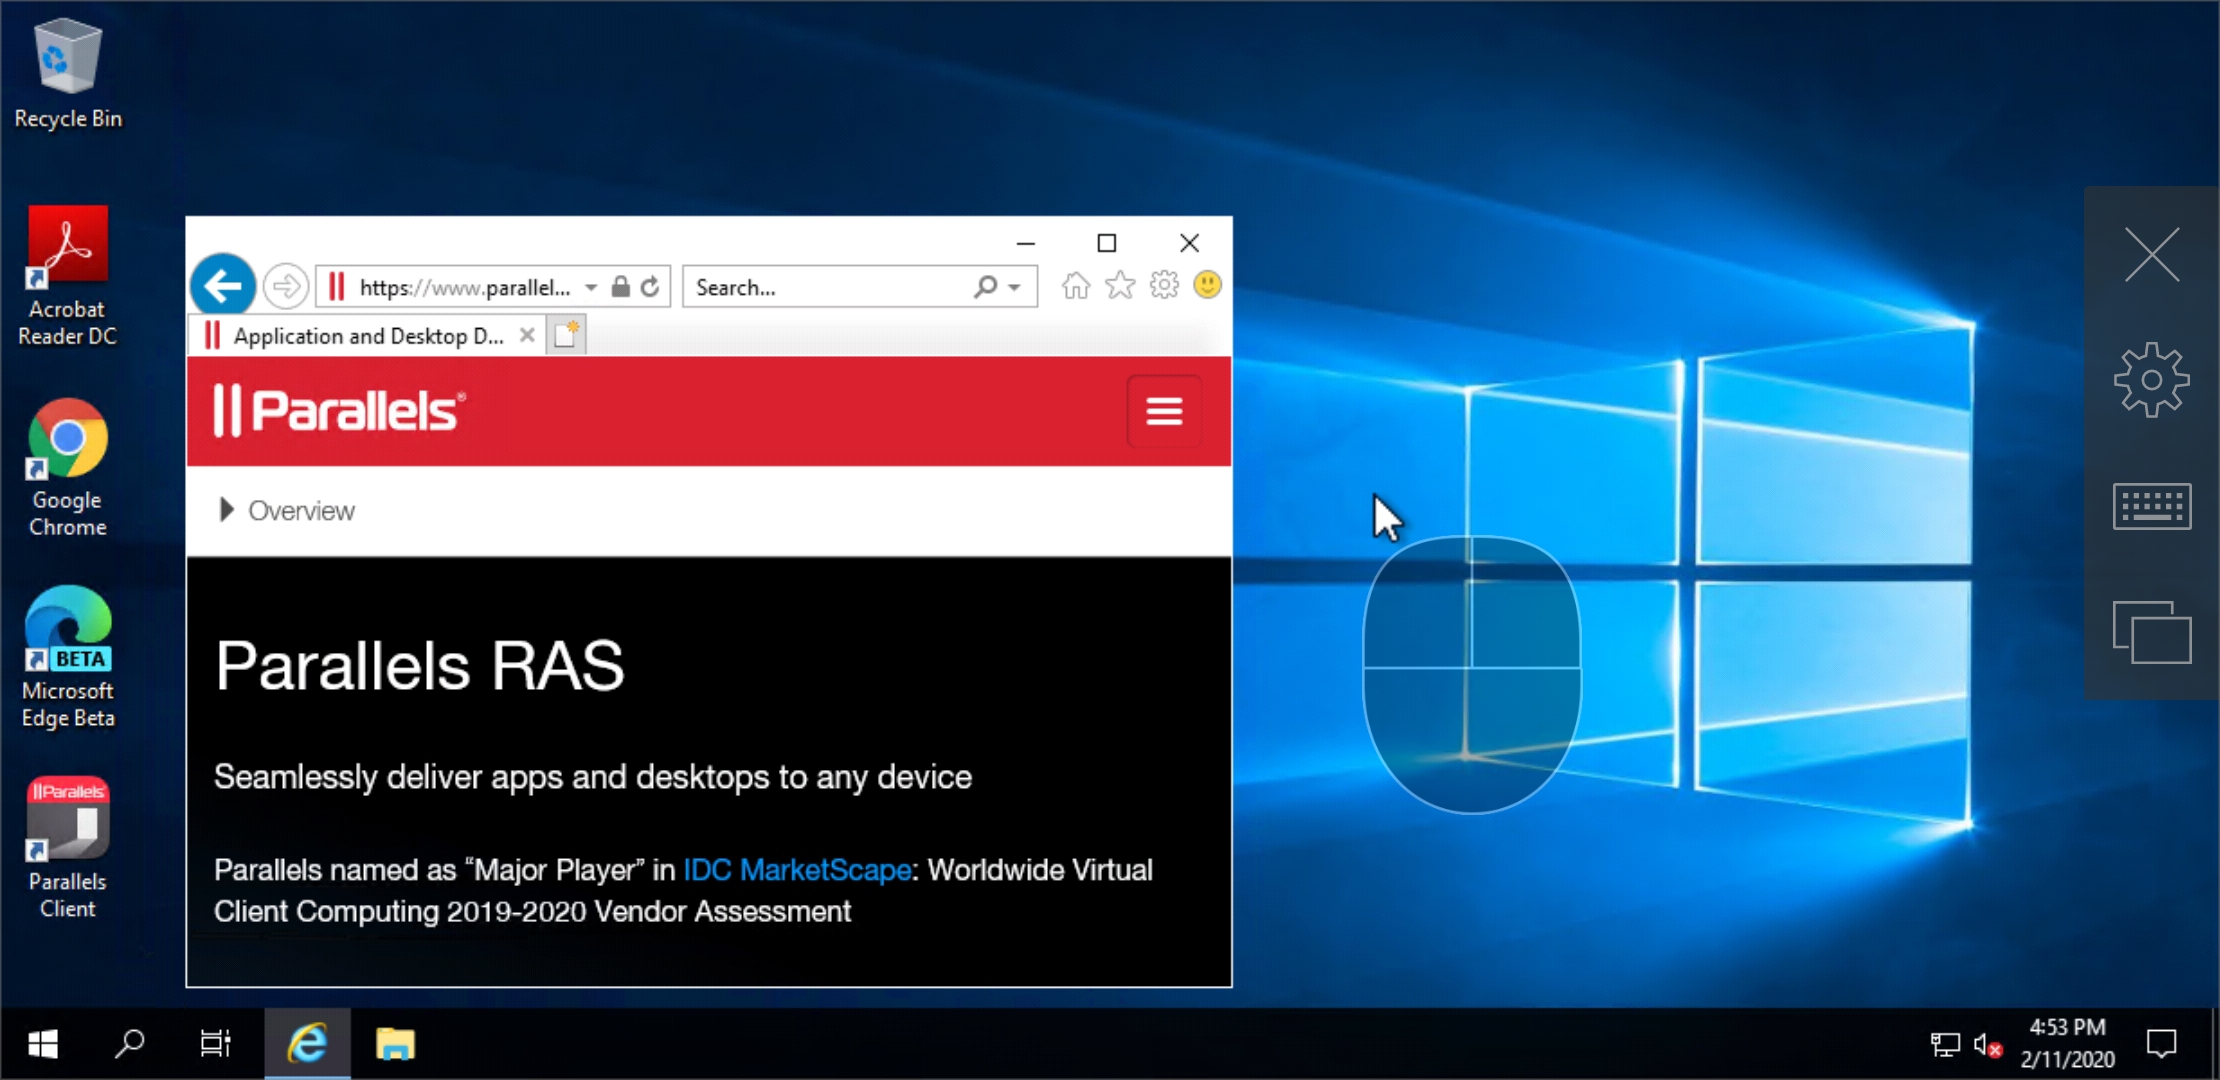
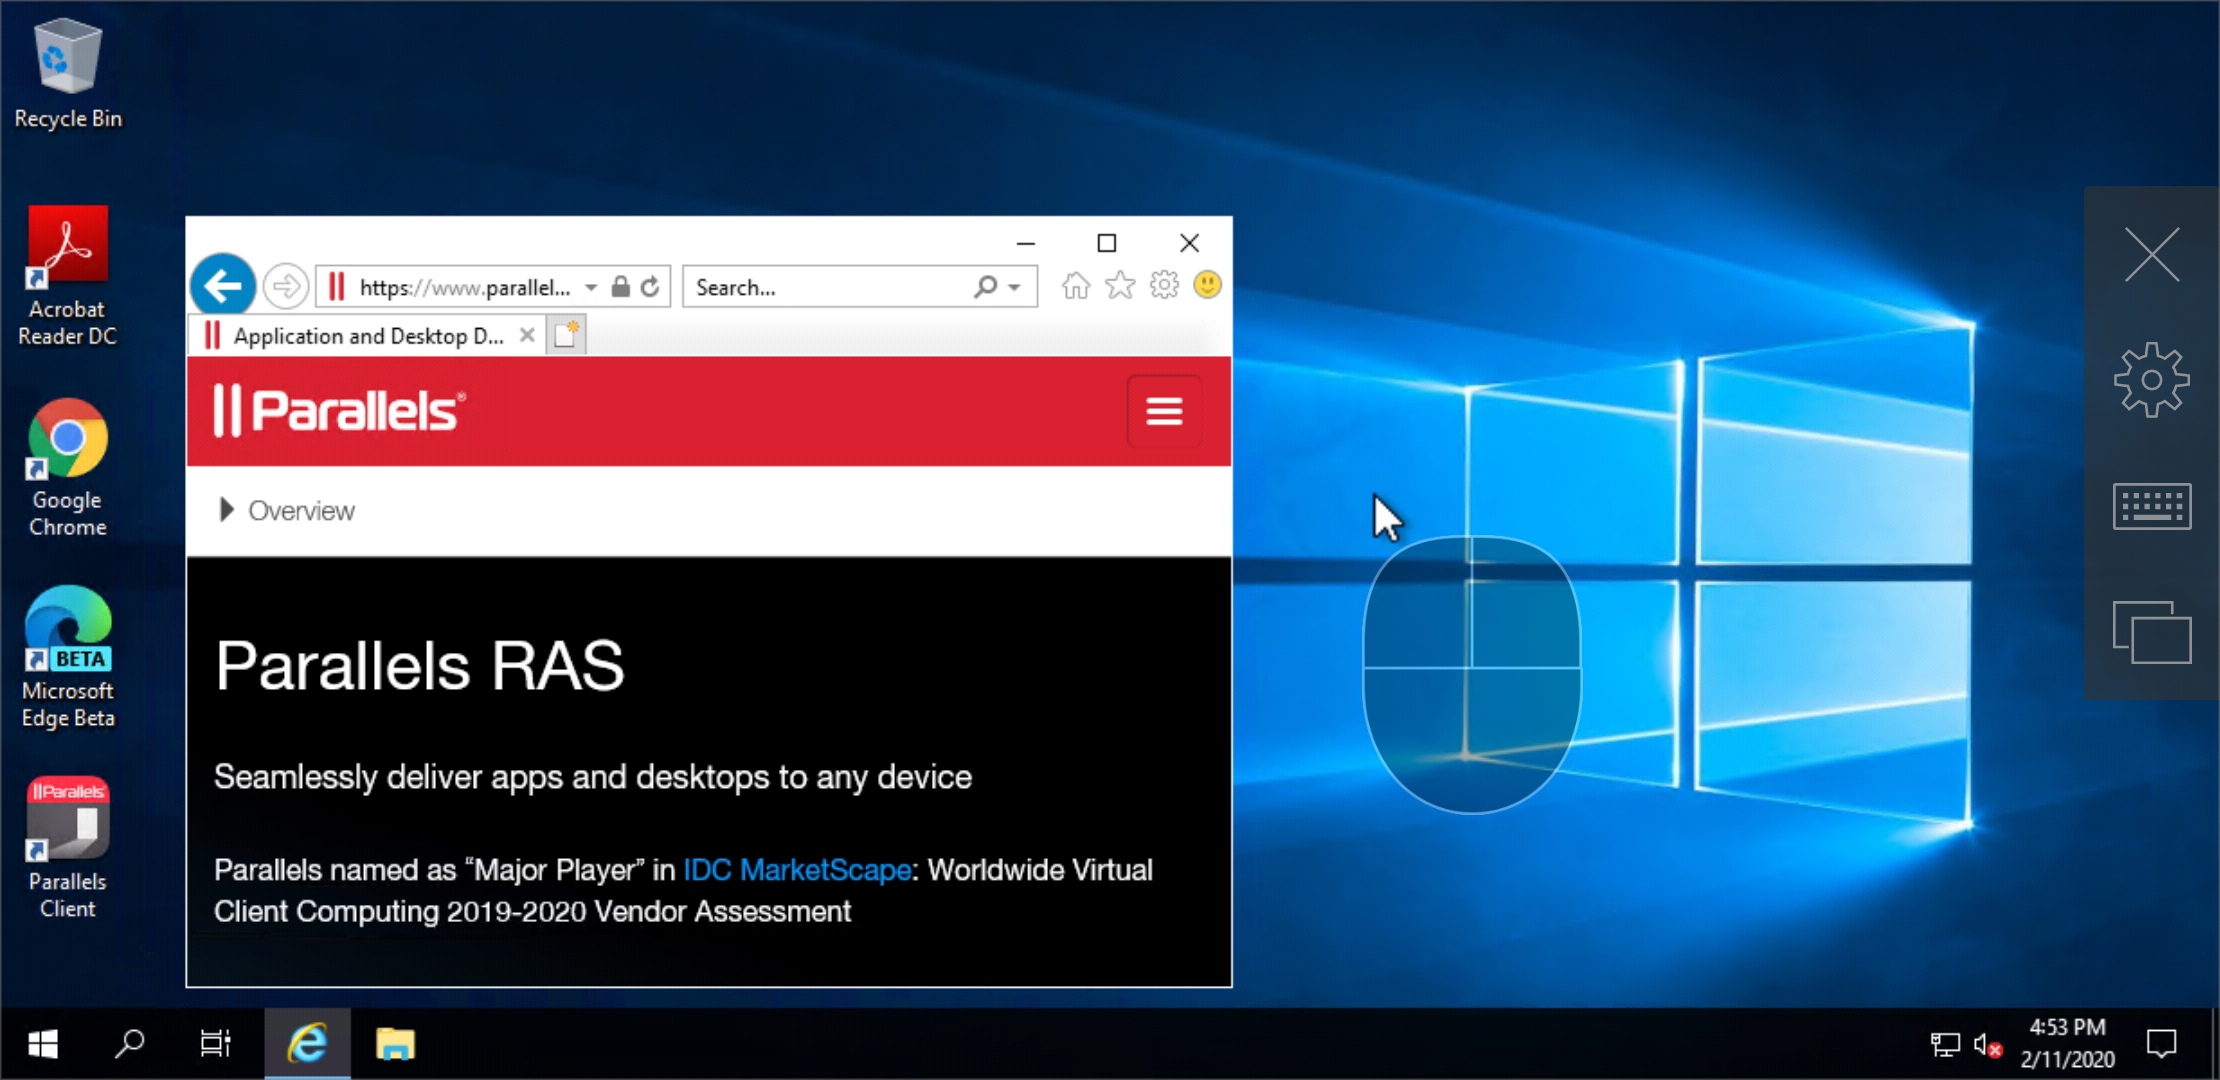
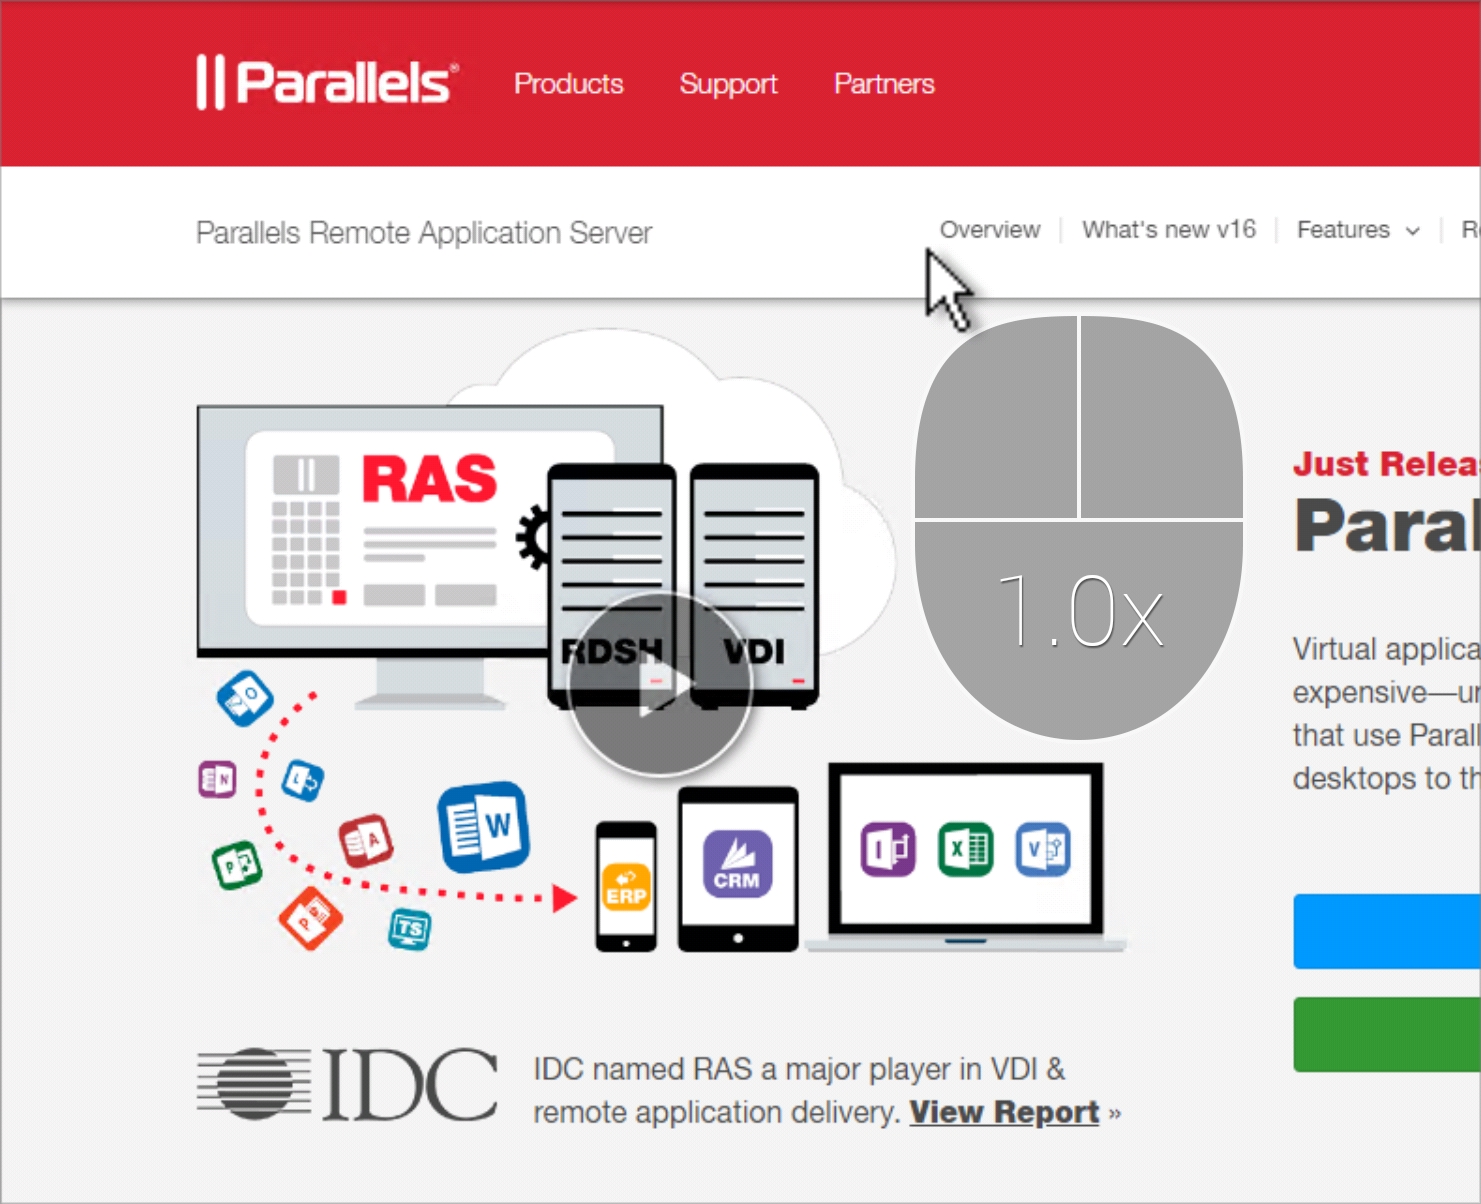
If you're working with remote applications using Dumbo mouse, you can use it to zoom in the screen.
To zoom in, double-tap the bottom part of Dumbo mouse:
To zoom out, double-tap the bottom part of Dumbo mouse again.
Some of the Parallels Client messages have the Don't show again checkbox. If you tap this checkbox, the message won't show again. Tap Reset all hidden messages to restore such messages.
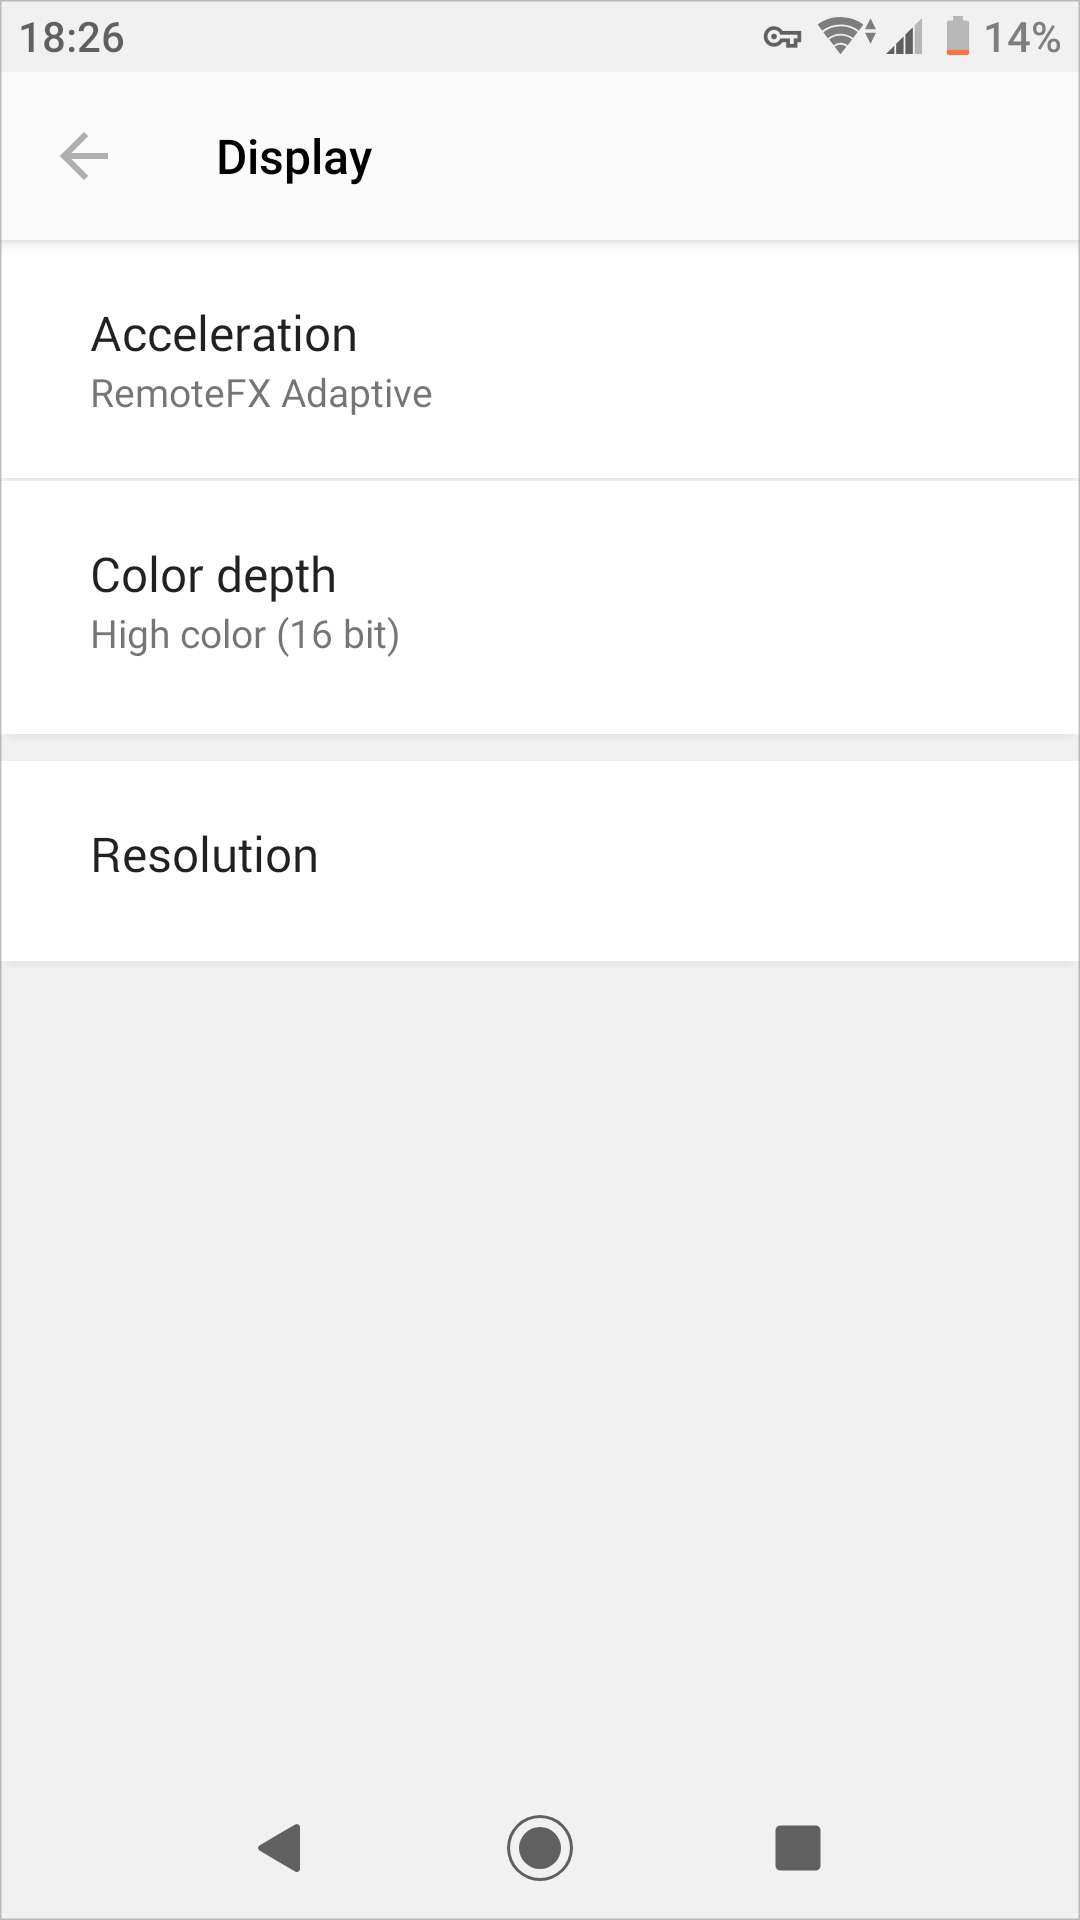
On the Display tab, you can edit the following settings:
Acceleration. In this menu, choose the graphics acceleration type. The more advanced the acceleration, the better will be the quality of the graphics. Please note that higher quality accelerations require more processing power and faster network.
To create an RDP connection, do the following:
Open Parallels Client.
Tap the Plus icon in the top right corner.
Select Standard RDP.
On the Local resources tab, you can edit the following settings:
Clipboard redirection. If this option is selected, when you copy some plain or formatted text to the clipboard on your Android device, this text also becomes available in the clipboard on the remote server and vice versa.
Open URLs on. Tap this menu to specify where you want to open "http:" links - on your Android device or remote server.
If you have any problems with Parallels Client or experienced a crash, check our help resources. Do the following:
Open Parallels Client.
Tap the icon in the top right corner and choose Help.
While working with Parallels Client, you can edit its settings the way you need. To open Parallels Client settings, do the following:
Open Parallels Client.
Open mail links on. Tap this menu to specify where you want to open "mailto:" links - on your Android device or remote server.
Redirect pen input. Select this option to enable or disable pen input redirection with pressure sensitivity support.
Sound redirection. Specify how the sound should be handled. You can choose one of the following:
Do not play. Select this option to disable sound.
Play on device. Select this option to redirect sound from the remote server and play it on your Android device.
Play on remote computer. Select this option to play sound on the remote server.
Camera redirection. Specifies video capture devices to redirect from a user device to the remote session. This is a high-level redirection that allows to redirect a composite USB device, such as a webcam with a microphone. You can select the following options:
Limit camera resolution to 720p — limit camera resolution to save data.
Create desktop shortcuts automatically. If configured in the Parallels RAS settings, published applications may create desktop shortcuts on your Android device. When you tap such a shortcut, Parallels Client starts automatically, connects to Parallels RAS and the application opens. However, if your desktop is already overcrowded with different icons and you don't want any new ones, you can choose not to create desktop shortcuts by deselecting this option.
Share folder. Select this option to enable import of files and folders from Android device storage to the remote server. A network disk called "Files on %device name%" will appear on the remote server, where %device name% is the name of your Android device. For information on how to import files, see section Application Toolbar.

The basic way to launch a published application is as follows:
Open Parallels Client on your Android device.
Connect to Parallels RAS. Once the connection is established, you'll see a list of available applications.
Tap the application you need and it will open.
However, there are a few other ways to launch a published application:
You can use desktop shortcuts to launch published applications. You can create such shortcuts manually or your administrator can make the published apps create desktop shortcuts automatically. It's an easy way to launch apps because when you tap such a shortcut, Parallels Client starts automatically, connects to Parallels RAS and the application opens.
If you work with some application most of your time, you can ask your administrator to configure it to open automatically. Once ready, just launch Parallels Client and connect to Parallels RAS - the application will open by itself.
If you use your Android device mainly to work with remote desktops or applications, you can ask your administrator to configure Parallels Client to start and open some app automatically once the Android device boots up.
This chapter contains additional information on how to work with Parallels Client.
None. No graphics acceleration.
Basic. Basic acceleration.
RemoteFX. More powerful graphics acceleration using the RemoteFX codec.
RemoteFX Adaptive. Best graphics acceleration using RemoteFX Adaptive and H.264 codecs.
Color depth. Use this menu to select the color depth.
Resolution. In this menu, select the remote server screen resolution.
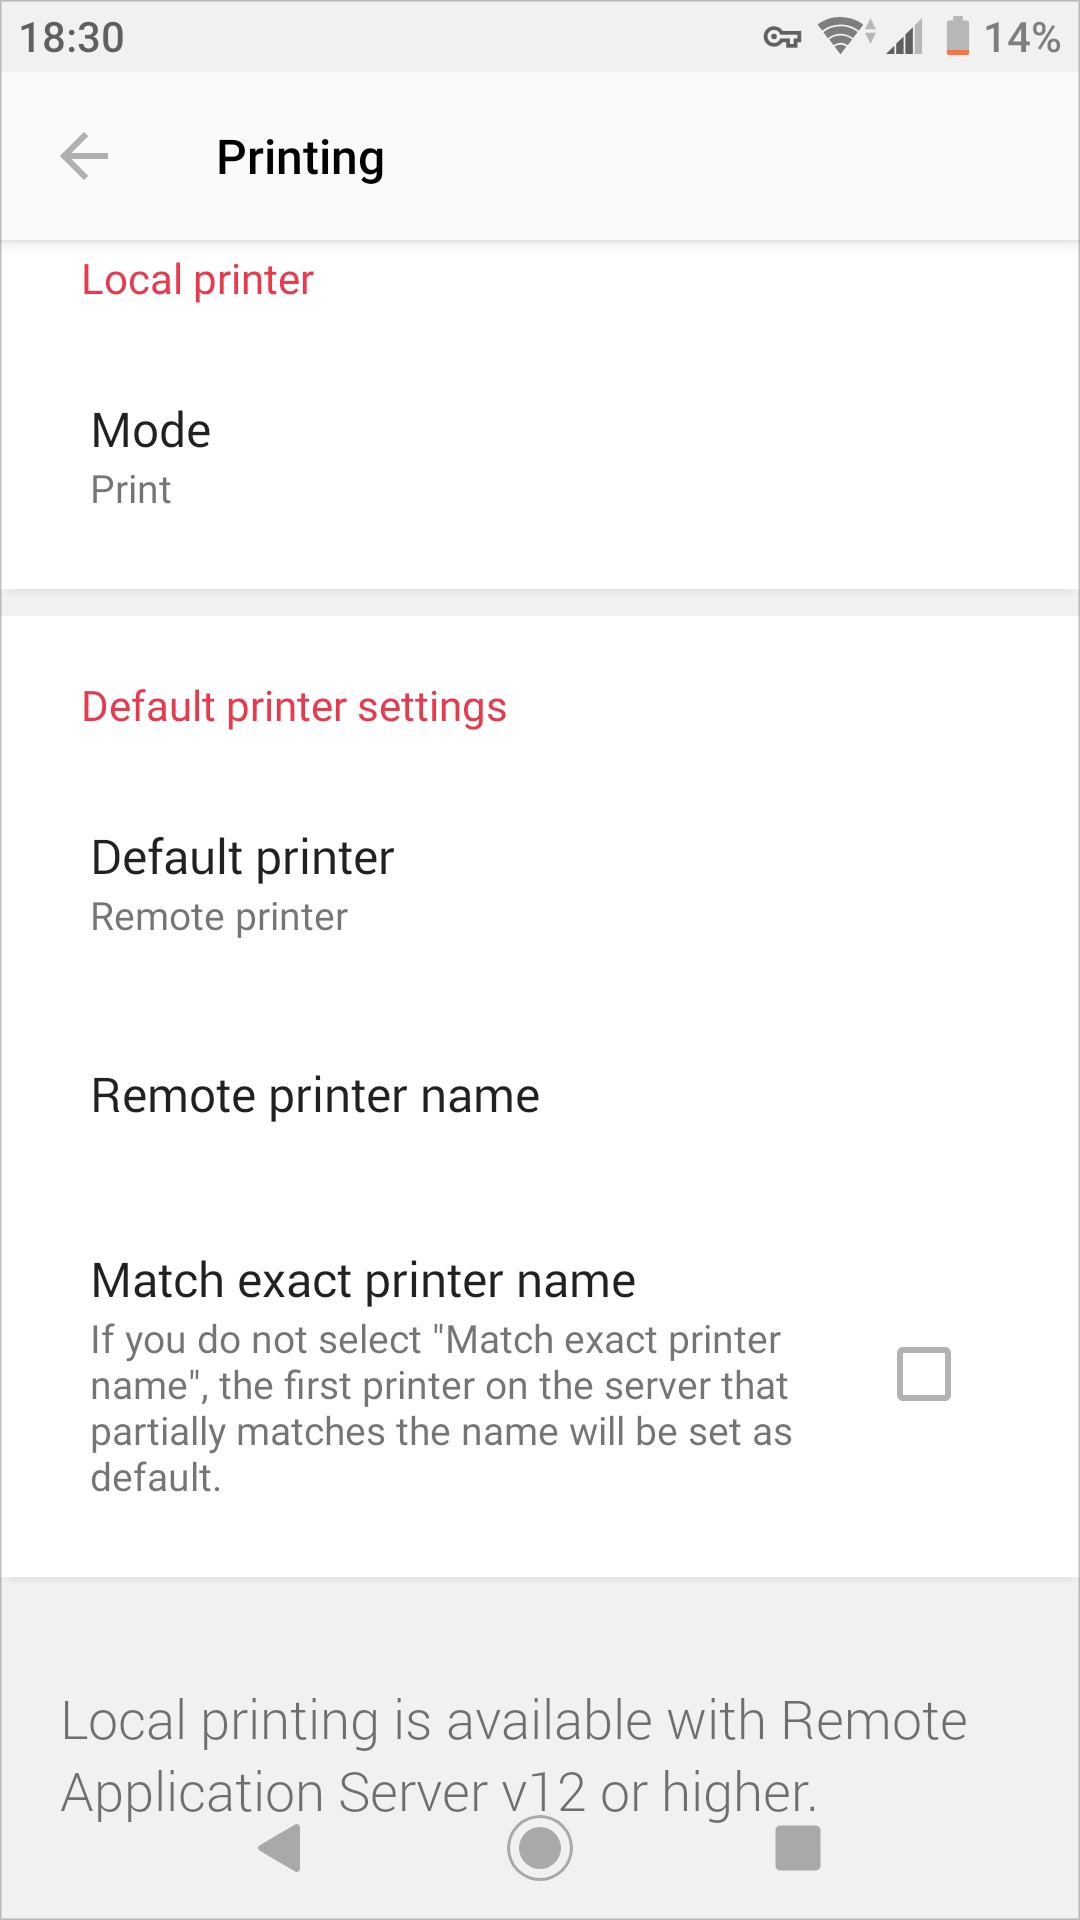
Print. Select this option to print documents.
View as PDF. Select this option to print documents to PDF.
In the Default printer settings section, specify which printer to use to print documents. Choose one of the following:
None. When this option is selected, default printer is chosen depending on the remote server settings.
Local printer. Choose this option to use the printer specified on your Android device.
Remote printer. Choose this option to use the printer specified on the remote server.
If Remote printer is selected, specify the following additional options:
If there are 2 or more printers configured on the remote server, type the name of the printer you want to use in the Remote printer name field. Parallels Client will use the first printer which name partially or fully matches the name specified in this field.
If you select Match exact printer name, Parallels Client will use the printer which name exactly matches the name specified in the Remote printer name field.
Specify the server address and tap Connect.
Enter the user's credentials and tap OK.
If the connection was successful, you will see the remote desktop and be able to start working with the server. If you receive an error, verify that the connection and logon information is entered correctly and try again.
You can read the most popular knowledge base articles or tap All knowledge base articles for more articles. If you still have a problem, contact the Parallels support team or send technical data to your Parallels Remote Application Server administrator. The technical data is collected to analyze the issue and work out a solution.
Tap the icon in the top right corner and choose Compact view. In this mode, connection icons become smaller and more connection are displayed in the list.
To switch back to the regular view, tap the icon and choose Regular view.
If you remember the server/alias name or IP address, you can use the Search field to find your connection. Do the following:
Open Parallels Client.
Tap the magnifying glass icon at the top of the screen and start typing the IP address or server/alias name of the connection you're looking for. The connection will appear below the Search field.
Read this chapter to learn which settings can be modified and how.
To create a Remote Application Server connection, do the following:
Open Parallels Client.
Tap the Plus icon in the top right corner.
Enter the Parallels RAS IP address, its hostname (this should be the server where the RAS Secure Gateway resides), or your work email address. You system administrator should tell you what to use.
Tap Authentication type and select the desired method of authentication:
Credentials. Select this option and then enter your username and password. You will be authenticated on the remote server using the specified credentials.
Web: Select this option to use the SAML SSO authentication.
Once ready, tap Connect.
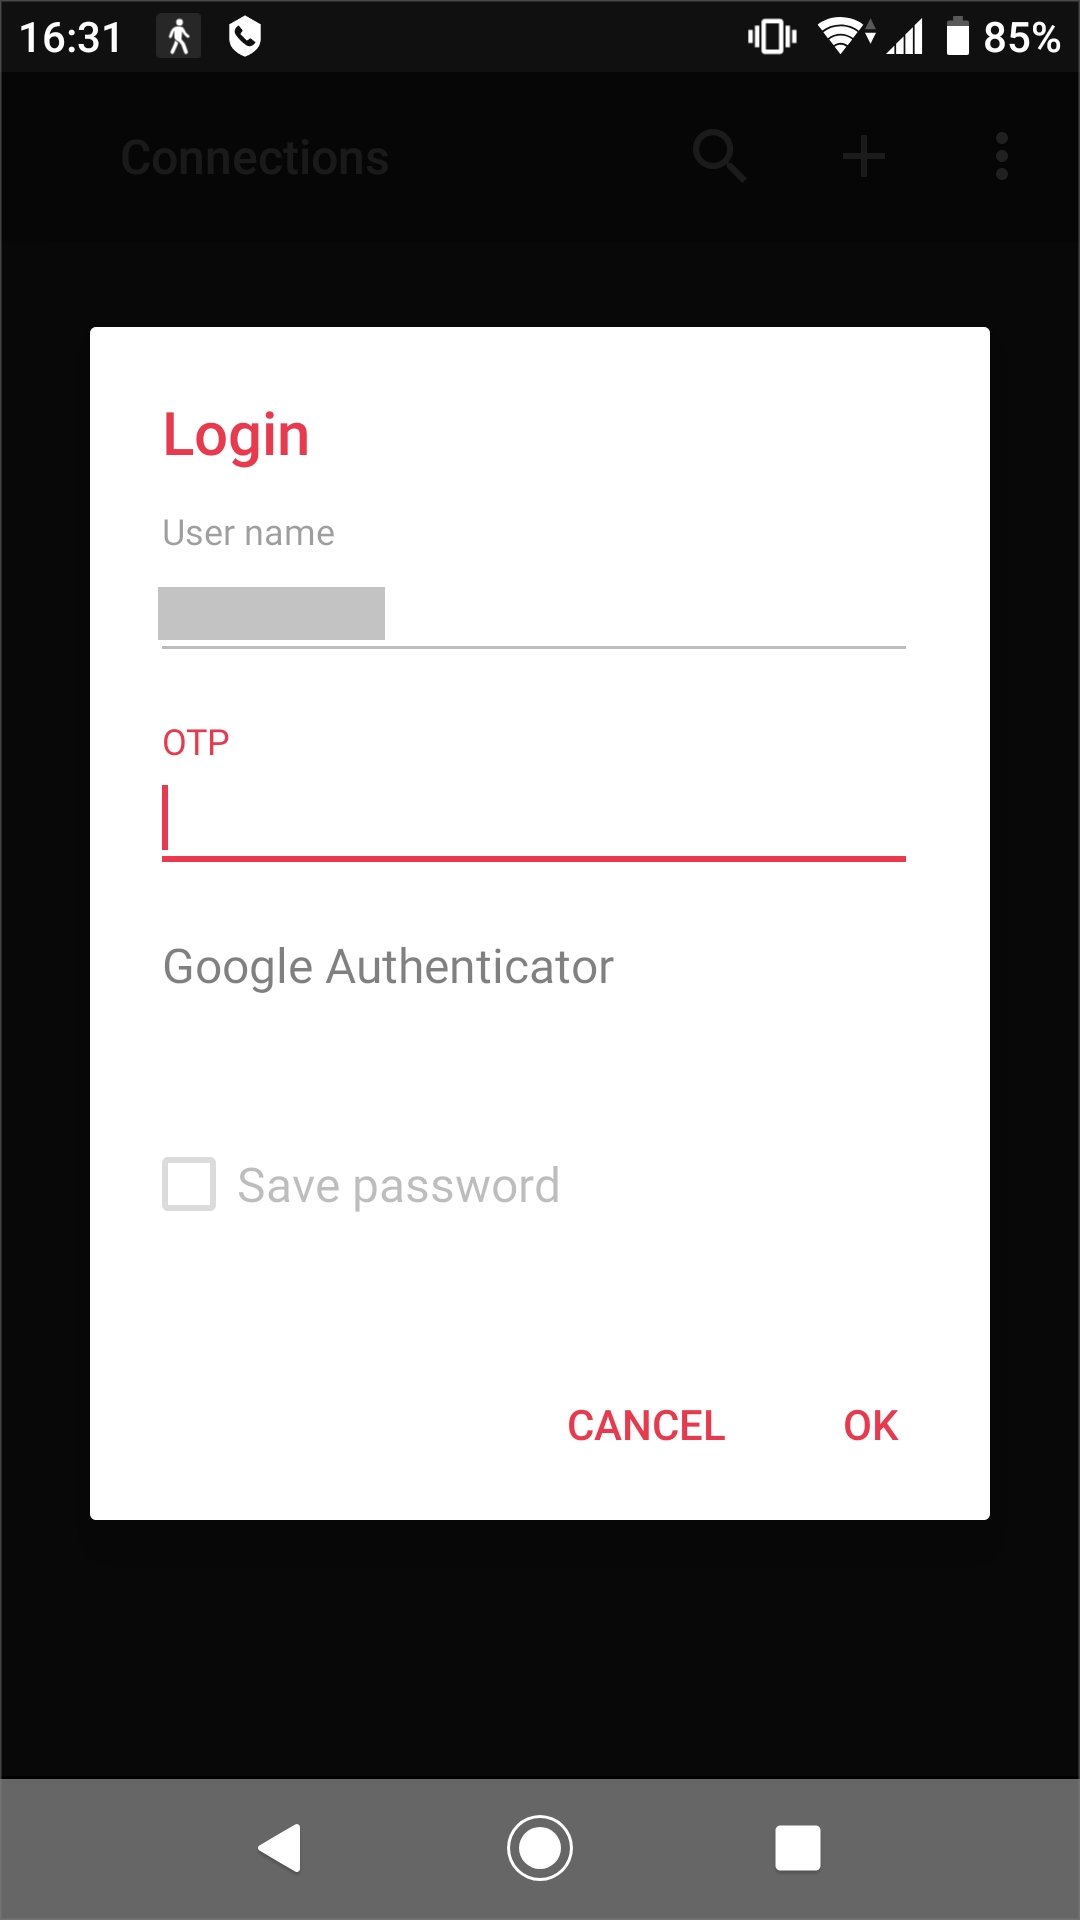
The next step may, or may not, appear depending on whether the multifactor authentication (MFA) is configured in Parallels RAS by the administrator. If configured, you need to enter a one-time password (OTP). Parallels RAS supports various MFA providers (Google Authenticator, RADIUS, Deepnet Security, SafeNet, etc.).
To gain a general understanding of how the connection process may look like if MFA is configured, please see the Authentication Using Google Authenticator and Authentication Using RADIUS subsections below.
If the connection was successful, you will see the published applications that you can use. If you receive an error, verify that the connection and logon information is entered correctly and try again.
If you connect to Parallels RAS for the first time, you will be suggested to create the "Shortcuts" folder on the desktop of your Android device. This folder contains shortcuts to all remote applications published for your user account. Next time you need to work with some application, you can open this folder and tap the app you need - Parallels Client will automatically connect to RAS and launch this application.
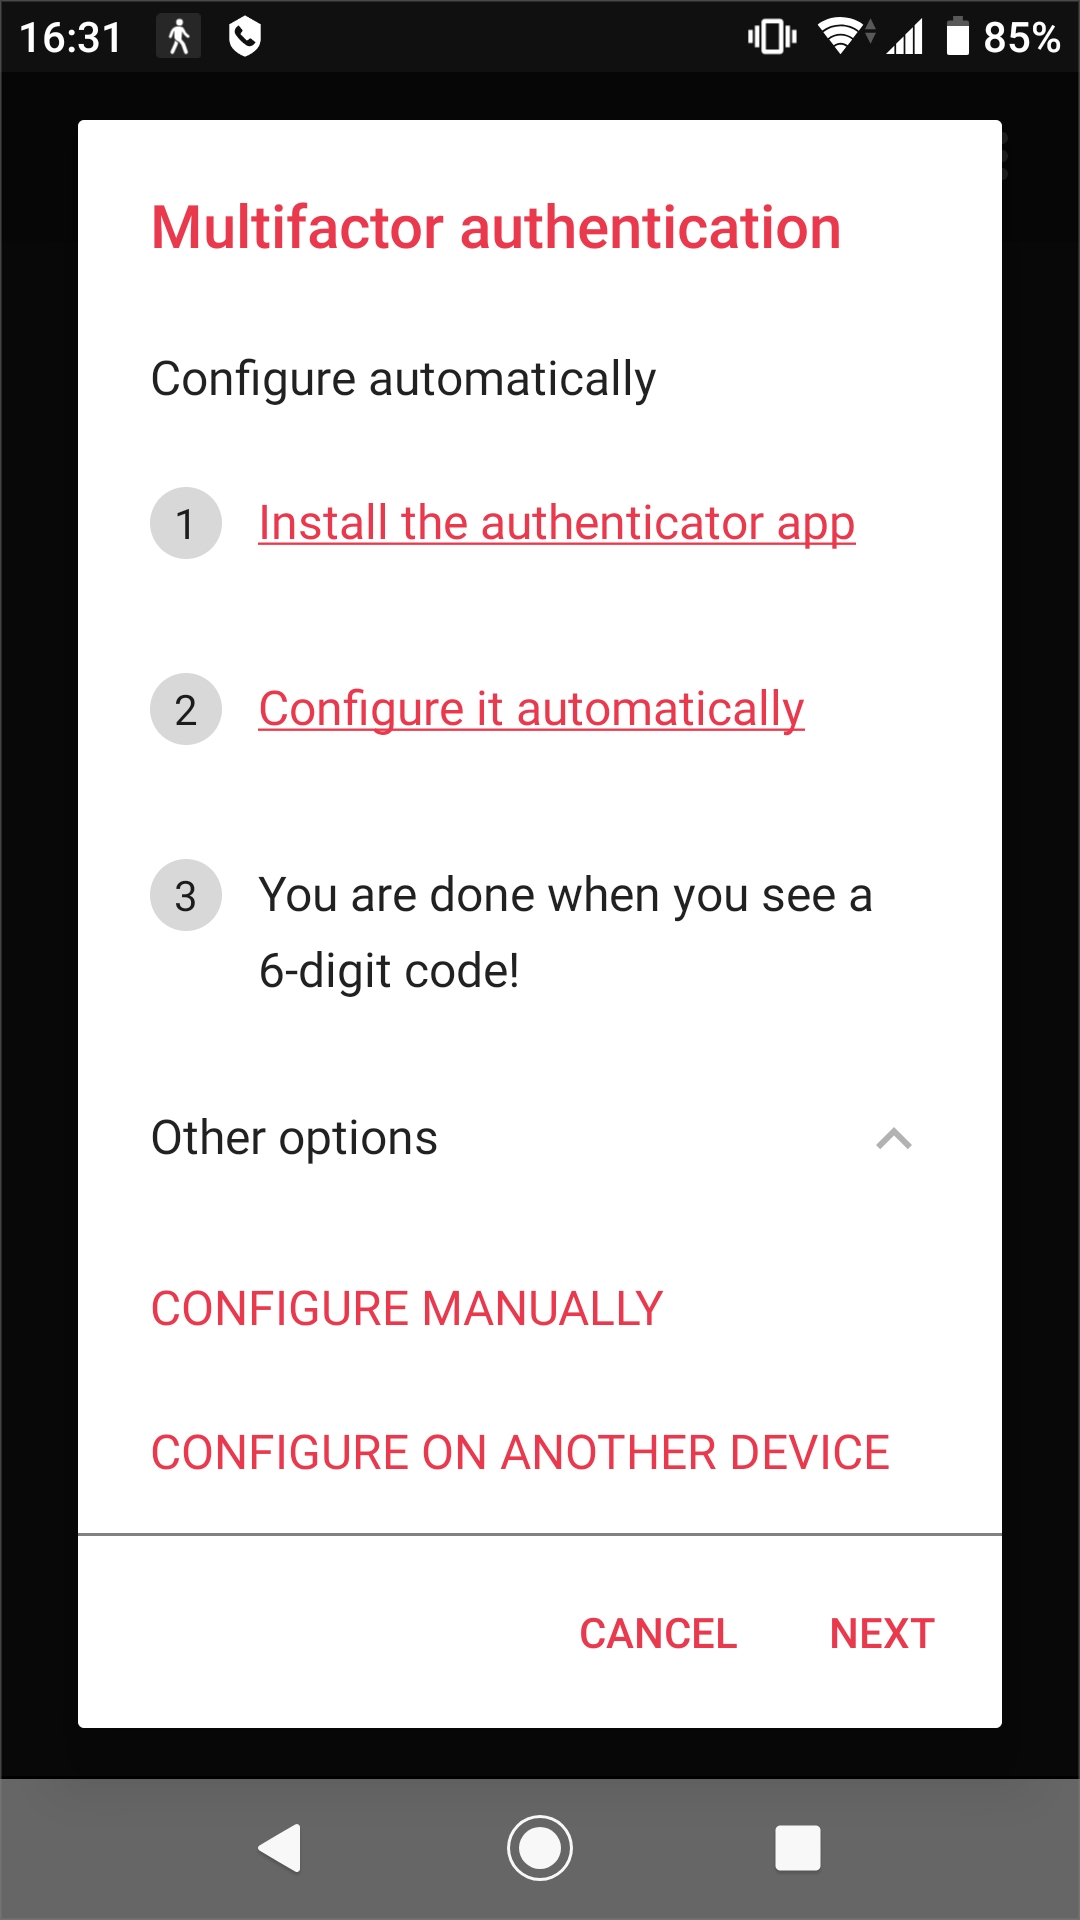
If your IT administrator configured multifactor authentication using Google Authenticator (or another TOTP provider), you will see the following screen after entering your credentials during the login procedure.
First you need to install the Google Authenticator app on your mobile device. If it is already installed, go to step 2. To install Google Authenticator, tap Install the authenticator app.
Configure Google Authenticator. Choose one of the following ways:
Configure automatically. To configure Google Authenticator automatically, tap this option and follow the onscreen instructions.
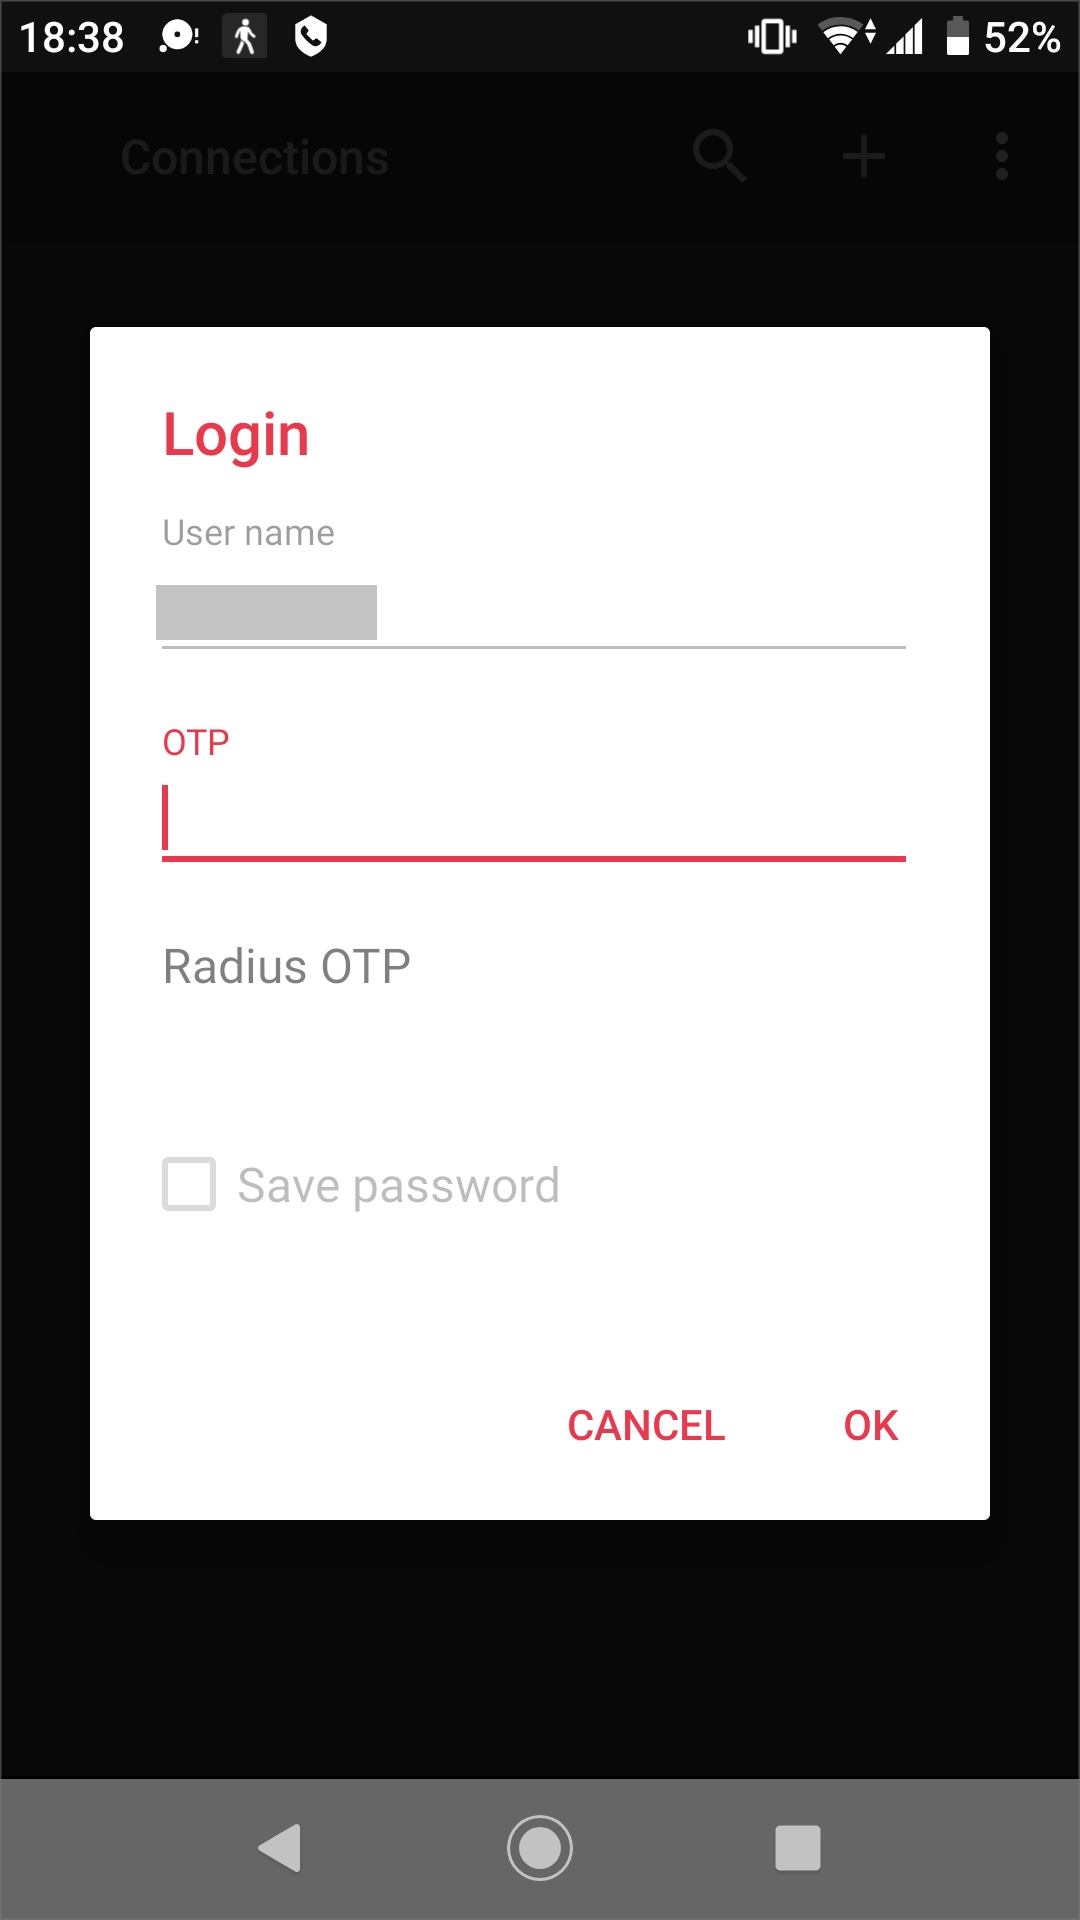
If your IT administrator configured multifactor authentication using RADIUS, you will see the following screen after entering your credentials during the login procedure.
Enter a one-time password in the OTP field. The method of OTP delivery (via email, SMS, etc.) depends on how your IT administrator configured the corresponding settings. Parallels Client may also ask you to select one of several available methods.
To edit your Remote Application Server or RDP connection parameters, do the following:
Open Parallels Client.
Tap the icon in the top right corner and choose Edit connections.
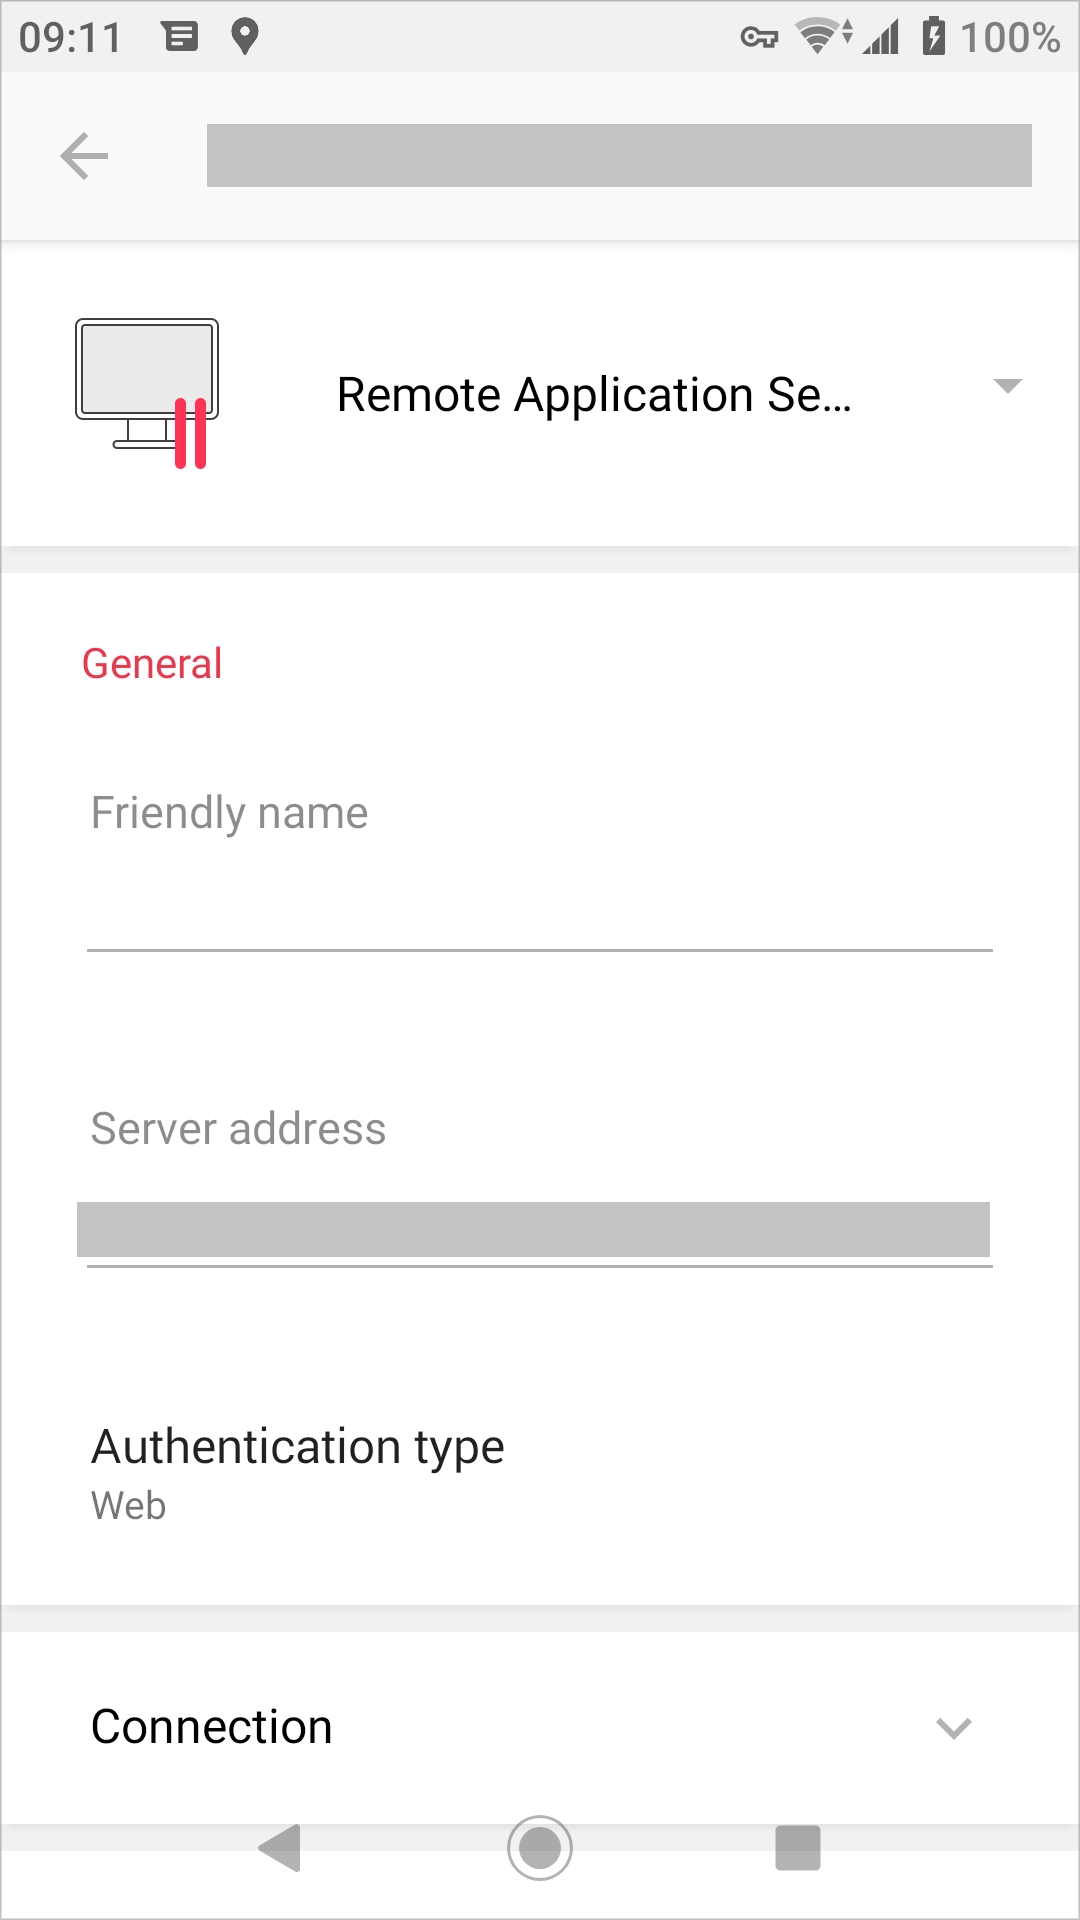
Tap the Gear icon below the connection which settings you want to modify. The following screen appears:
You can edit the following parameters:
Friendly name. In this field, you can change the name of your connection.
Server address. In this field, you can change the remote server IP address or host name.
Authentication type. Tap this menu to select the desired method of authentication:
Credentials
Once ready, tap Save in the top right corner.
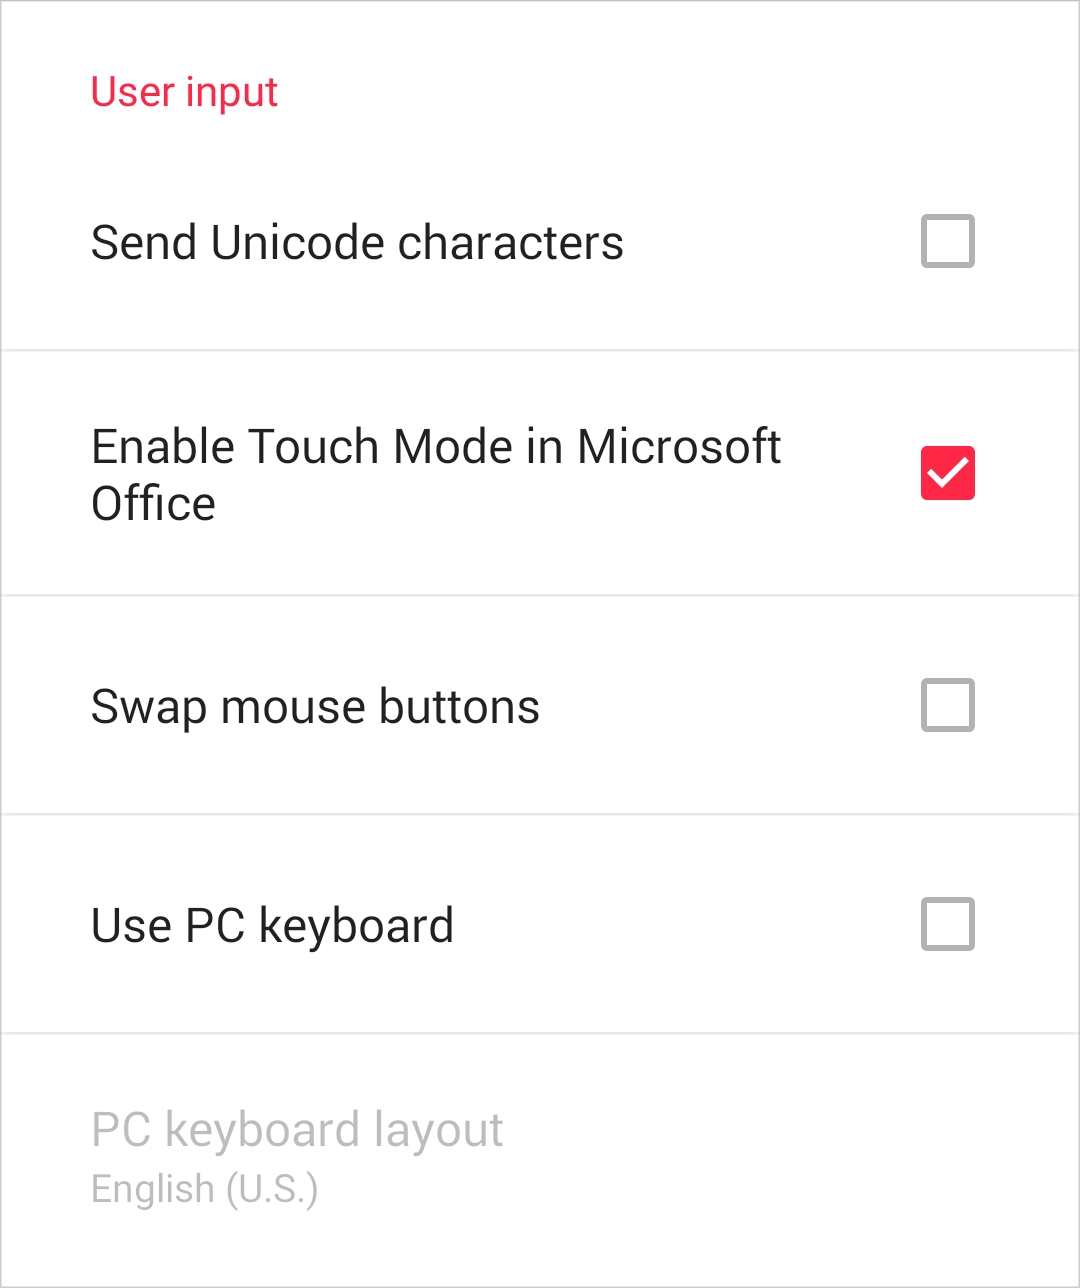
The User input section allows you to modify the following settings:
Send Unicode characters. Enable this option if you want the keyboard to send characters as unicode instead of scancode.
Enable Touch Mode in Microsoft Office. Use this option to enable or disable Touch Mode in Microsoft Office applications.
Swap mouse buttons. Enable this option to swap the mouse buttons on the remote server.
Use PC keyboard. When you're working with published applications and a text field gets focus, a mobile keyboard pops up. By default, an Android native keyboard is used.
If you experience any input problems (for example, the keyboard types wrong keys), try to switch to a PC keyboard. Enable Use PC keyboard and choose the keyboard language you need from the PC keyboard layout list.
To log off:
Tap the Back arrow until you get to the list of remote applications.
Tap the icon in the top right corner and tap Log off.
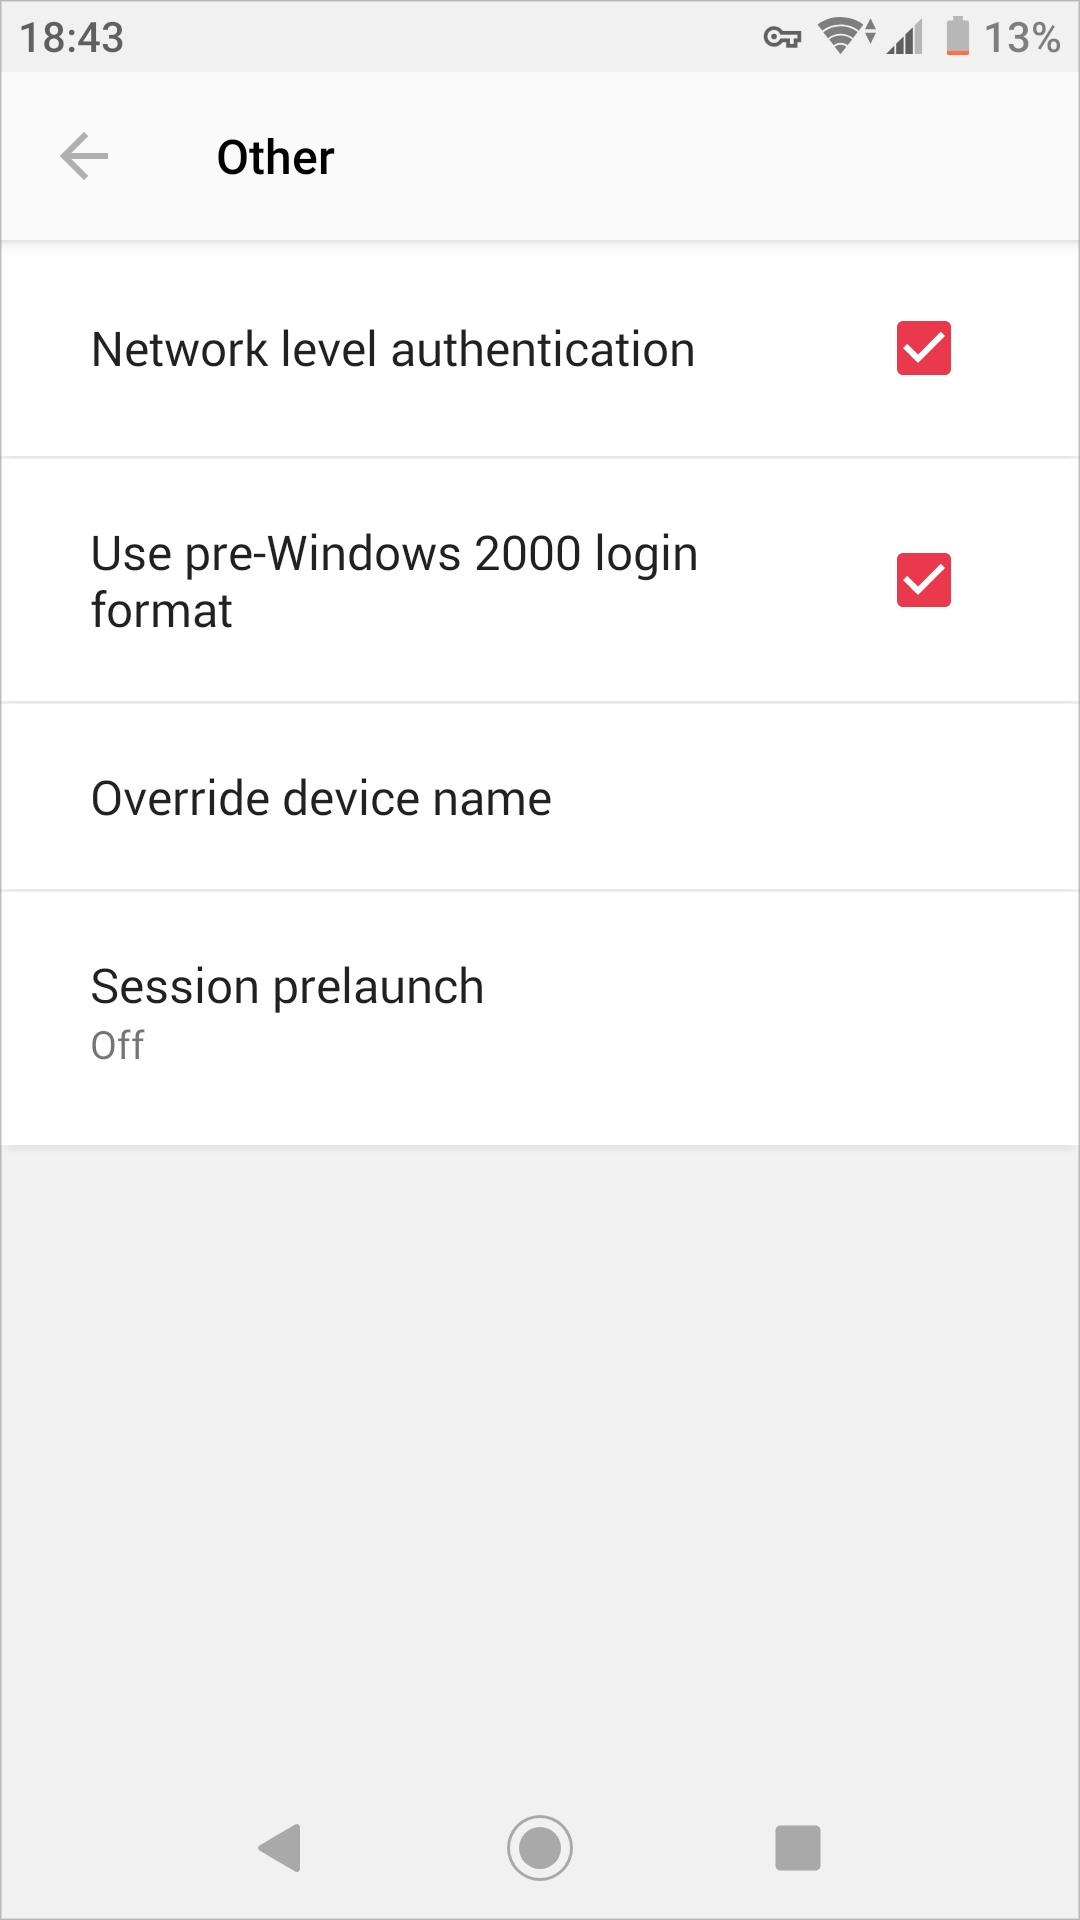
On the Other tab, you can edit the following settings:
Network level authentication. Select this option to enable network level authentication, which will require the client to authenticate before connecting to the server.
Use pre-Windows 2000 login format. Select this option to use domain\user as the login format to log in to remote computer.
Override device name. Tap this option to set another name under which your Android device will be displayed on the remote server.
Session prelaunch. When you open a remote application or desktop, a session must first be launched. Launching a session can take time, which will result in waiting for the application to start. To improve user experience, a session can be launched ahead of time, before you actually open an application. When a session is prelaunched, it will all happen in the background, so you will not see any windows or message boxes on the screen. When you start an application, it will open using the prelaunched session, so it will start very quickly.
You can choose one of the following:
Off. No session prelaunch is used.
Basic. A session is prelaunched as soon as you get the application listing. The assumption is, that you will open an application within the next few minutes. The session will stay active for 10 minutes. If you don't open an application during that time, the client will disconnect from the session.
Sometimes working with applications on a small screen is inconvenient, especially when you have to scroll the app window left/right/up/down, select or tap small GUI elements, or type a lot of text...
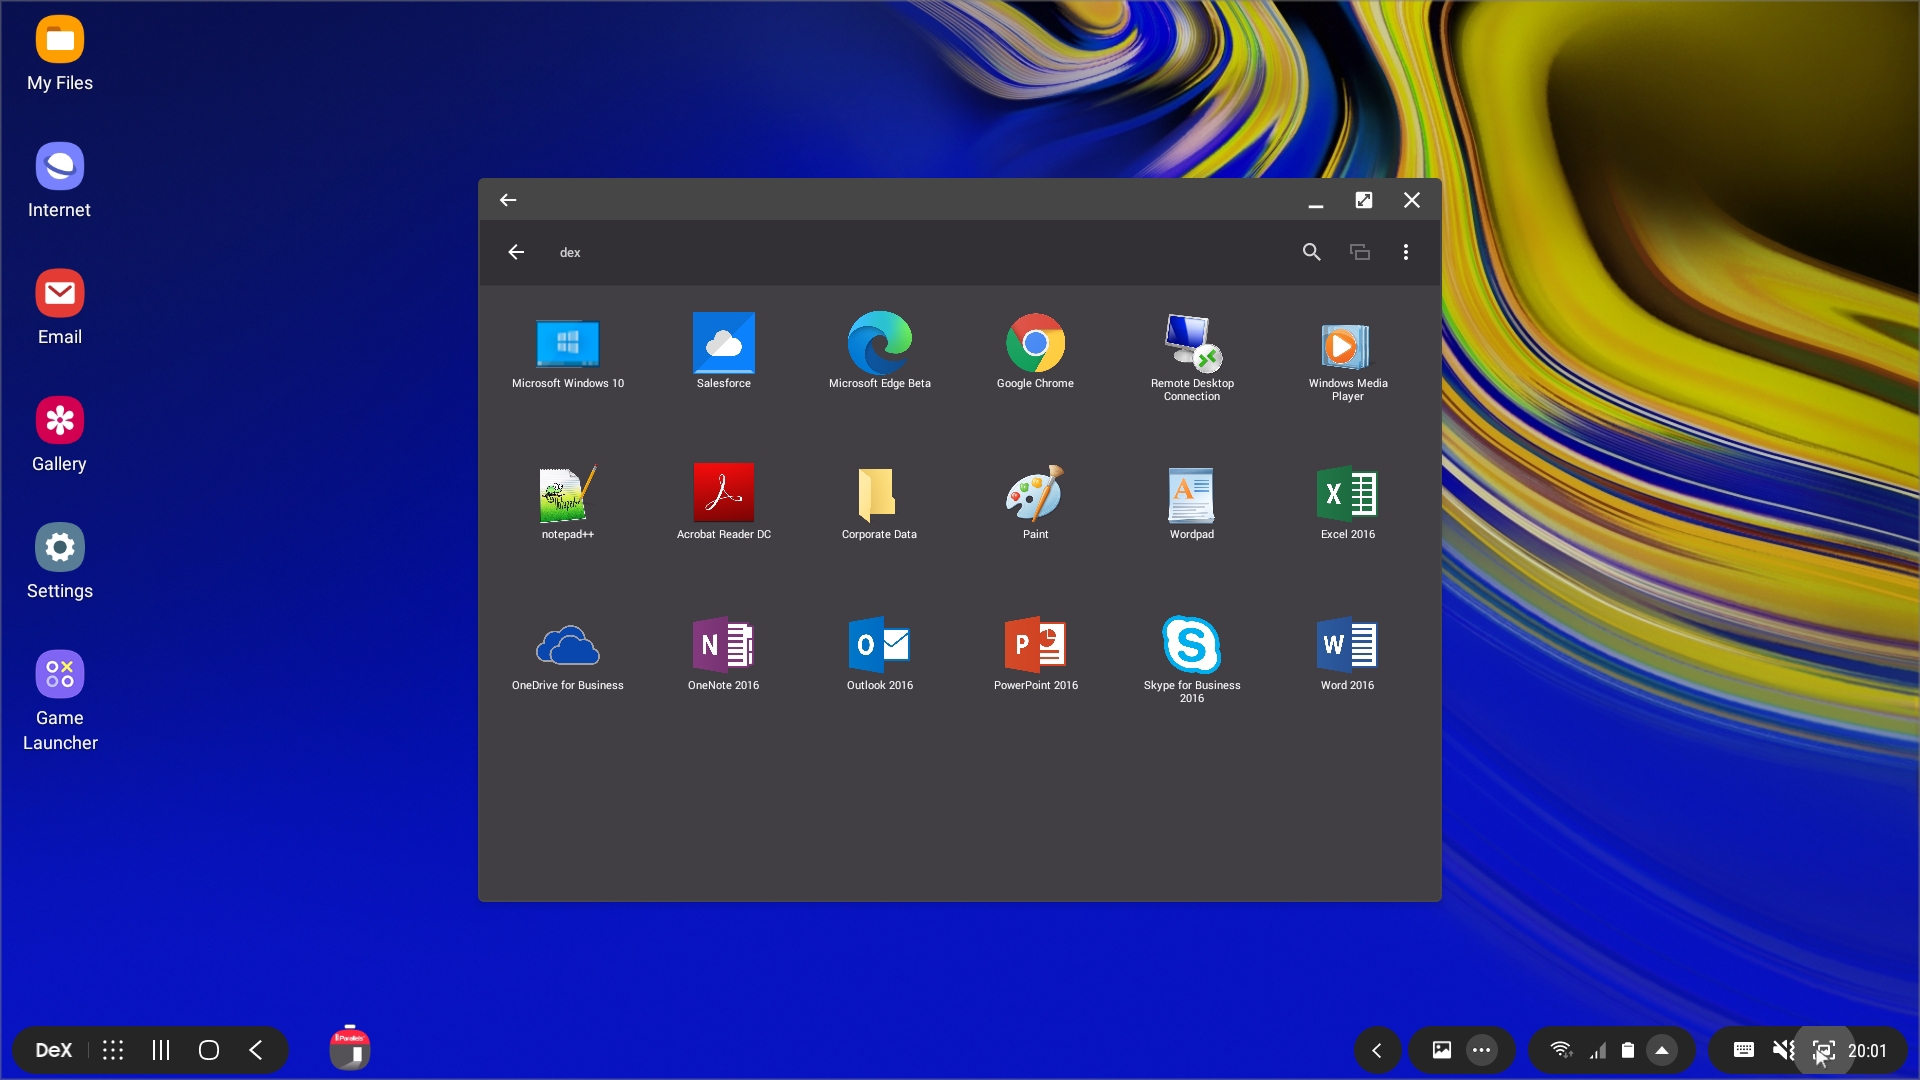
But now, starting from version 17.1, Parallels Client supports the Samsung DeX feature (it was first included on Galaxy S8 smartphones). So if you use a Samsung mobile device with DeX support, you can work with Parallels Client, remote apps and desktops either in the full-screen mode or side by side with other Android apps on a big display (you can use an external monitor or TV).
To make the desktop experience even more convenient for you, the Parallels engineers implemented support for keyboard and mouse. Now you can type in remote apps using the keyboard, click or right-click various GUI items with the mouse and scroll page content with the mouse wheel.
You can also use system shortcuts (e.g., "Alt + Tab", "Windows + D", etc.) while working with remote apps and desktops. When you press them on the keyboard connected to the DeX Station, they are not intercepted by Android.
And that's not all - if you need to go somewhere, take your mobile device with you. Parallels Client smoothly switches between the DeX and phone modes without interrupting your working session.
Configure on another device. You can install, configure and use Google Authenticator on any of your other mobile devices. Tap Other options at the bottom of the screen, select CONFIGURE ON ANOTHER DEVICE and follow the onscreen instructions.
When successfully configured, Google Authenticator will display a time-based one-time password. Copy this password to the clipboard, switch back to Parallels Client, tap Next and enter the password in the OTP field.
Web: Select this option to use the SAML SSO authentication.
Connection. Tap this field to access the group of connection-related settings.
Advanced. Tap this field to access the group of advanced settings.
View applied server policy. This point is visible only if some RAS policy is applied to your device. Tap it to see .
Machine Learning. When the application listing is acquired, a session is prelaunched based on your habits. With this option enabled, Parallels Client will record and analyze your habits of launching applications on a given day of the week. A session is started a few minutes before you usually open an application.

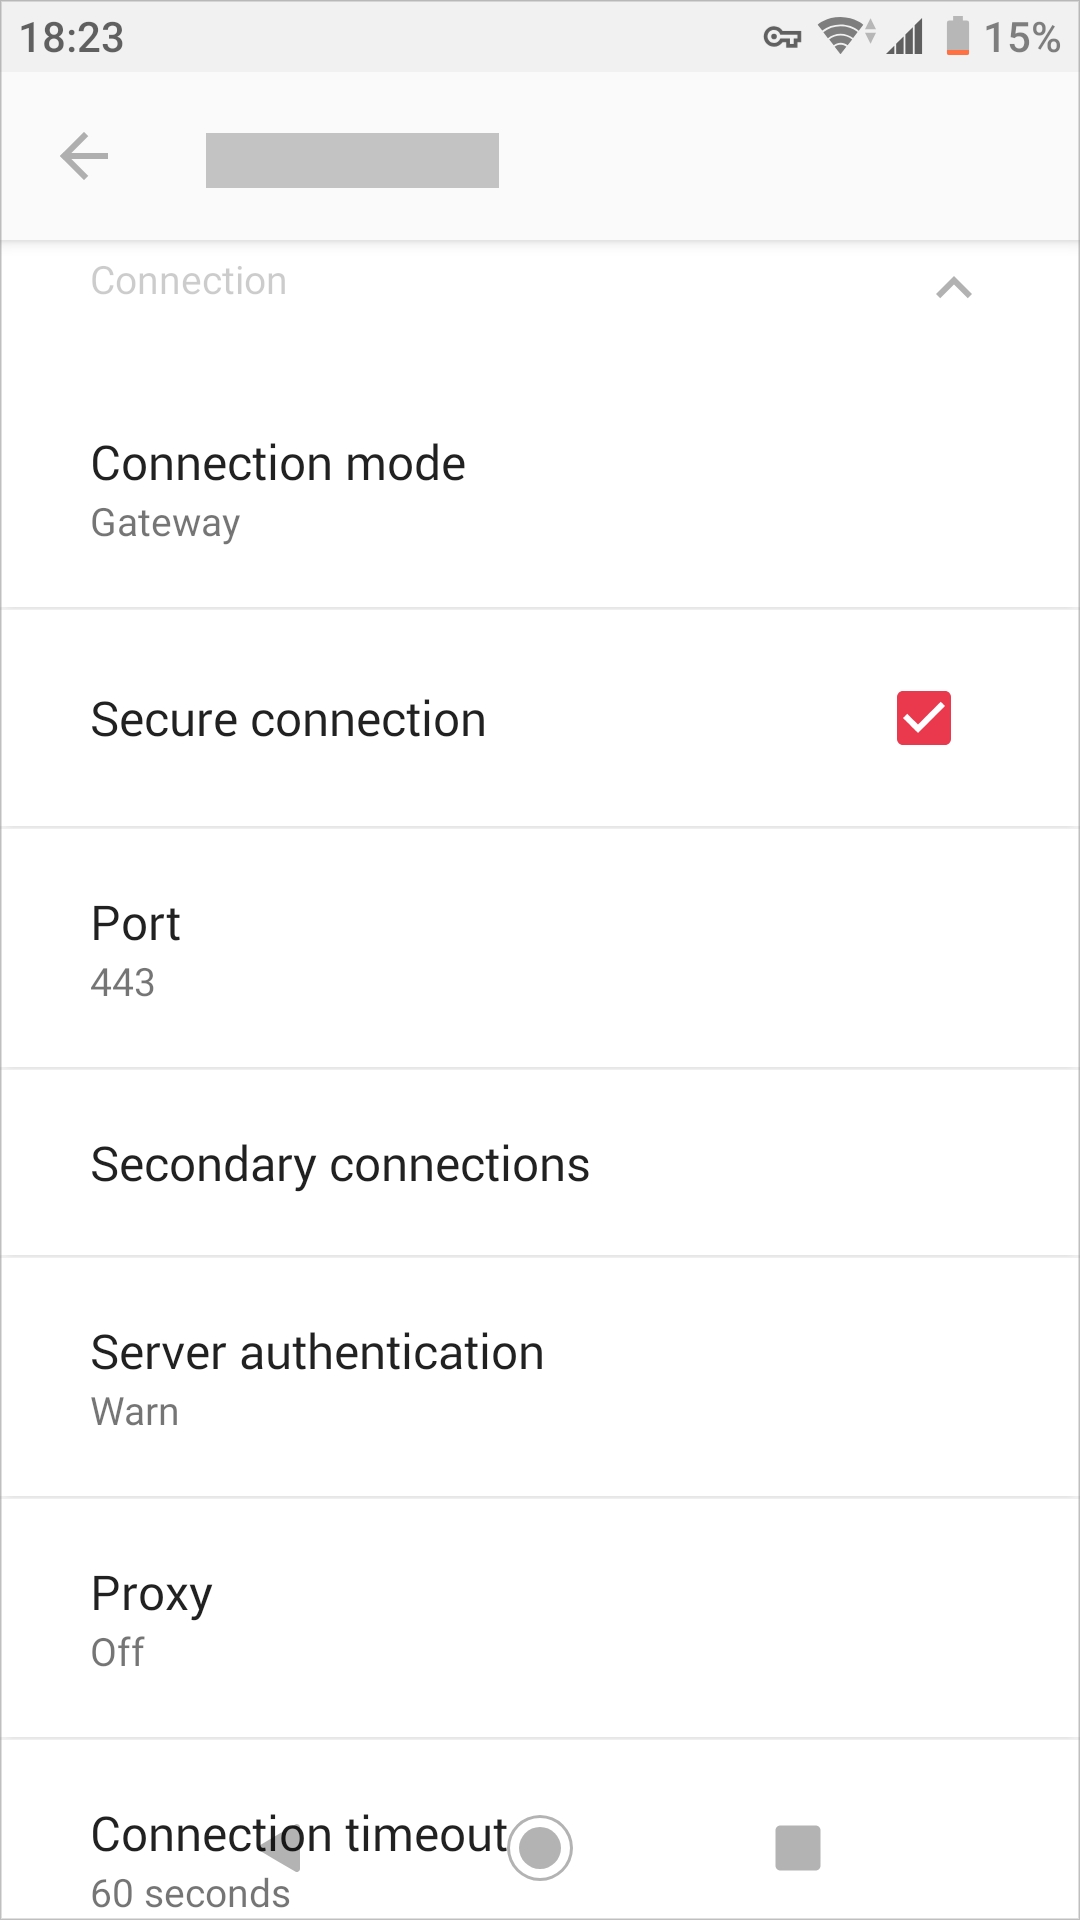
In the Connection section, you can modify the following connection settings:
Connection mode. In this menu, you can edit the connection mode:
Gateway. This mode is ideal for Terminal servers, VDI desktops and remote PCs that are only reachable via Parallels Secure Gateway.
Direct. Parallels Client connects directly to the remote server. This option can be used when both Parallels Client and the server are connected to the same network.
Secure connection. This option defines whether Parallels Client is using an SSL certificate to establish a connection to Parallels Secure Gateway. You should change this setting only if your system administrator told you to do so.
Port. In this field, you can modify the port. You should do this only if your system administrator told you to do so.
Secondary connections. If the server you are connecting to has more than one RAS Secure Gateway, you can define a secondary connection, which will be used as a backup connection in case the primary connection fails. To add a secondary connection, tap this field, tap the + icon in the top right corner and do the following:
Specify a server name or IP address. This should be a server hosting a secondary RAS Secure Gateway (the primary gateway is used by the primary connection).
Select the connection mode and modify the port number if necessary. Tap OK.
Back in the Secondary Connections dialog, you can move connections up or down the list if you have more than one. If the primary connection cannot be established, Parallels Client will use secondary connections in the order listed.
Server authentication. Tap this field to choose what to do when an untrusted certificate is used to establish connection to the remote server.
Proxy. If you have to use a proxy server to connect to Parallels Remote Application Server, tap this field and specify the proxy server parameters.
Connection timeout. Specify the time interval (in seconds) after which Parallels Client should stop trying to connect to RAS if it failed to connect at once.
Reconnect if connection is dropped. Parallels Client tries to reconnect if the connection was dropped.
Multi-factor authentication. When you log into Parallels RAS via MFA using RADIUS, Parallels Client displays the OTP dialog where you can select an authentication method. Your administrator defines the authentication methods. For example, if you click the "Push" icon, a push notification is sent to your mobile device, where you can simply tap "Approve." Or there could be a "Text me" icon, in which case a text is sent to your mobile phone with a one-time password.
If you always use the same authentication method, you can make it the default one. To do so, tap MFA authentication and select the Remember last method used checkbox.

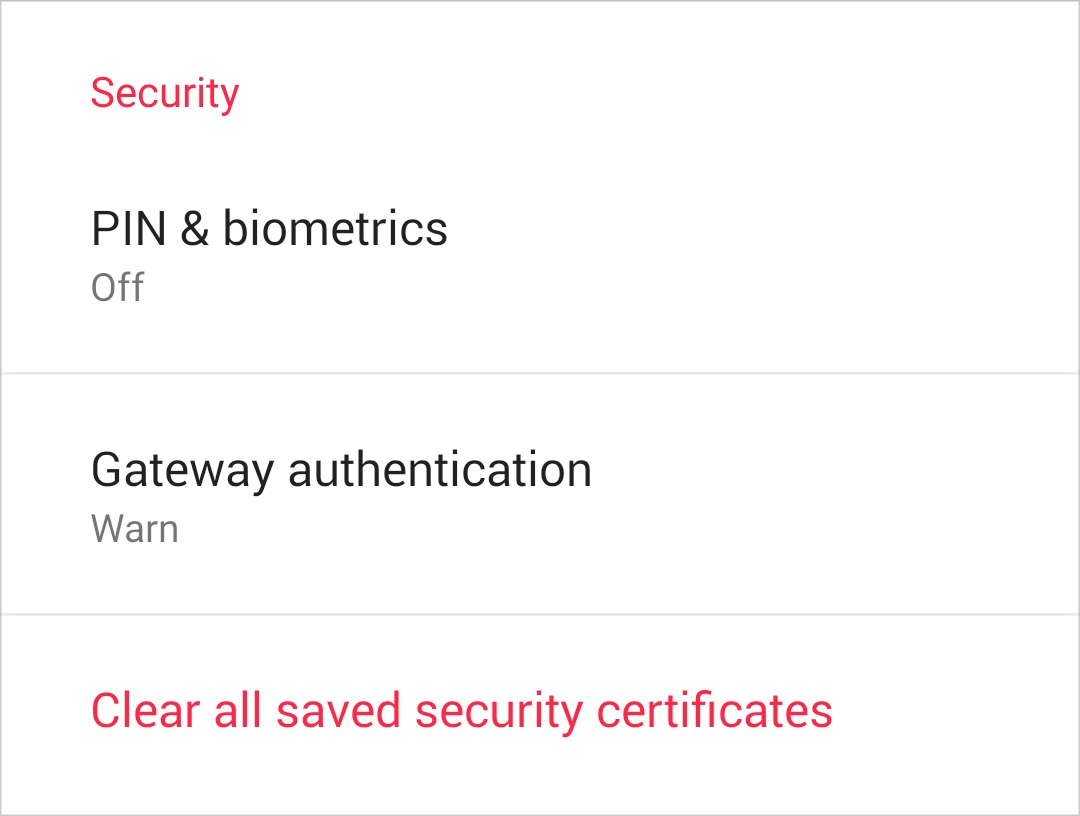
The Security section allows you to modify the following settings:
PIN & biometrics. Tap this field to choose whether to protect Parallels Client from unauthorized access with a PIN code and fingerprint.
Gateway authentication. Tap this field to choose what to do when the gateway certificate is untrusted.
Clear all saved security certificates. Tap this field to remove all saved security certificates.
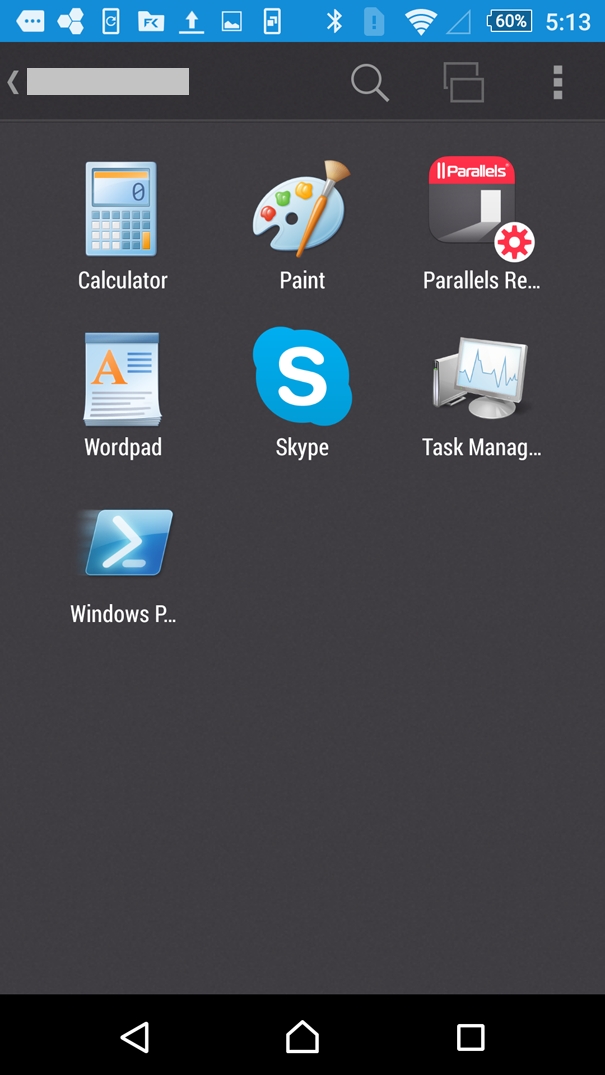
When connected to a remote server via a Remote Application Server connection, Parallels Client shows the App Launcher screen. On this screen, you can find all the applications published for the user you used to connect to the remote server.
To launch an application, just tap its icon. If you launched an app, read to learn how to use Application Toolbar.
If there's a lot of applications, use the Looking glass icon at the top of the screen to find the application you need.
When an application is added to favorites, you are able to quickly access it on the Favorites tab.
To add an application to favorites:
Long press the icon of the application that you want to add to favorites. A context menu will appear.
In the context menu, tap the Add to Favorites option.
The application will appear on the Favorites tab.
To remove an application from favorites:
Long press the icon of the application that you want to remove from favorites. A context menu will appear.
In the context menu, tap the Remove from Favorites option.
The application will be removed from favorites.
You can import files from your Android device to the remote server you are connected to. Tap to open the import dialog. For information on how to import files, see Application Toolbar.
If you have two or more applications running at the same time, tap App Switcher to easily switch between the application windows.
To close a running application, tap App Switcher and tap Close on the application you want to close.
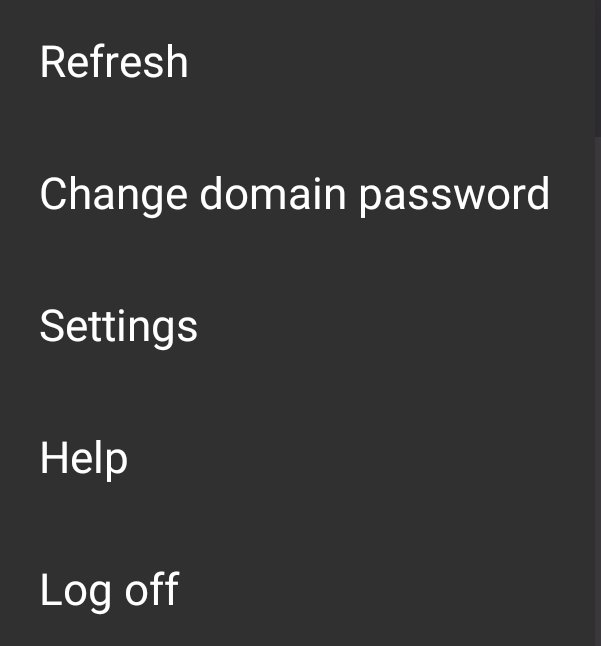
Tap the icon in the top right corner to open the menu that allows you to perform the following actions:
Refresh. Tap this item to refresh the list of published applications and connection settings.
Change domain password. Tap this item to change the user's domain password. Depending on Parallels RAS configuration you will be able to change the password either via Parallels Client itself or a third-party identity provider. To be able to change the password via Parallels Client, you must know the current password.
Settings. Tap this item to display and edit the Parallels Client settings.
Help. Tap this item to get .
Log off. Tap this item to terminate your session and return to the list of connections.
If you already have one or more connections in the Connections list, you can export them and then open on another device with Parallels Client.
To export a connection, do the following:
Open Parallels Client.
Tap the icon in the top right corner and choose Share connections.
Select the connection you want to share and tap Share in the top right corner.
Choose how you want to share your connection. It will be exported as a file with the .2xc extension.
To import a connection, do the following:
Open the email or cloud storage (or what you used to share the connection in step 4 above) on another device with Parallels Client installed.
Select the .2xc file and choose to open it with Parallels Client. The application will start and open the selected connection.
The About Parallels Client section allows you to get the following information:
Version. This field allows you to check the Parallels Client version.
Customer experience program. Tap this field to read more about the customer experience program.
Copyright information. Tap this field to see the copyright information.
Technical support. Tap this field to learn how to get technical support.
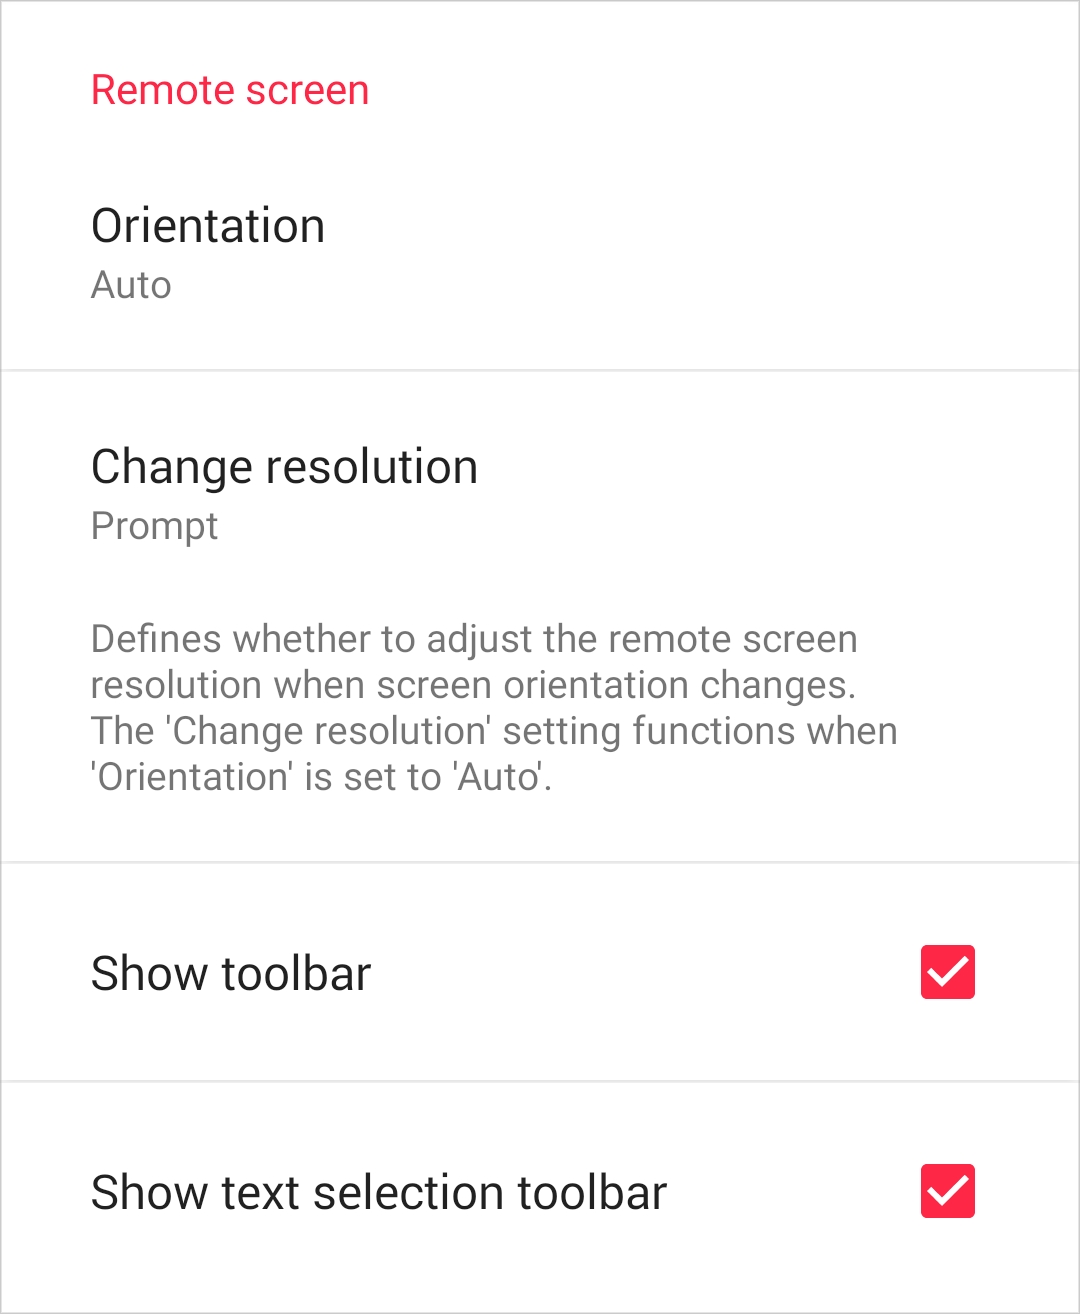
The Remote screen section allows you to modify the following settings:
Orientation. Choose the preferred screen orientation between Portrait, Landscape, and Auto.
Change resolution. If Orientation is set to Auto, choose whether to change the screen resolution when the orientation changes.
Show toolbar. Select or deselect this option to show or hide the
Show text selection toolbar. Deselect this option if you don't need the text selection toolbar that is usually displayed at the top of the screen when you select some text in a remote text editing application (e.g., MS Word, Wordpad, etc.).
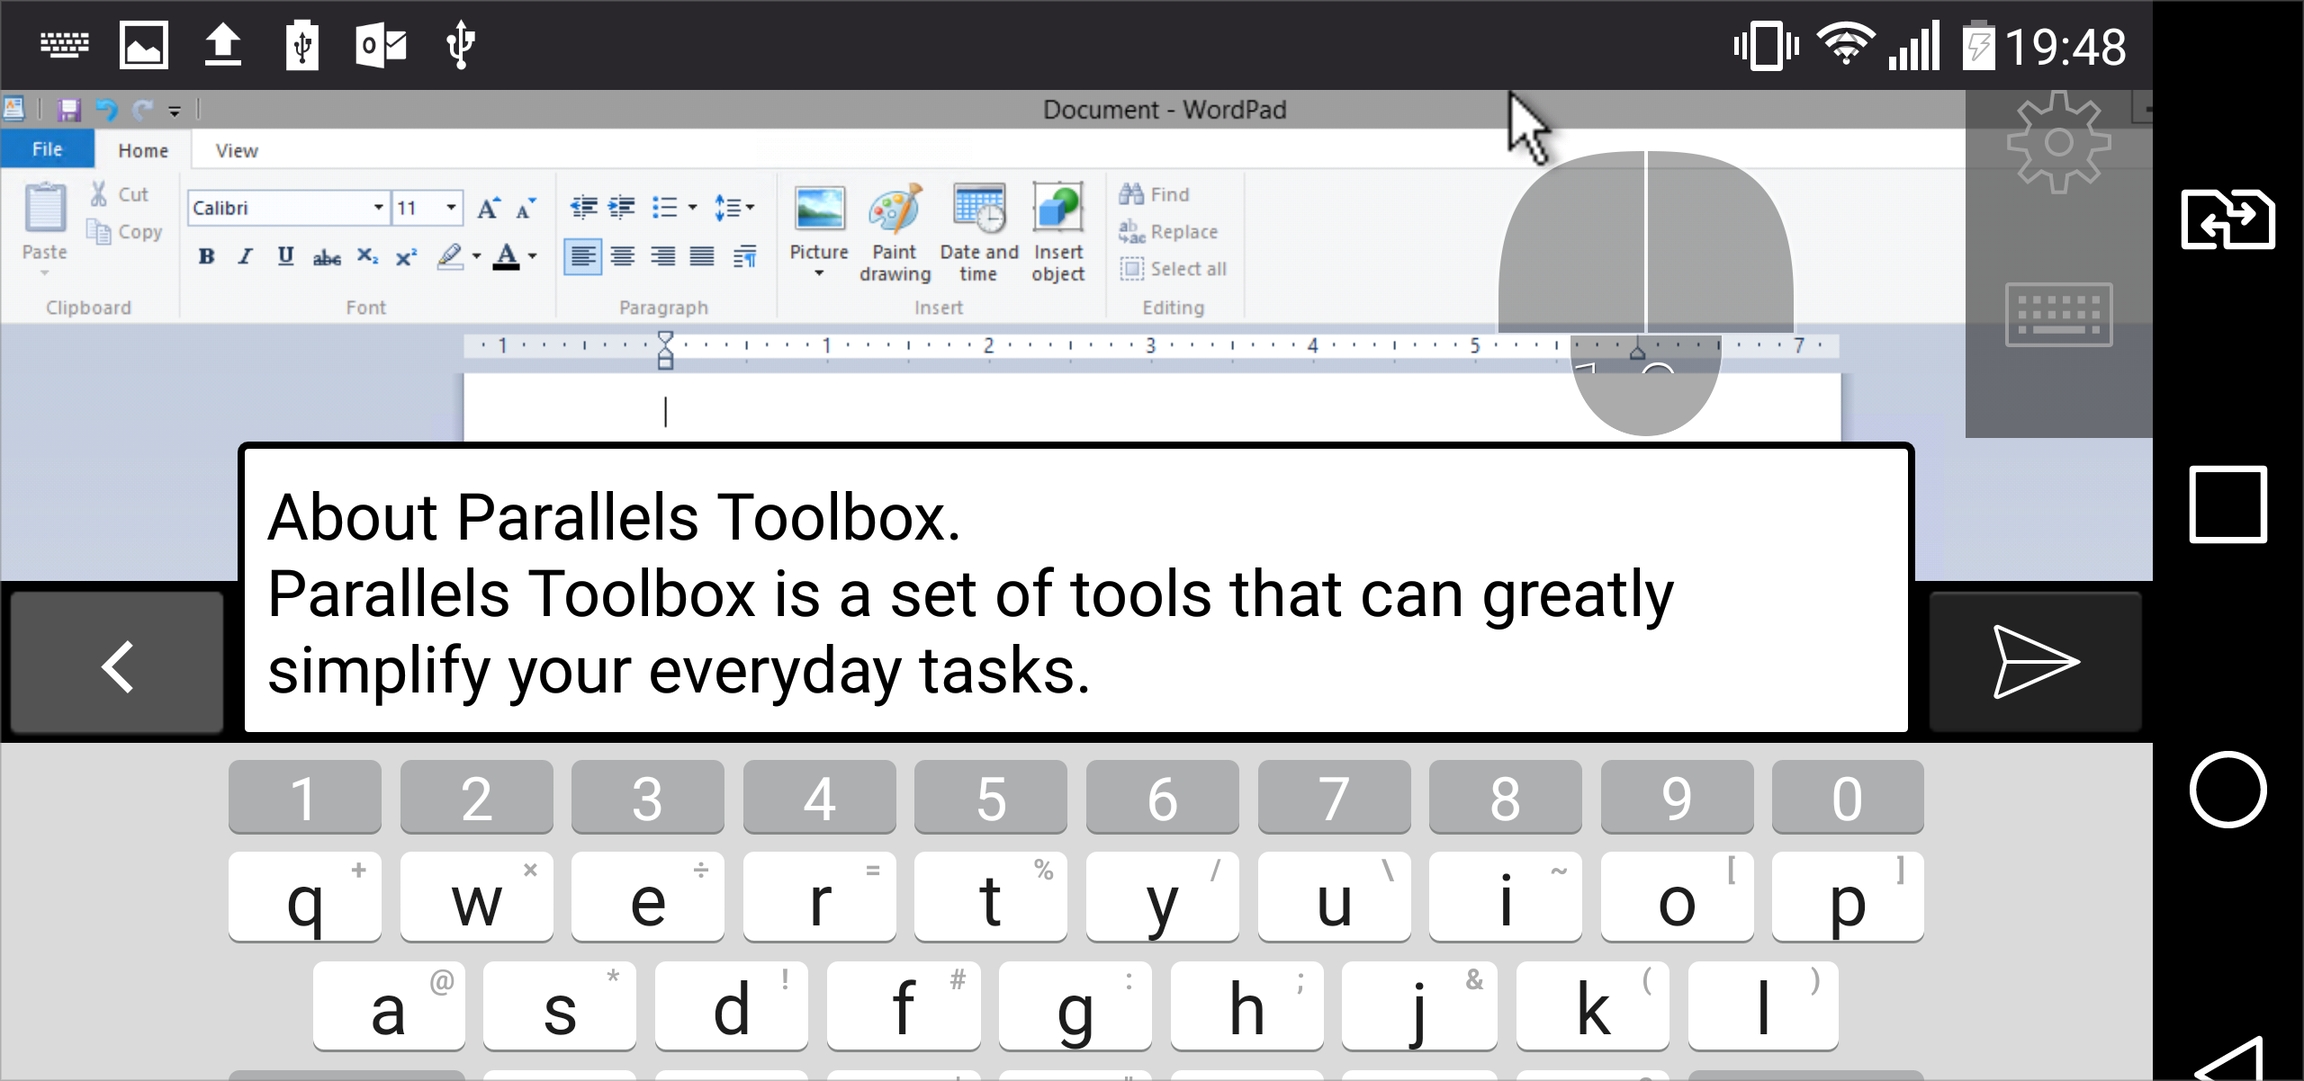
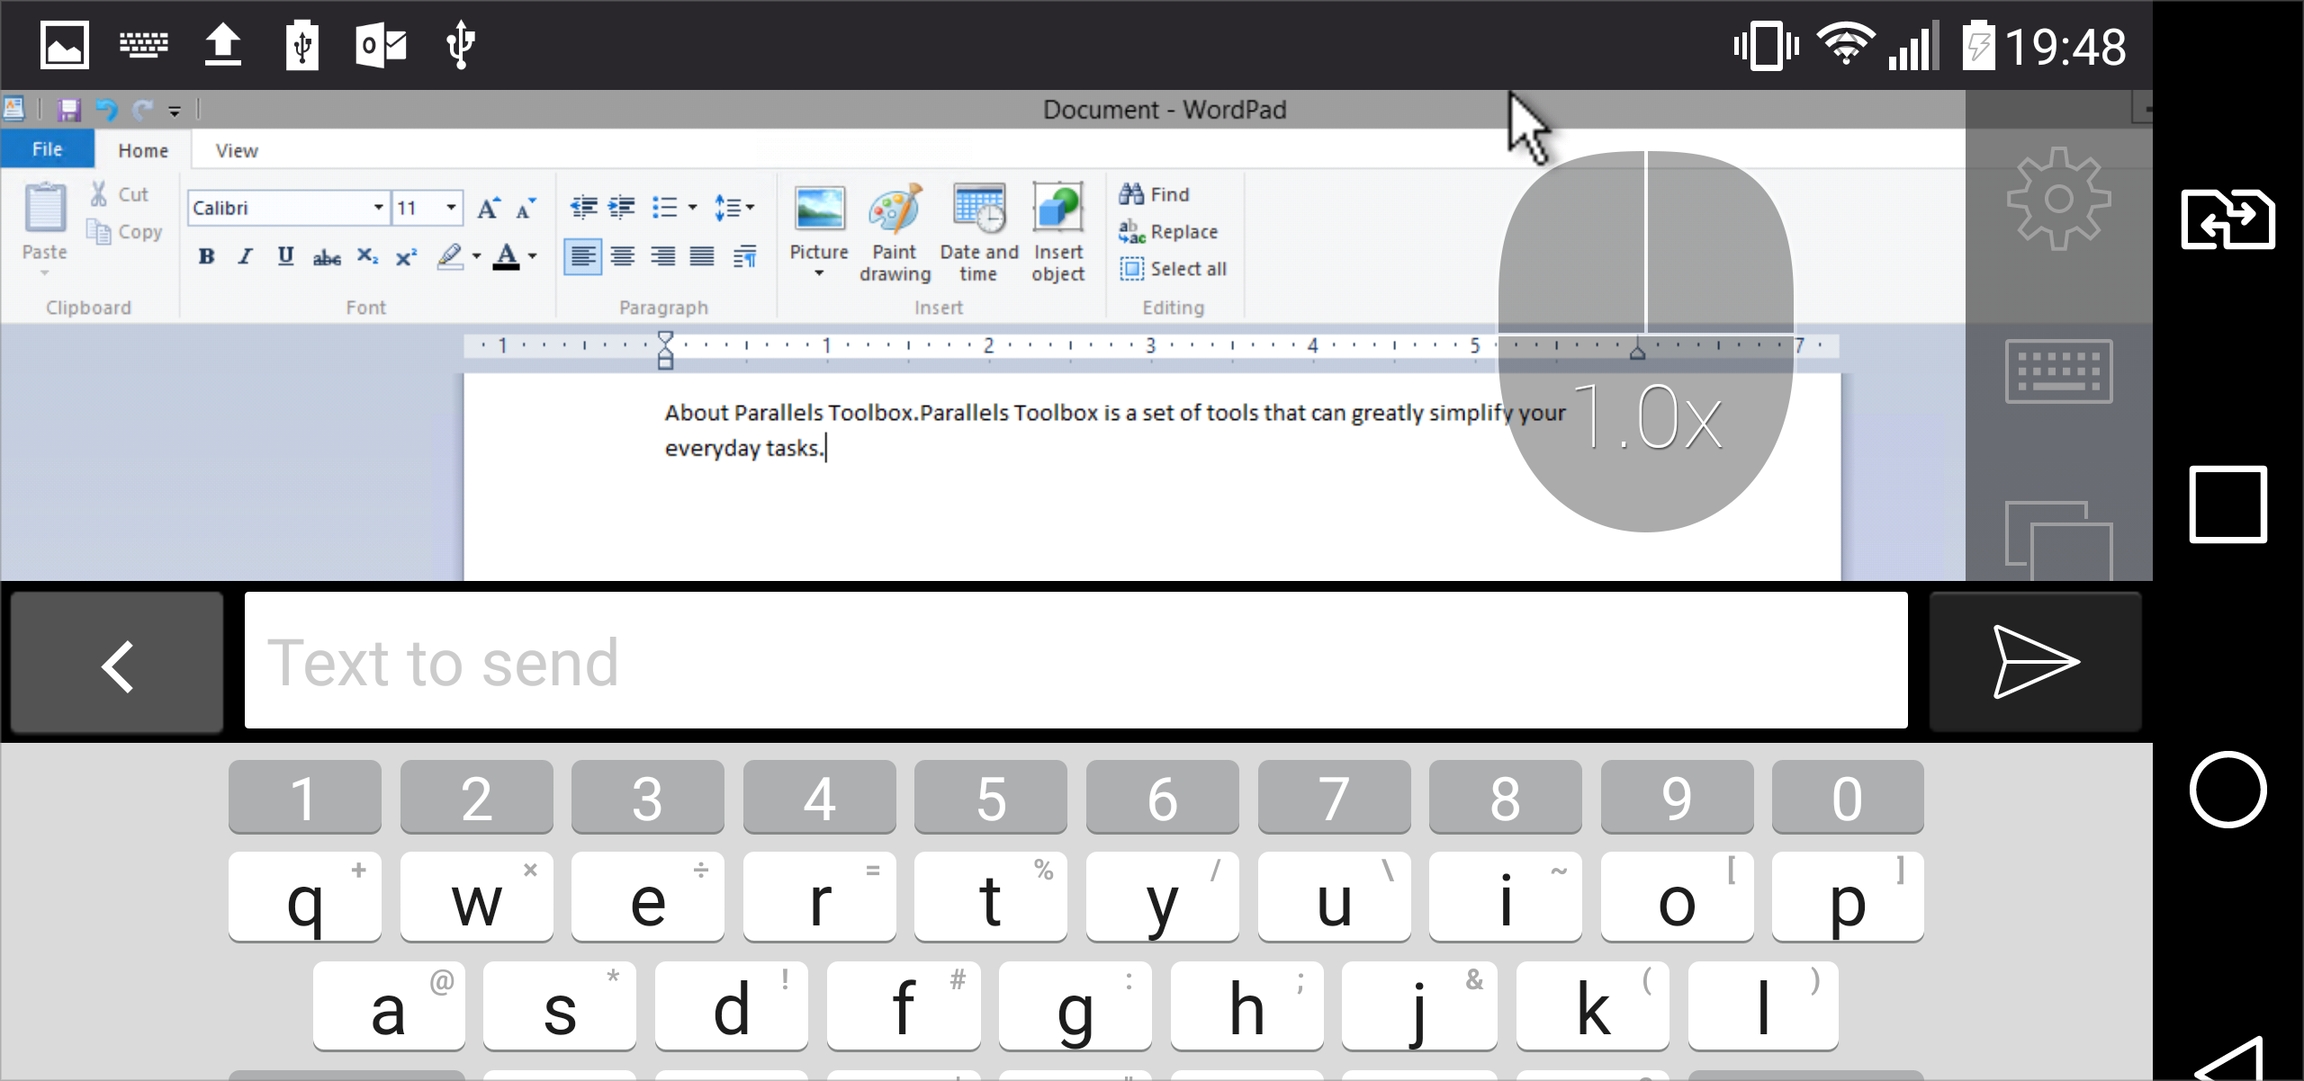
If the screen of your Android device is too small to type comfortably, you can type text in a special field directly in the keyboard and then send it to a remote app. Here is how it works:
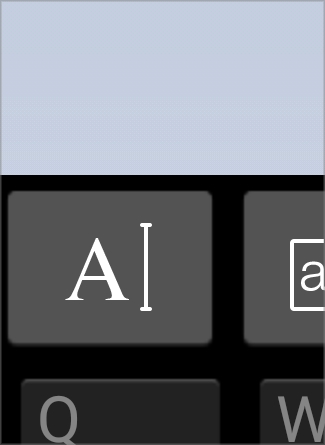
When you tap a text field in a remote application, the onscreen keyboard pops up. Tap the text button in the top left corner of the keyboard:
A local text field appears. Start typing the text you need in this field. Once ready, tap the send button.

The text appears in the remote app.
The Troubleshooting section allows you to modify the following settings:
Use detailed log messages. If you have any issues with Parallels Client and decided to send technical data to your Remote Application Server administrator, select Use detailed log messages before sending the data. The administrator will receive a more detailed log file and spend less time to fix the issue. It is not recommended that you keep this option enabled all the time - Parallels Client may start working slower.
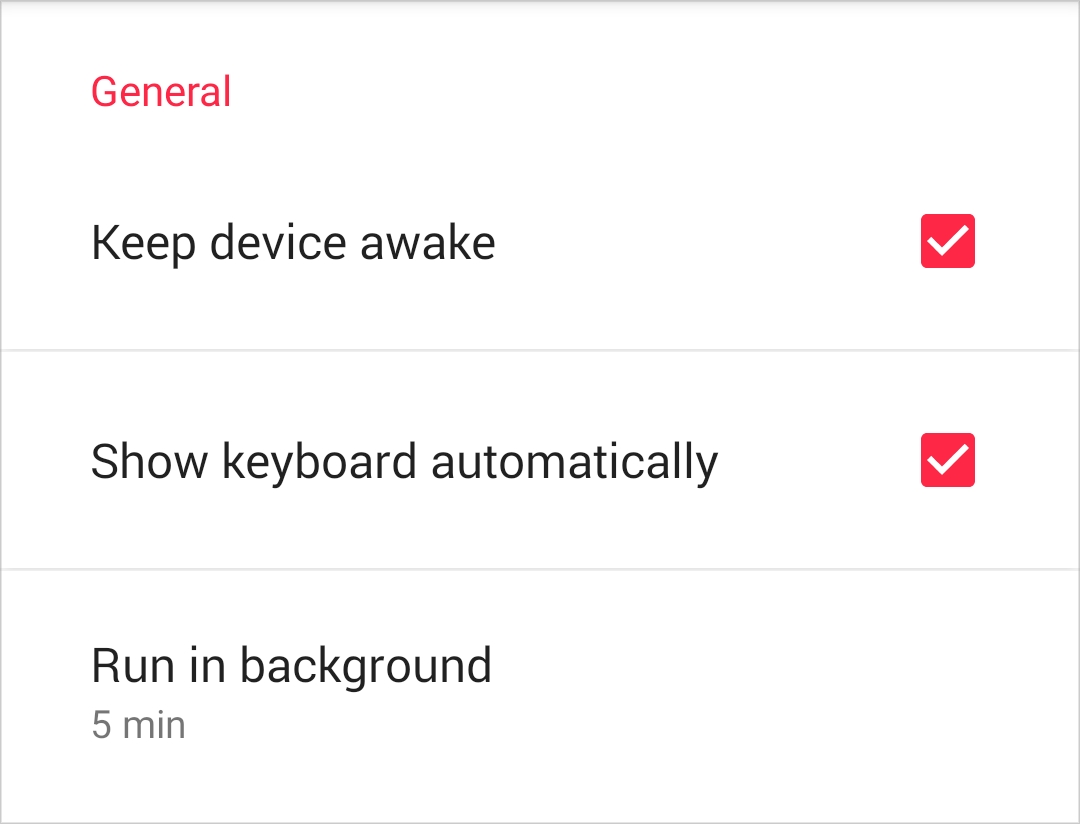
The General section allows you to modify the following settings:
Keep device awake. If you're connected to a remote server and this option is enabled, your mobile device won't switch to sleep mode after some interval of user inactivity.
Show keyboard automatically. When this option is on, the keyboard will pop up automatically every time you tap a text field.

When you tap an app icon in App Launcher, the application opens. Application Toolbar is displayed on the right side of the screen:
This toolbar has essential system functions and is always there when you need it. You can move the toolbar on the right side of the screen by dragging it up or down.
Tap to hide the remote application screen and return to App Launcher. Your session will continue to run on the remote server.
Tap to open the dialog that allows you to import a file or a folder from your Android device to the remote server. To import an object, click the icon in the top right corner and select Import files or Import folder. A network disk called "Files on %device name%" will appear on the remote server, where %device name% is the name of your Android device.
Tap to zoom in. Tap this button again to return to the original view.
Tap to see Help.
Tap to display or hide the keyboard.
Tap to display App Switcher at the bottom of the screen.
App Switcher displays remote applications that you have currently running on your device and the (the rocket) icon. To switch to an application, tap it in App Switcher. To display App Launcher, tap the rocket icon. When in App Launcher, you can open App Switcher by clicking the same double-window icon at the top of the screen. You can then tap an application to switch to.
Tap to open the menu bar at the bottom of the screen. You can swipe it left or right to see more menu items if needed.
The menu bar extends the toolbar with more system functions. Please note that some of the menu bar items function as a switch, which means that if you tap an item, the corresponding feature is turned on and the menu item is displayed in red. To turn it off, you have to open the menu bar again and tap the item one more time.
The menu bar contains the following:
Additional keys. When enabled, additional keyboard keys are displayed at the bottom of the screen.
Mouse mode. Tap this icon to choose one of the following mouse modes:
Touch mode. If you use this mode, there's no mouse pointer on the screen.
To imitate a left-click, tap the screen with one finger.
To imitate a right-click, tap the screen with 2 fingers.
When a policy is applied to your device, tap View applied policy to see the information about it. This information can be used to verify that the correct policy was delivered. It includes:
ID: The policy ID as displayed in the ID field in the Policies list in the RAS Console.
Version: The policy version number as displayed in the Version field in the Policies list in the RAS Console.
By comparing the information above in Parallels Client and the information in the RAS Console, RAS administrators can see which policy was applied to a user device.
Dumbo mouse. If you select this mode, a virtual mouse with 2 buttons and a pointer appears on the screen.
To move the mouse pointer, drag the mouse with one finger.
To imitate a left- or right-click, use the mouse buttons.
To zoom in/out the remote screen, double-tap the bottom part of Dumbo mouse.
Pointer. If you use this mode, the mouse pointer and 2 buttons (for left- and right-click) are displayed on the screen.
To move the mouse pointer, tap the screen with one finger and move it - the pointer will move correspondingly.
To imitate a left- or right-click, use the buttons at the bottom of the screen. Alternatively, you can tap the screen with one finger for left-click and with two fingers for right-click.
To display a magnifying glass (helps to see small things), tap the screen with one finger and hold for a while.
Desktop resolution. Tap this icon to choose the screen resolution that best fits your needs. You can choose between Best for your device, More space, or set a custom resolution.
Microphone. Tap this icon to mute or unmute the device microphone.
Printing. Tap this icon to modify printing settings.
Session information. Tap this icon to see the detailed information about your session.
Help. Tap Help to get help with Parallels Client or open the tutorial about using gestures.
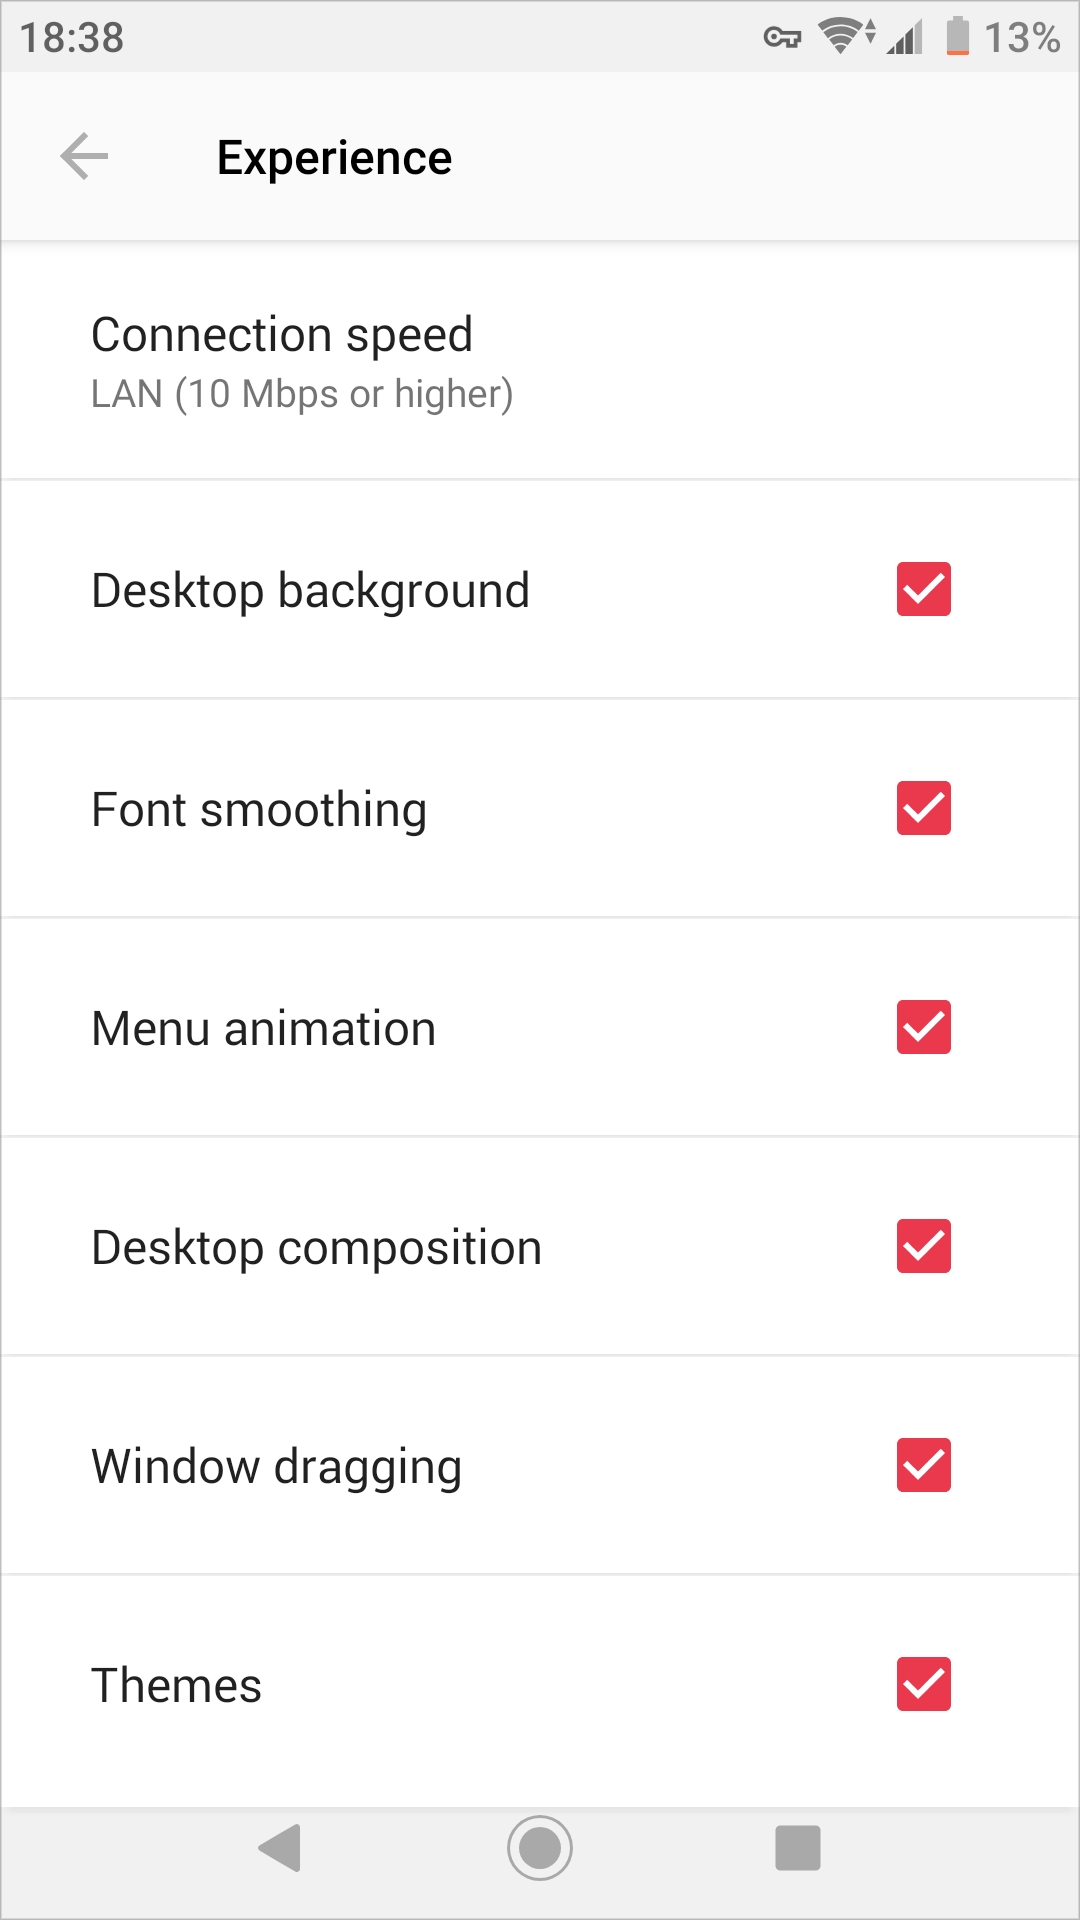
On the Experience tab, you can edit the following settings:
Connection speed. Tap this menu to select the suitable connection speed for the most fluid experience. By default, connection settings are optimized automatically. However, if you choose some option other than Detect automatically, you'll be able to configure the following additional options:
Font smoothing. This option makes all fonts smooth for improved readability.
Menu animation. If menus and windows on the remote computer have visual effects and this option is enabled, these effects are also shown on your Android device.
Desktop composition. Desktop composition changes the way windows are depicted on the screen.
Window dragging. Enable this option to show window contents when dragging windows.
Themes. Enable this option to use the remote desktop themes when connected.
To remove a connection, do the following:
Open Parallels Client.
Tap the icon in the top right corner and choose Edit connections.
Tap the Recycle Bin icon below the connection you want to remove and tap Remove.
Once ready, tap the tick in the top left corner.
When connected to a remote server via a standard RDP connection, Parallels Client shows the remote desktop:
You can start working with the remote computer the same way you would as if you were sitting in front of it. Application Toolbar will make your working process more comfortable.
In the Advanced section, you can modify the following settings:
Display. Tap this option to open the display-related settings.
Printing. Tap this option to open the printing settings.
Local resources. Tap this option to open the .
Experience. Tap this option to open the .
Other. Tap this option to open .
